PROM Installation
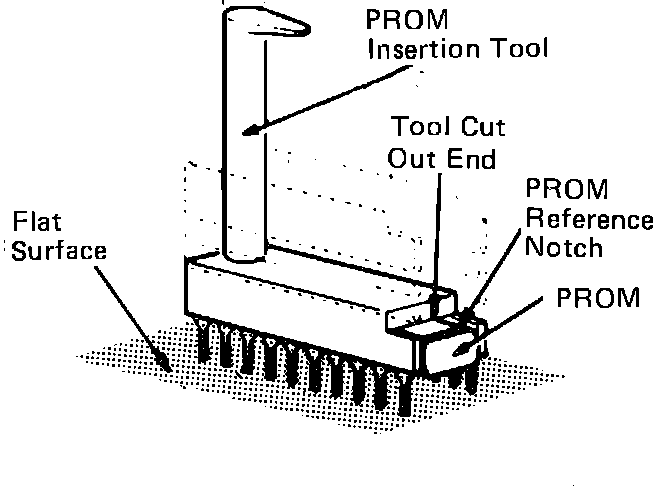
Fig. 103 Checking PROM Tool Fit:
1. Remove PROM from the box and verify that the part number on the old PROM matches the part number on the new PROM. (unless a supercession has occurred)
2. Place the PROM with the leads pointing downward on a flat, clean surface, Fig. 103.
3. At this point make sure the installation tool fits properly on the new PROM.
Fig. 104 Inserting PROM:
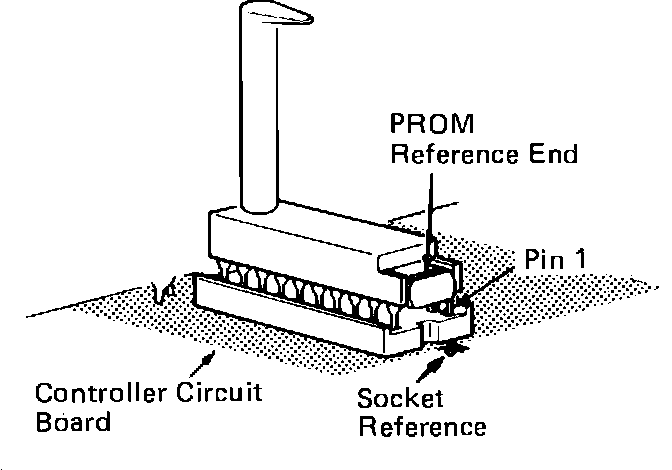
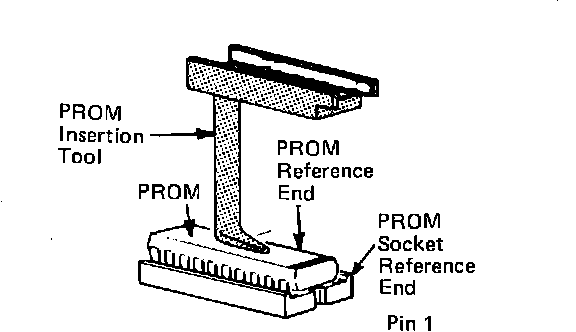
Fig. 105 Inserting PROM:
NOTE: Before installing the new PROM into the socket, be aware that if the PROM is inserted backwards and the ignition switch is turned on, the new PROM will be destroyed.
4. Mate the PROM held by the insertion tool to the PROM socket on the circuit board.
5. Make sure the reference ends of both the PROM and the socket are aligned in the same direction, Fig 104.
6. Turn the insertion tool over and using the blunt end press down on the PROM until fully seated, Fig. 105.
7. Check for any bent pins and that the PROM is aligned properly.
8. Put the cover back on the ECM and install ECM in vehicle.