Condenser HVAC: Service and Repair
1. Recover the refrigerant with a Recovery/Recycling/Charging System.Condenser Replacement:
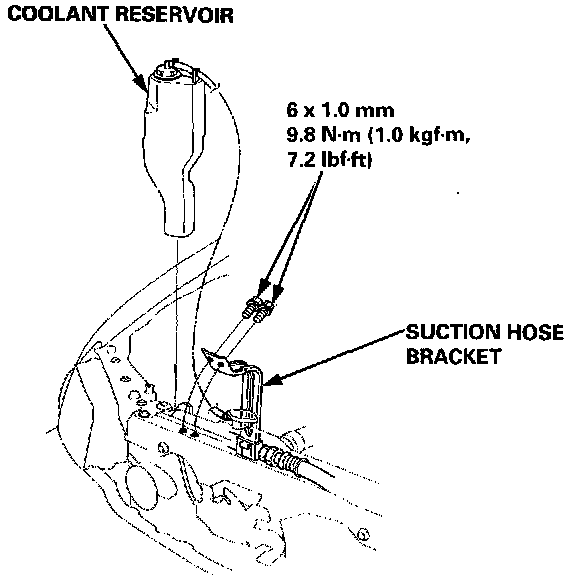
2. Remove the coolant reservoir. Remove the two bolts and the suction hose bracket.
NOTE: Do not disconnect the reservoir hose from the coolant reservoir and the radiator.
Condenser Replacement:
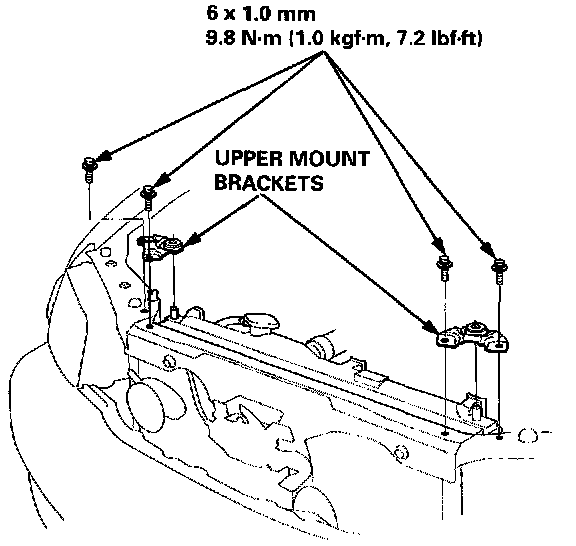
3. Remove the four bolts and the two radiator upper mount brackets.
Condenser Replacement:
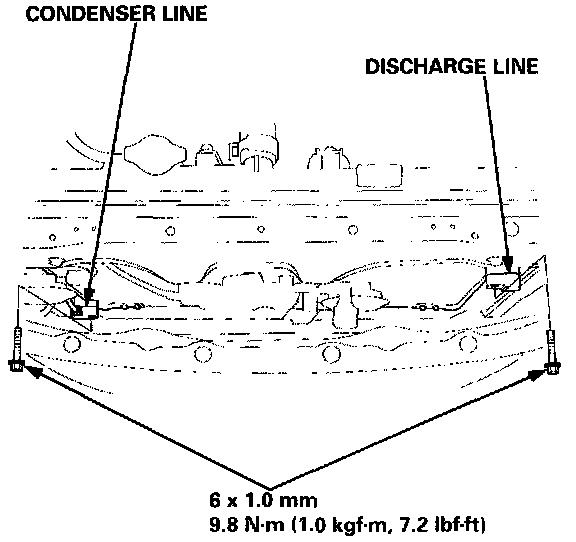
4. Remove the bolts, and disconnect the discharge line and the condenser line from the condenser.
NOTE: Plug or cap the lines immediately after disconnecting them to avoid moisture and dust contamination.
Condenser Replacement:
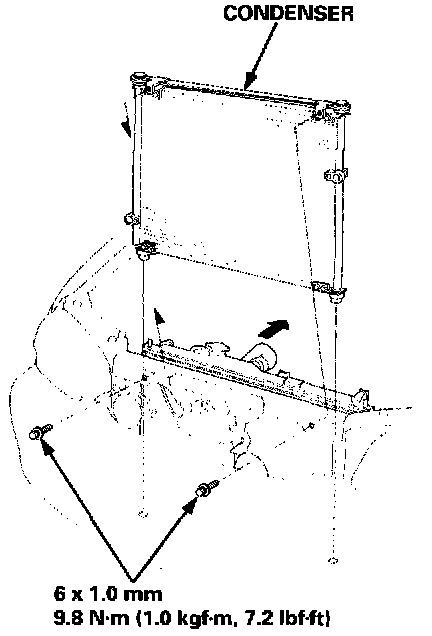
5. Remove the two mounting bolts, and lift out the condenser as shown.
NOTE: Be careful not to damage the radiator and condenser fins when removing the condenser.
6. Install in the reverse order of removal. Make note of the following items.
- If you're installing a new condenser, add refrigerant oil (ND-OIL 8).
- Replace the O-rings with new ones at each fitting, and apply a thin coat of refrigerant oil before installing them.
NOTE: Be sure to use the right O-rings for HFC-134a (R-134a) to avoid leakage.
- Be careful not to damage the radiator and condenser fins when installing the condenser.
- Be sure to install the condenser mount cushions securely into the holes.
- Charge the system and test its performance.