Lower Control Arm
Removal ProcedureTools Required
^ J 21474-01 Control Arm Bushing Service Set
^ J 21474-3 Lower Control Arm Bushing Screw
^ J 21474-4 1/2 Inch Nut
^ J 21474-5 Bushing Receiver
^ J 21474-6 Control Arm Bushing Receiver
^ J 21474-8 Lower Control Arm Bushing
^ J 21474-12 Lower Control Arm Bushing
^ J 41014-1 Control Arm Bushing Installer
^ J 22269-1 Tie Rod End Installer
1. Remove the lower control arm from the vehicle.
2. Install the lower control arm in a vise.
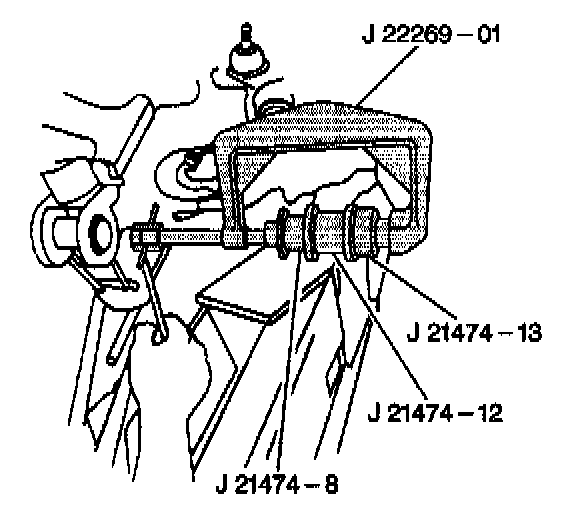
3. Remove the rear bushing.
1. Install the J 22269-1, the J 21474-8, the J 21474-12, and the J 41014-1.
2. Tighten until the rear bushing becomes free.
3. Using a blunt chisel, drive the front bushing flare down flush with the rubber part of the bushing.
4. Prior to removing or installing the front bushing, place a wedge or spacer between the control arm bushing housing. This keeps the control arm bushing housing from bending while removing or installing the bushing.
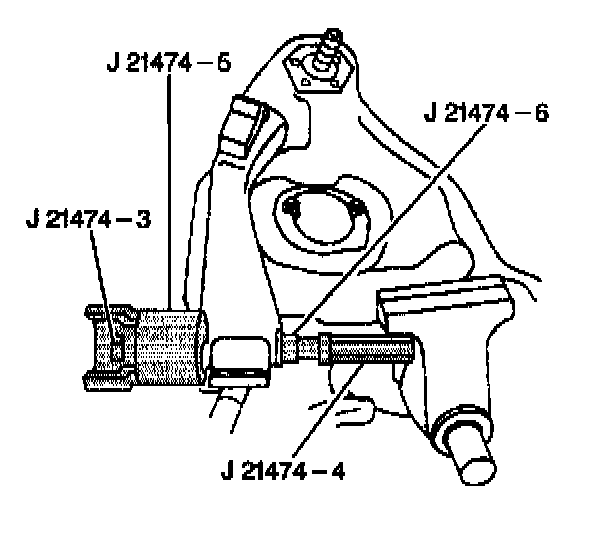
5. Remove the front bushing.
1. Install the J 21474-3, the J 21474-4, the J 21474-5, and the J 21474-6. Tighten until the bushing is partially removed.
2. Reverse the J 21474-6 and tighten until the front bushing becomes free.
Installation Procedure
Tools Required
^ J 21474-01 Control Arm Bushing Service Set
^ J 21474-02 Bushing Installer
^ J 21474-4 1/2 Inch Nut
^ J 21474-5 Bushing Receiver
^ J 41014-1 Control Arm Bushing Installer
^ J 22269-1 Tie Rod End Installer
1. Prior to removing or installing the bushing, place a wedge or spacer between the control arm bushing housing. This keeps the control arm bushing housing from bending while removing or installing the bushing.
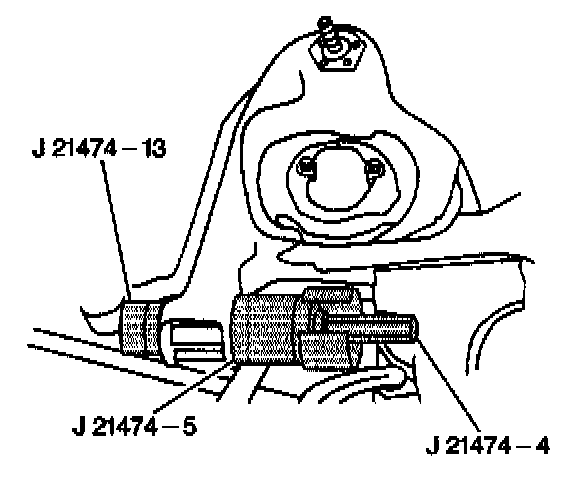
2. Install the front bushing into the lower control arm.
3. Install the J 21474-4, the J 21474-5, and the J 41014-1. The lip is on the outside of the control arm.
4. Tighten until the front bushing seats fully into the lower control arm. Remove the tools.
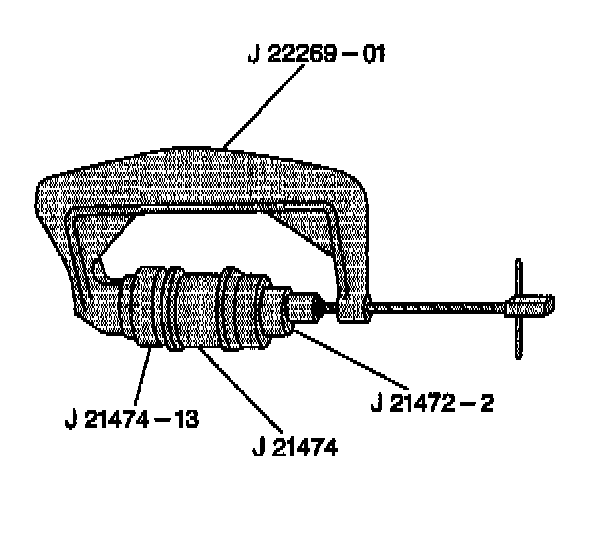
5. Install the rear bushing into the lower control arm.
1. Install the J 22269-1, the J 21474-02, and the J 41014-1. The lip is on the outside of the control arm.
2. Tighten until the rear bushing seats fully into the lower control arm. Remove the tools.
6. Remove the lower control arm from the vise.
7. Install the lower control arm to the vehicle.