Removal and Installation
Removal1. Disconnect battery ground cable.
2. Disconnect connector of intake air temperature sensor from intake air duct.
3. Remove PCV hose from air intake duct.
4. Remove nut from air intake duct bracket and loosen hose clamp on throttle body. Remove air intake duct assembly with air cleaner cover.
5. Remove intake air duct bracket from cylinder head.
6. Drain engine coolant.
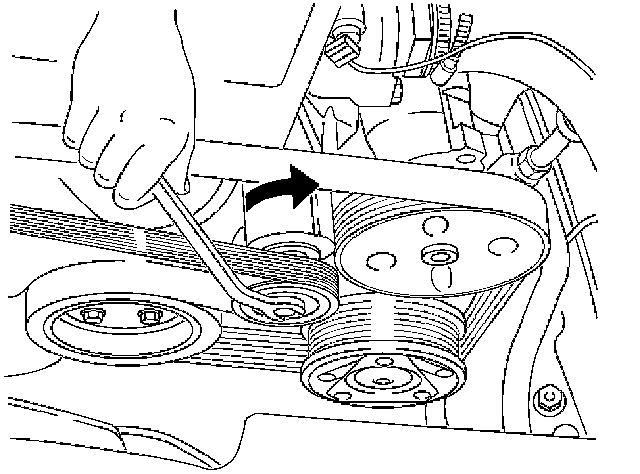
7. Move drive belt tensioner to loose side using wrench then remove drive belt.
8. Remove radiator upper hose from engine side.
9. Remove four nuts of exhaust front pipe.
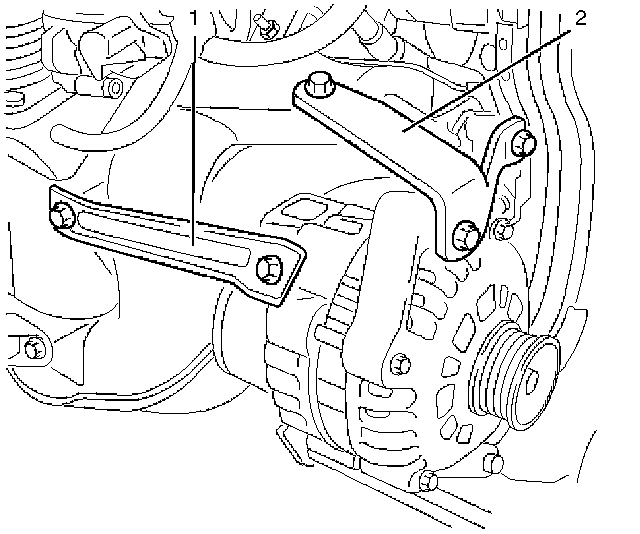
10. Remove three bolts from generator bracket then remove the generator with brackets.
11. Disconnect crankshaft angle sensor connector.
12. Disconnect knock sensor connector.
13. Remove heater hose from adapter side.
14. Remove heater hose from water pipe side.
15. Remove water hose between water pipe and throttle body.
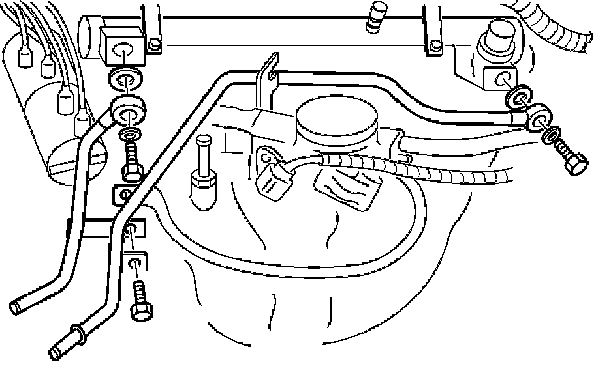
16. Remove fuel pipe joint eye bolts from fuel rail assembly and remove fuel pipe bracket with electric ground cable.
17. Disconnect connector for evaporation valve.
18. Remove canister hose.
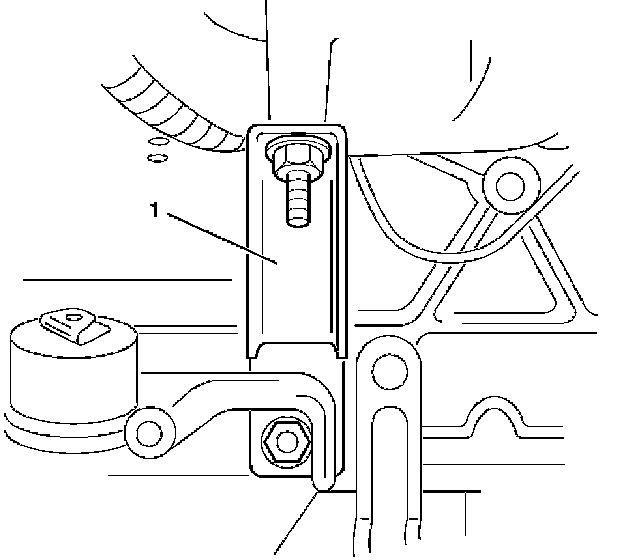
19. Remove fixing nut of intake manifold stay from cylinder block side.
20. Remove two bolts from intake manifold for water pipe support and remove cylinder head assembly.
21. Remove engine harness cover and disconnect three connectors from chassis harness on left rear side engine compartment.
22. Disconnect connector for power steering pump pressure switch.
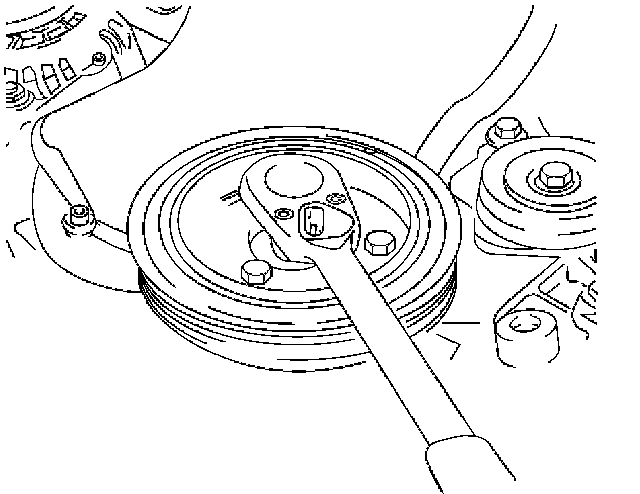
23. Remove four bolts and remove crankshaft pulley.
24. Remove two bolts and nut then remove timing belt front cover.
25. Remove ventilation hose from cylinder block side and from cylinder head side.
26. Remove two bolts, ignition cable cover and remove ignition cables from spark plug.
27. Disconnect camshaft angle sensor connector.
28. Remove ten bolts and remove cylinder head cover.
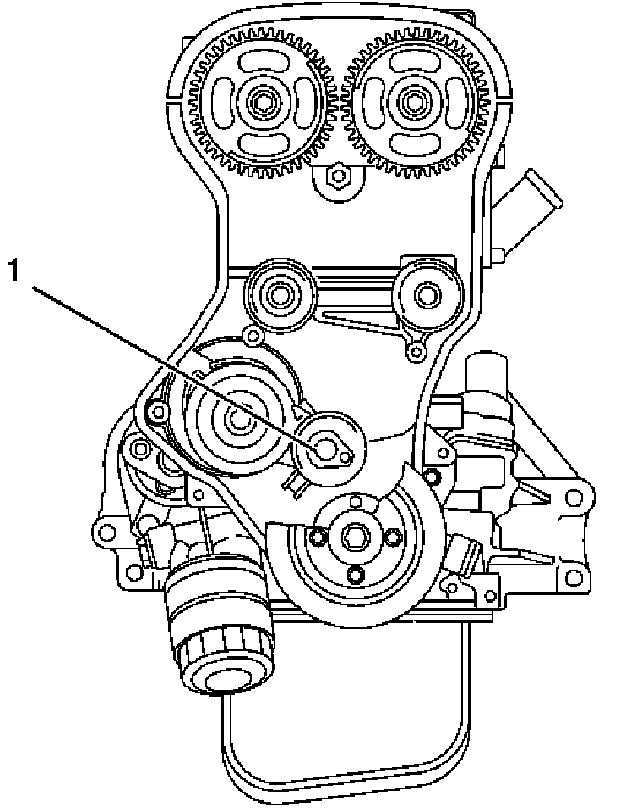
29. Remove fixing bolt of timing belt tensioner then remove timing belt tensioner.
30. Remove timing belt.
Caution:
- Do not bend or twist belt, otherwise its core could be damaged. The belt should not be bent at a radius less than 30 mm.
- Timing belt drive pulley counter hold with J-42620.
- Do not allow oil or other chemical substances to come in contact with the belt They will shorten the life.
- Do not attempt to pry or stretch the belt with a screw driver or any other tool during installation.
- Store timing belt in cool and dark place. Never expose the belt direct sunlight or heat.
31. Use adjustable wrench to hexagonal portion of camshaft and remove fixing bolts from front end of camshaft.
32. Remove camshaft drive pulley from intake and exhaust camshaft.
33. Remove two idle pulleys, the left side with idle pulley bracket.
34. Remove two bolts and stud bolt and remove timing belt rear cover.
35. Remove camshaft angle sensor
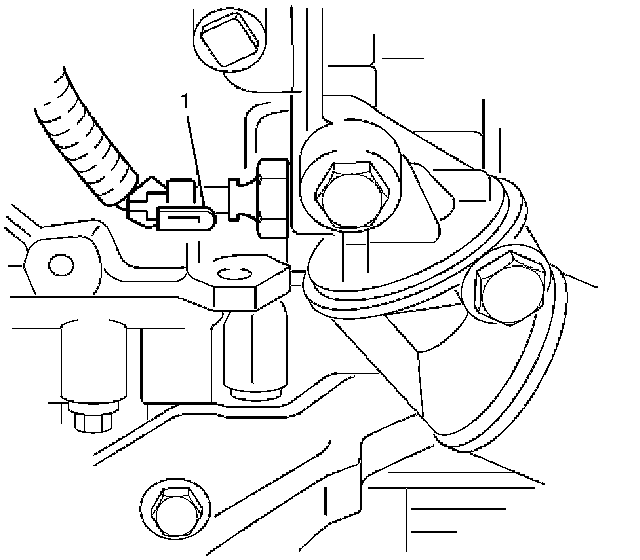
36. Disconnect engine oil pressure switch connector.
37. Remove camshaft assembly exhaust side.

38. Use J-42623 to remove ten cylinder head fixing bolts
Installation
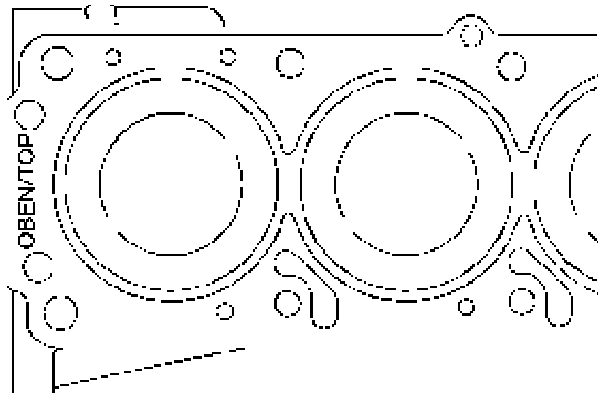
1. Clean sealing surface.
Put new cylinder head gasket on the cylinder block.

2. Install the cylinder head assembly, tighten cylinder head bolts by four steps tightening method in the following sequence to the specified torque. (use J-42623)
Torque: 25 Nm (18 ft. lbs.) + 90° + 90° + 90°

3. Install camshaft assembly exhaust side and tighten camshaft bracket bolts in the sequence to the specified torque.
Torque: 8 Nm (69 inch lbs.)
4. Install the camshaft drive pulley, align a guide hole on the camshaft drive pulley marked "IN" for in take and "EX" for exhaust to guide pin on the camshaft. Tighten drive pulley fixing bolt to the specified torque.
Torque: 50 Nm (37 ft. lbs.) + 60°
New bolts must be used.
5. Connect engine oil pressure switch connector.
6. Install camshaft angle sensor and bolt.
Torque: 6 Nm (52 inch lbs.)
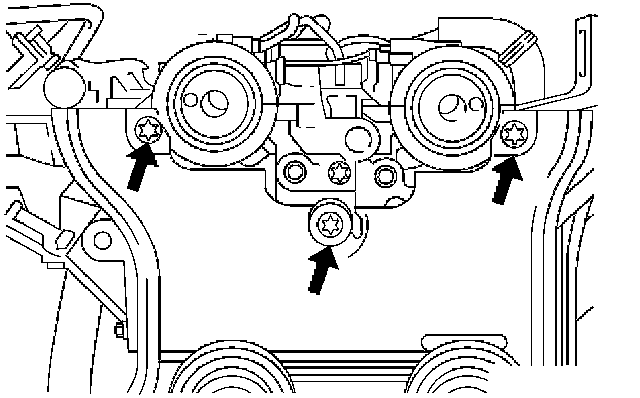
7. Install the timing belt rear cover and tighten three bolts with apply thread sealant to the specified torque.
Torque
M6 bolt: 6 Nm (52 inch lbs.)
M8 bolt: 8 Nm (69 inch lbs.)
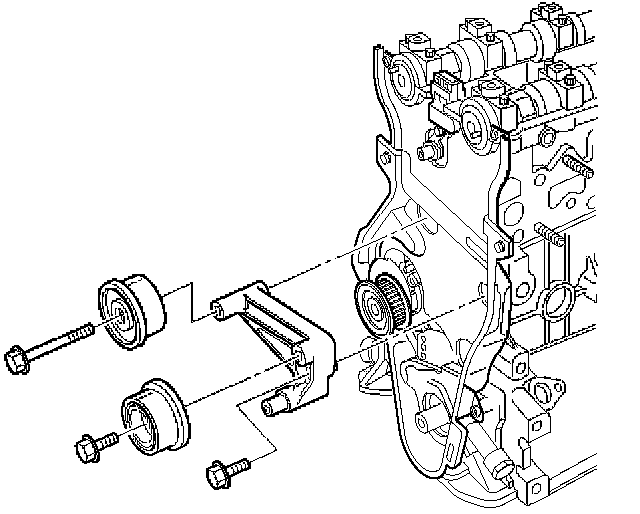
8. Install left side idle pulley with idle pulley bracket, tighten to the specified torque and install right side idle pulley and tighten to the specified torque.
Torque: 25 Nm (18 ft. lbs.)
9. Install timing belt tensioner then tighten it temporarily until make alignment timing belt.
10. Install the cylinder head cover and tighten fixing bolt temporally.
11. Install the timing belt and perform timing belt setting, refer to Timing Components; Timing Belt; Service and Repair.
Note: The tensioner setting is critical to reliable engine running, refer to Timing Components; Timing Belt; Service and Repair.
12. Tighten cylinder head cover to the specified torque.
Torque: 6 Nm (52 inch lbs.)
13. Connect camshaft angle sensor connector.
14. Install the ignition cable cover and tighten two bolts.
15. Install ignition cable cover and tighten two bolts.
Torque: 3 Nm (26 inch lbs.)
16. Install ventilation hoses to cylinder block side and cylinder head side.
17. Install timing belt front cover and tighten two bolts to the specified torque.
Torque: 6 Nm (52 inch lbs.)
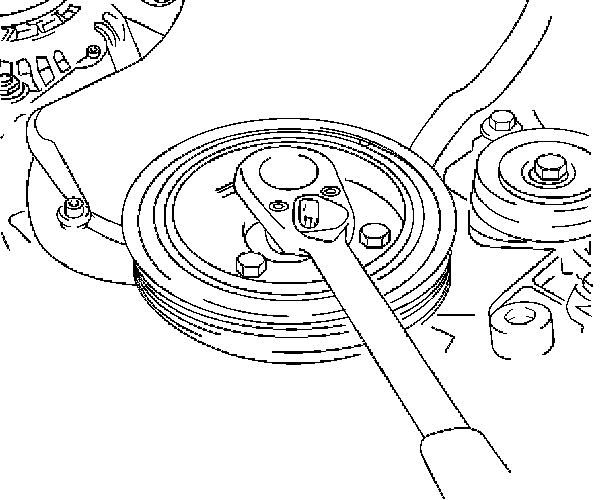
18. Install crankshaft pulley and tighten four bolts.
Torque: 20 Nm (14 ft. lbs.)
19. Connect connector for power steering pump pressure switch.
20. Connect engine harness connector to chassis harness of the left rear of engine compartment and install engine harness cover.
21. Install two bolts to intake manifold for water pipe support.
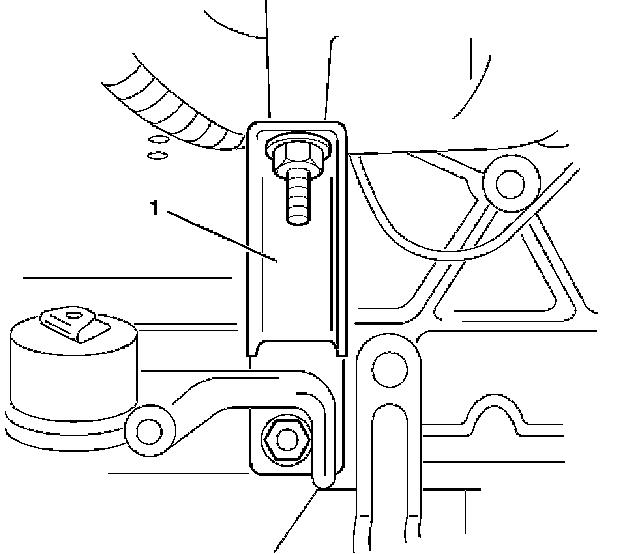
22. Install fixing nut of intake manifold stay (1) to cylinder block.
23. Install canister hose.
24. Connect connector for evaporation valve.
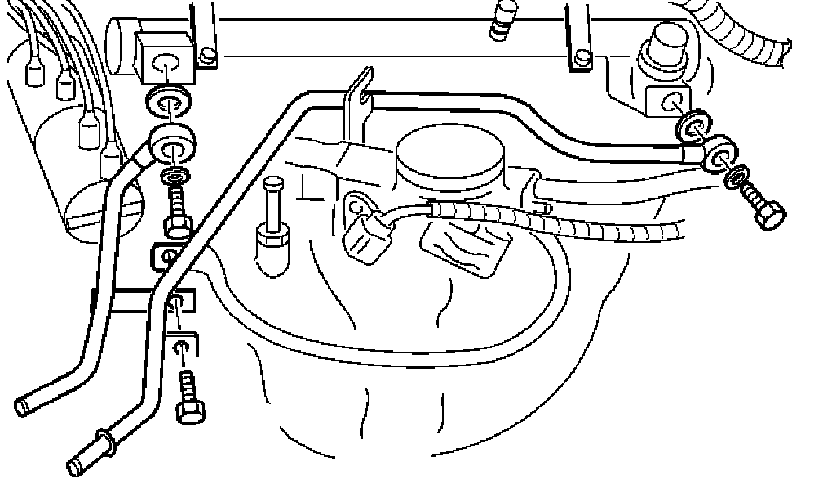
25. Install fuel pipe joint eye bolts to fuel rail assembly and install fuel pipe bracket with electric ground cable.
Torque: 25 Nm (18 ft. lbs.)
26. Install water hose between water pipe and throttle body.
27. Install heater hose to water pipe side.
28. Install heater hose to adapter side.
29. Connect knock sensor connector.
30. Connect crankshaft angle sensor connector.
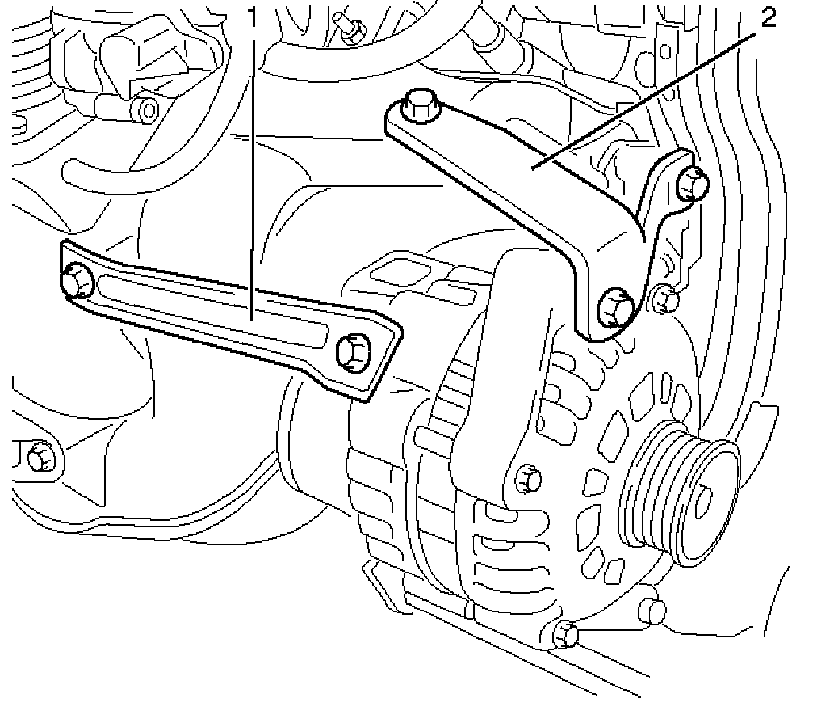
31. Install generator with bracket and tighten three bolts.
Torque: 20 Nm (14 ft. lbs.)
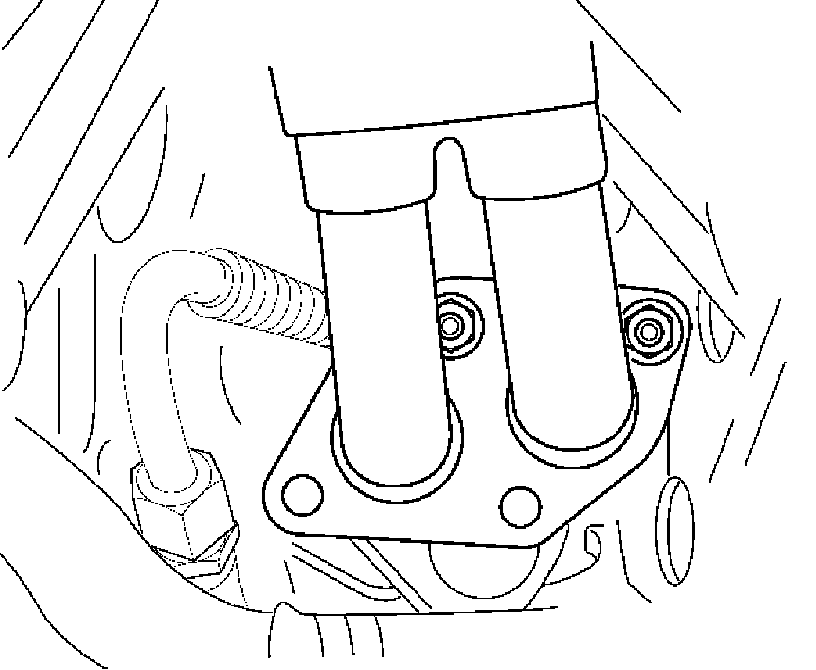
32. Install exhaust front pipe to exhaust manifold and tighten four nuts to the specified torque.
Torque: 25 Nm (18 ft. lbs.)
33. Install radiator upper hose to engine.
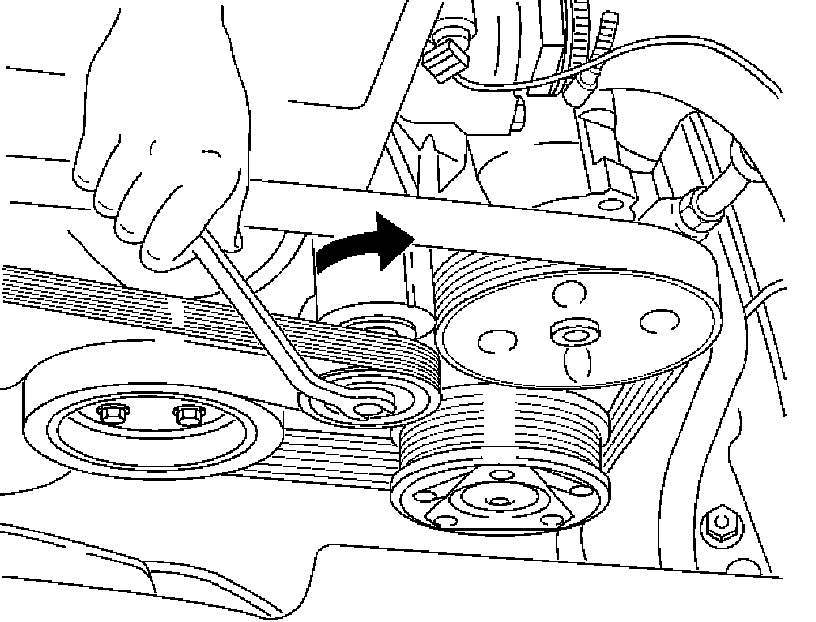
34. Move drive belt tensioner to loose side using wrench then install the drive belt to normal position.
35. Install intake air duct bracket to cylinder head.
36. Install air intake duct assembly with air cleaner cover to throttle body and tighten nut to the air intake duct bracket then tighten hose clamp.
Torque:
7 Nm (61 inch lbs.) for nut
3 Nm (26 inch lbs.) for hose clamp bolt
37. Install PCV hose to air intake duct.
38. Connect connector of intake air temperature sensor on intake air duct.
39. Connect battery ground cable.
40. Fill engine coolant to full level in the engine coolant reservoir tank.