Condenser Tube Replacement
CONDENSER TUBE REPLACEMENTTOOLS REQUIRED
J 39400-A Halogen Leak Detector
REMOVAL PROCEDURE
1. Recover the refrigerant. Refer to Refrigerant Recovery and Recharging.
2. Remove the grille.
CAUTION: Do not remove hoses or lines before system is fully discharged. System may be under pressure and contact with R134a may cause personal injury.

3. Remove the condenser tube bolt from the receiver dehydrator.
4. Remove the condenser tube from the receiver dehydrator.
5. Remove the condenser tube nut from the evaporator tube.
6. Remove the condenser tube.
INSTALLATION PROCEDURE
NOTE: Refer to Fastener Notice in Service Precautions
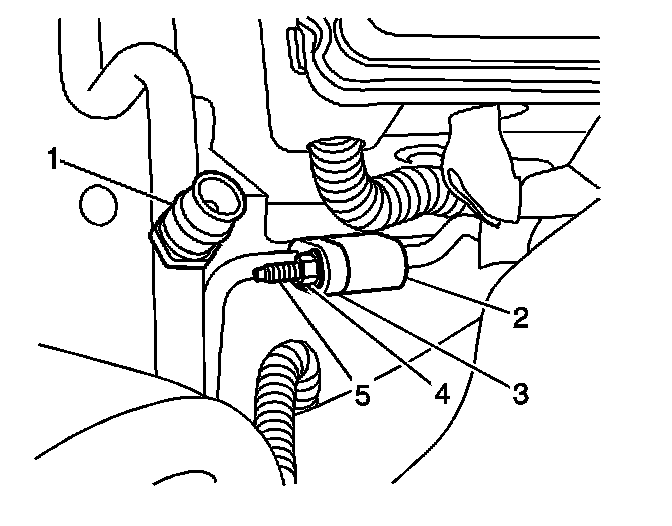
1. Install the condenser tube to the evaporator tube with the receiver/dehydrator clamp nut.
Tighten
Tighten the nut to 5 N.m (44 lb in).
2. Install the condenser tube to the receiver dehydrator.
3. Install the condenser tube bolt to the receiver dehydrator.
Tighten
Tighten the bolt to 20 N.m (15 lb ft).
4. Evacuate and recharge the A/C system. Refer to Refrigerant Recovery and Recharging.
5. Using J 39400-A, leak test the fittings of the component.
6. Install the grille.