Receiver Dryer: Service and Repair
Removal and Installation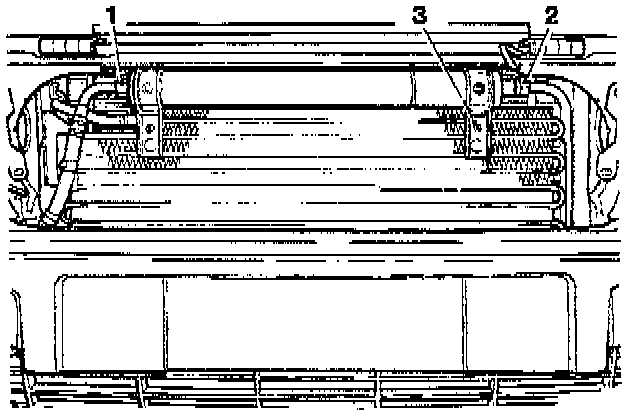
- Disconnect battery earth lead.
- As required, depressurize the system.
WARNING: Do not vent refrigerant directly to atmosphere and always use Jaguar approved recovery/recycle/recharge equipment. Wear suitable eye and skin protection. Do not mix HFC 134a with CFC 12. Observe all applicable safety requirements.
- Remove the radiator grille.
- Release the Liquid line tube nut at the receiver/dryer (1) and displace the hose.
^ Torque: 12.5-17.5 Nm (9.2-12.9 ft lb).
- Fit blanking plugs to the liquid line and the receiver/dryer.
- Release the receiver/dryer tube nut at the condenser (2).
^ Torque: 12.5-17.5 Nm (9.2-12.9 ft lb).
- Remove the receiver/dryer to condenser fixings and place aside receiver/dryer (3).
^ Torque: 1.5-2.5 Nm (1.1-2.5 ft lb).
- Fit blanking plugs to the receiver/dryer and condenser.
NOTE: Installation is the reverse of this procedure. ALL "O" rings must be replaced and lightly lubricated prior to assembly with Suniso 5GS or similar oil. Seat all fixings before finally tightening to torque.