Evaporator Core: Service and Repair
Evaporator Core (82.25.20)
Removal
1. Remove the cover and disconnect the battery ground cable.
2. Raise and support the vehicle.
WARNING: Do not work on or under a vehicle supported only by a jack. Always support the vehicle on safety stands.
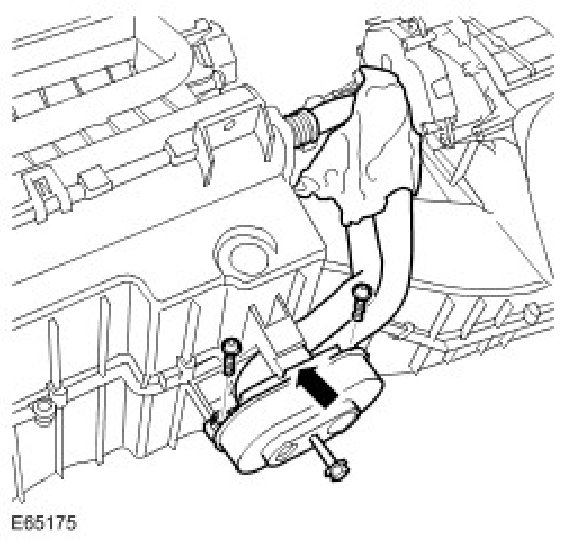
3. Remove the TXV assembly.
4. Remove the A/C pipes.
- Release the clamp.
- Remove the 2 screws.
- Release the clip.
- Release the foam pad and the upper section of the clamp.
CAUTION: Always plug any open connections to prevent contamination.
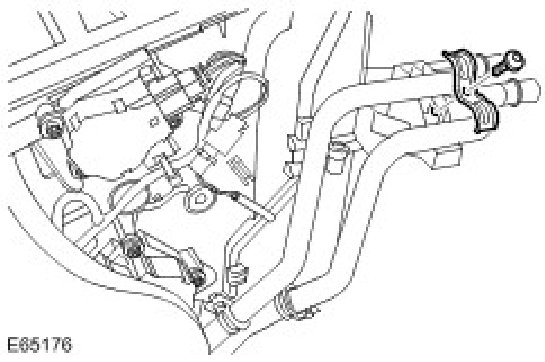
5. Remove the coolant pipe clamp.
- Remove the screw.
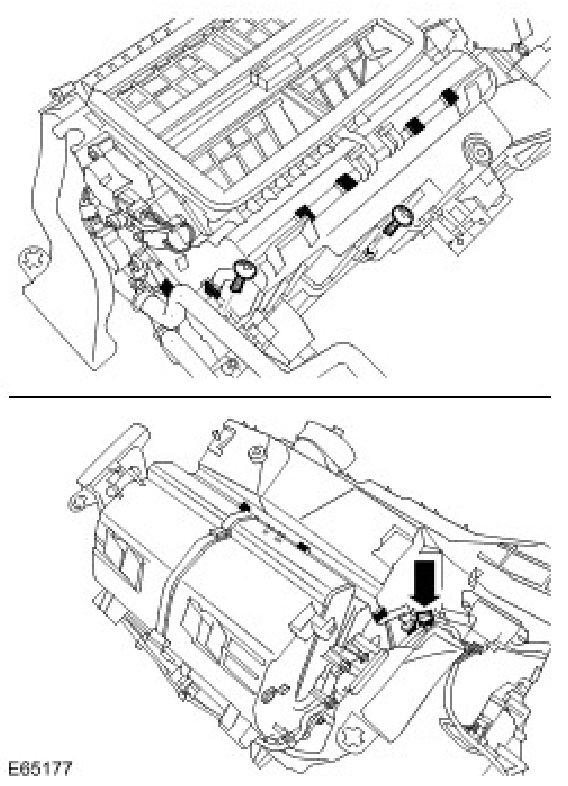
6. Carefully separate the evaporator housing.
- Remove the 4 screws.
- Remove the 10 clips.
- Release the blower motor harness clip.
- Release the 2 evaporator housing clips.
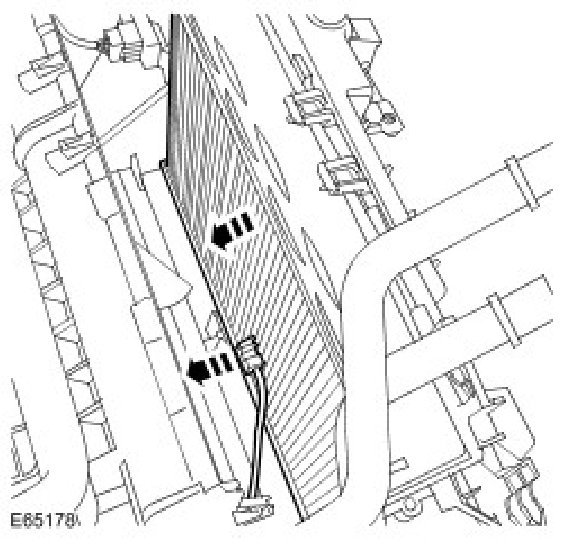
7. Remove the evaporator core.
- Carefully remove the evaporator core temperature sensor.
Installation
1. Install the evaporator core.
- Carefully install the evaporator core temperature sensor.
NOTE: Make sure all components are clean.
2. Install the evaporator housing cover.
- Install the clips.
- Install the screws.
CAUTION: Make sure the evaporator temperature sensor harness does not become trapped.
3. Install the coolant pipe clamp.
- Install the screw.
4. Install the A/C pipes.
- Install the foam pad.
- Install the clamp.
- Install the screws.
5. Install the TXV assembly.
6. Connect the battery ground cable and install the cover.