Coolant Line/Hose: Service and Repair
Coolant Manifold
This is a "Trustmark Authoring Standards (TAS) Repair Procedure"
- TAS style procedures can be identified by steps that have no accompanying step text and the magenta color of the electrical connectors and fasteners such as nuts, bolts, clamps or clips.
- TAS removal and installation procedures use a sequence of color illustrations to indicate the order to be followed when removing/disassembling or installing/assembling a component.
- Many of the TAS procedures will have the installation information within the removal steps.
- The TAS color illustrations use a variety of symbols to indicate important details of the procedures. It is important to understand these symbols in order to properly used the TAS procedures.
Refer to How to Use TAS Procedures and TAS Symbol Glossary at Vehicle | Description and Operation for additional information on these TAS procedures.
For additional information, refer to How to Use TAS Procedures
For additional information, refer to TAS Symbols Glossary
Removal
CAUTION: Engine coolant will damage the paint finished surfaces. If spilt, immediately remove the coolant and clean the area with water.
For additional information, refer to Battery Disconnect and Connect Battery Disconnect and Connect
WARNING: Do not work on or under a vehicle supported only by a jack. Always support the vehicle on safety stands.
1 Raise and support the vehicle.
For additional information, refer to Cooling System Draining, Filling and Bleeding Service and Repair
For additional information, refer to Air Cleaner Outlet Pipe Service and Repair
For additional information, refer to Supercharger Belt Supercharger Belt
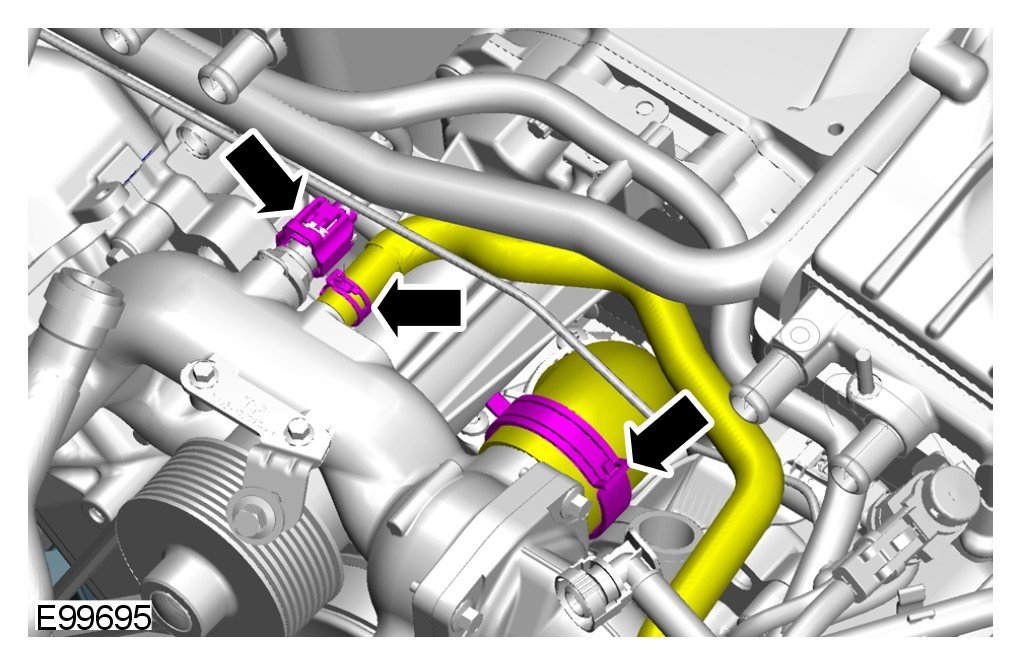
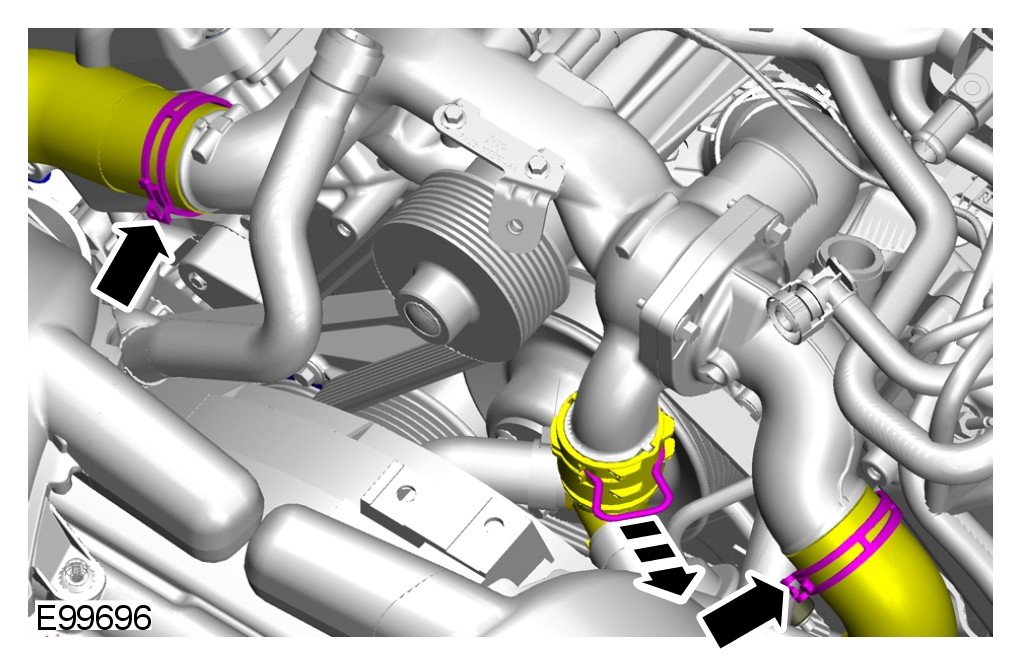
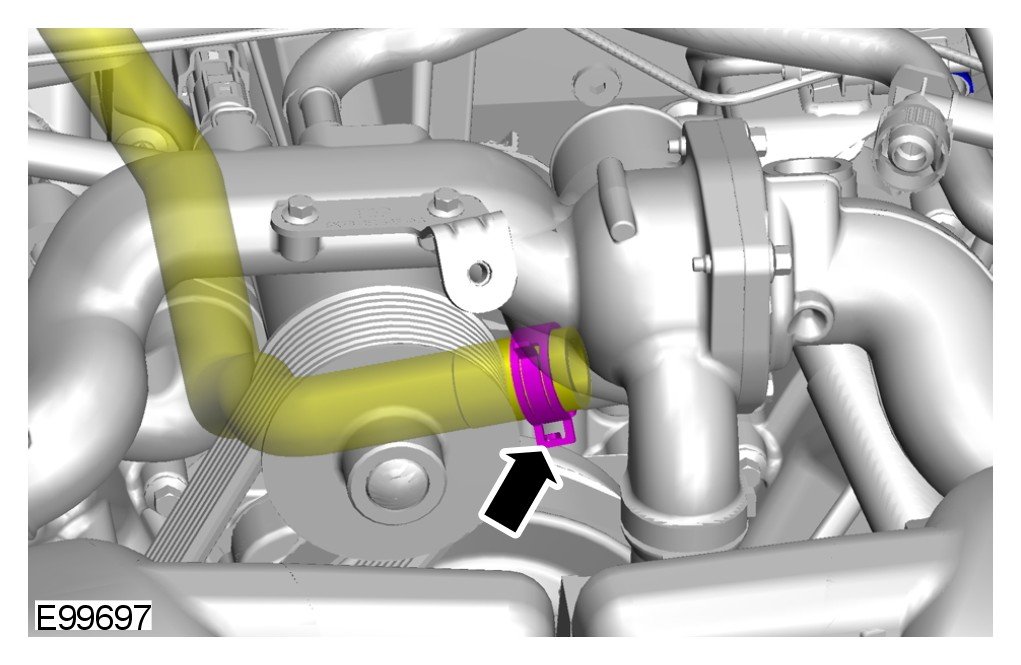
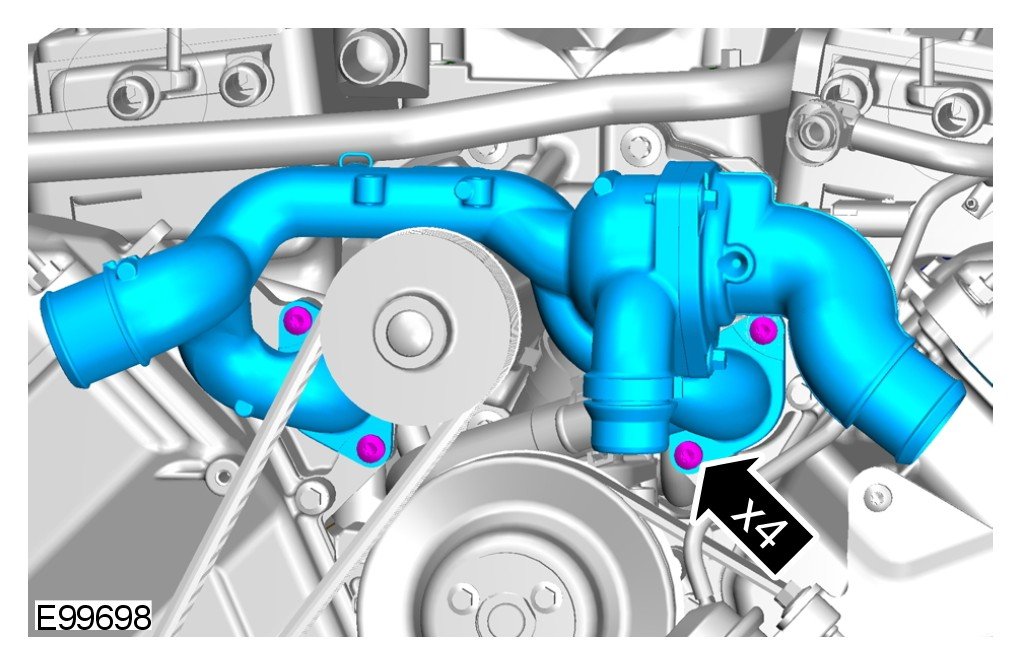
Torque to: 10 Nm
Installation
1 To install, reverse the removal procedure.