Part 2
Engine
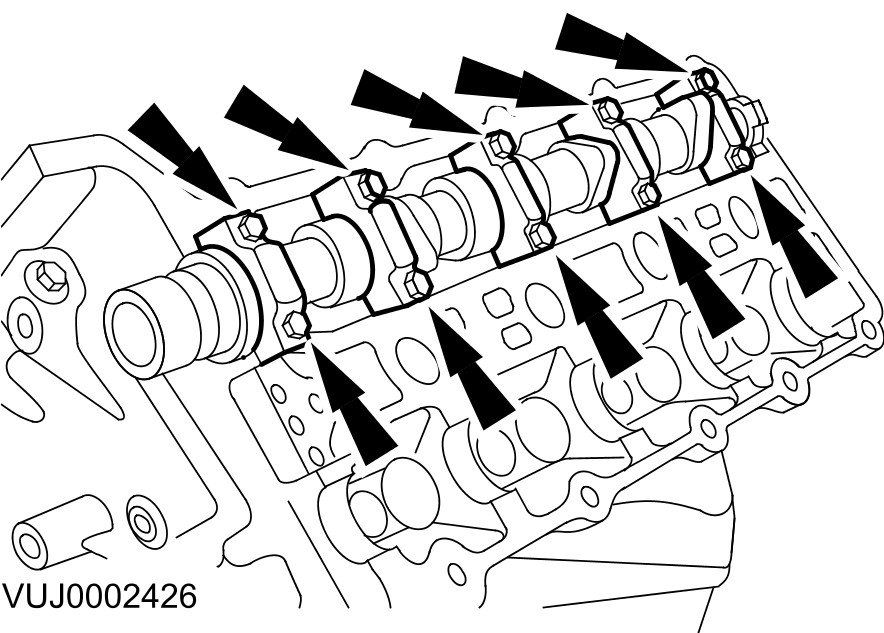
32 Install the left-hand inlet camshaft.
33
CAUTION: Alternate bolt tightening to correctly seat the camshaft bearing caps.
Install the camshaft bearing cap bolts evenly.
- Tighten to 10 Nm.
34
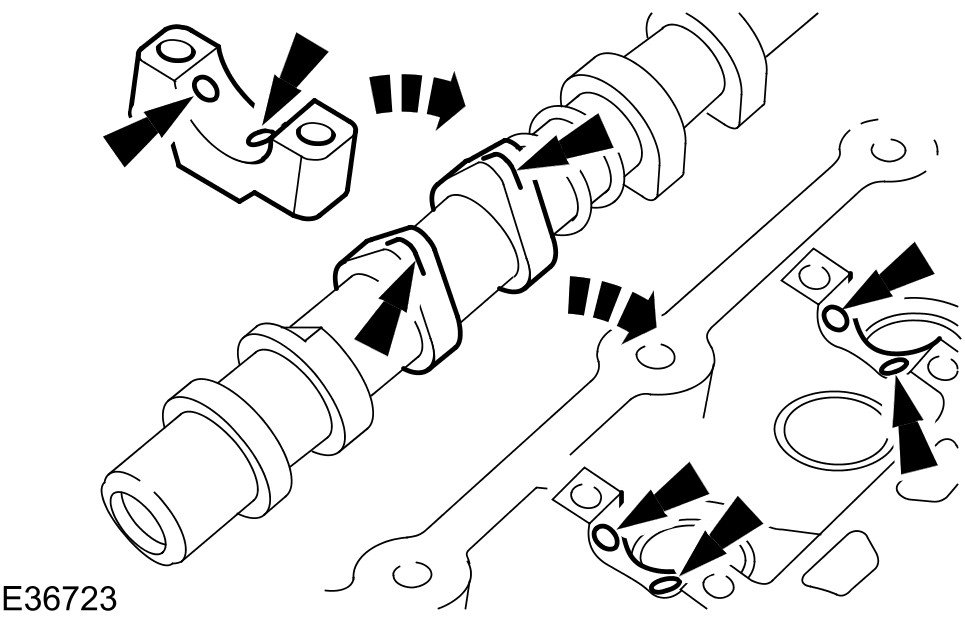
NOTE:
Make sure all components are clean.
Apply oil (EP-90) to the camshaft and bearing surfaces, as follows:
- To the upper face of each bearing surface in the cylinder head.
- To the upper face of each bearing surface in each bearing cap.
- On the cam lobes ONLY, not on the base circle area.
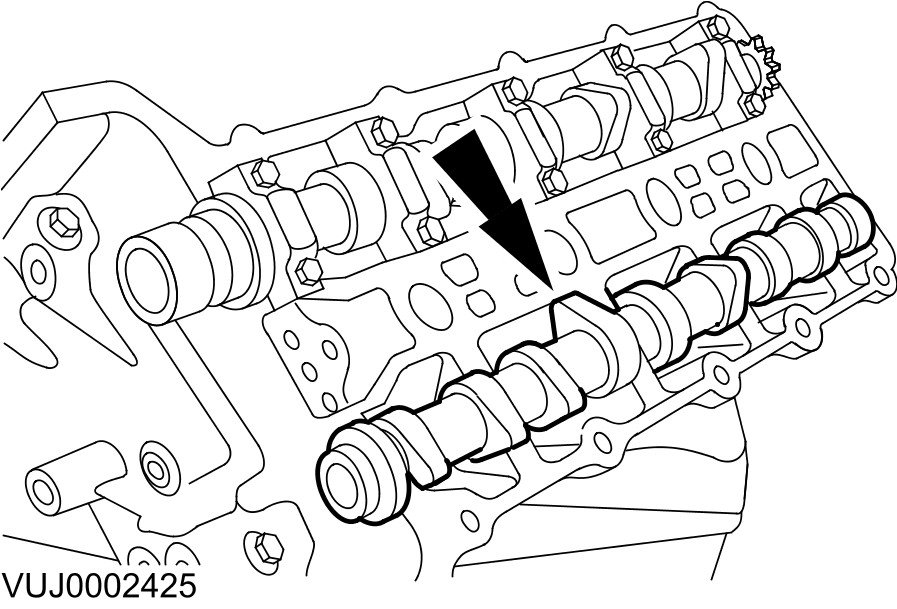
35 Install the left-hand exhaust camshaft.
36
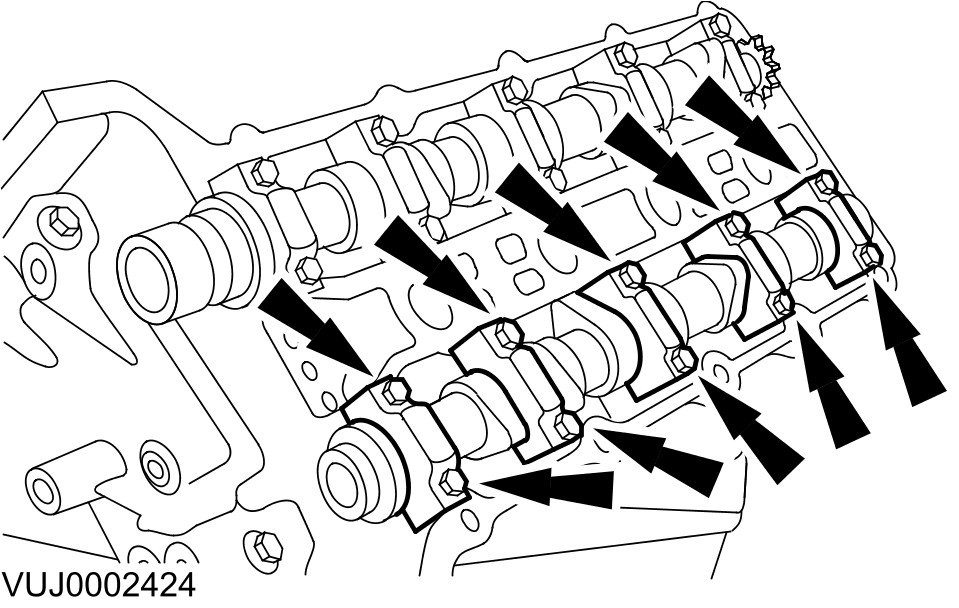
CAUTION: Alternate bolt tightening to correctly seat the camshaft bearing caps.
Install the camshaft bearing cap bolts evenly.
- Tighten to 10 Nm.
37
NOTE:
Make sure all components are clean.
Apply oil (EP-90) to the camshaft and bearing surfaces, as follows:
- To the upper face of each bearing surface in the cylinder head.
- To the upper face of each bearing surface in each bearing cap.
- On the cam lobes ONLY, not on the base circle area.
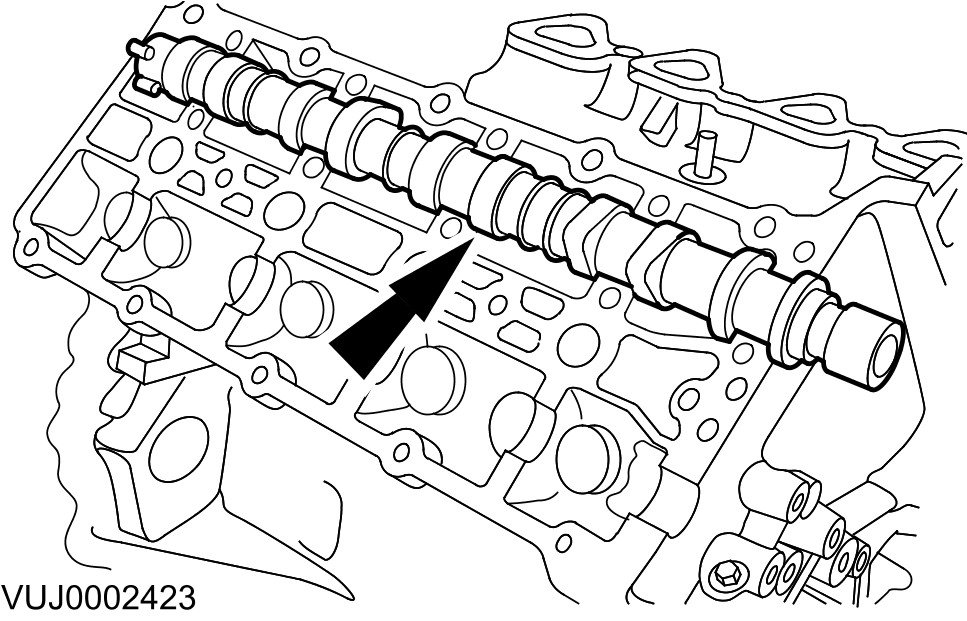
38 Install the right-hand inlet camshaft.
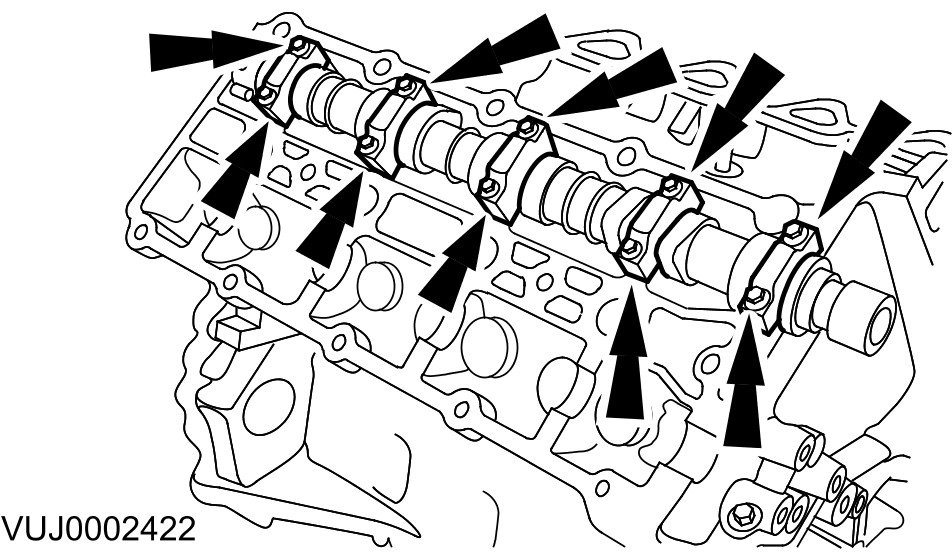
39
CAUTION: Alternate bolt tightening to correctly seat the camshaft bearing caps.
Install the camshaft bearing cap bolts evenly.
- Tighten to 10 Nm.
40
NOTE:
Make sure all components are clean.
Apply oil (EP-90) to the camshaft and bearing surfaces, as follows:
- To the upper face of each bearing surface in the cylinder head.
- To the upper face of each bearing surface in each bearing cap.
- On the cam lobes ONLY, not on the base circle area.
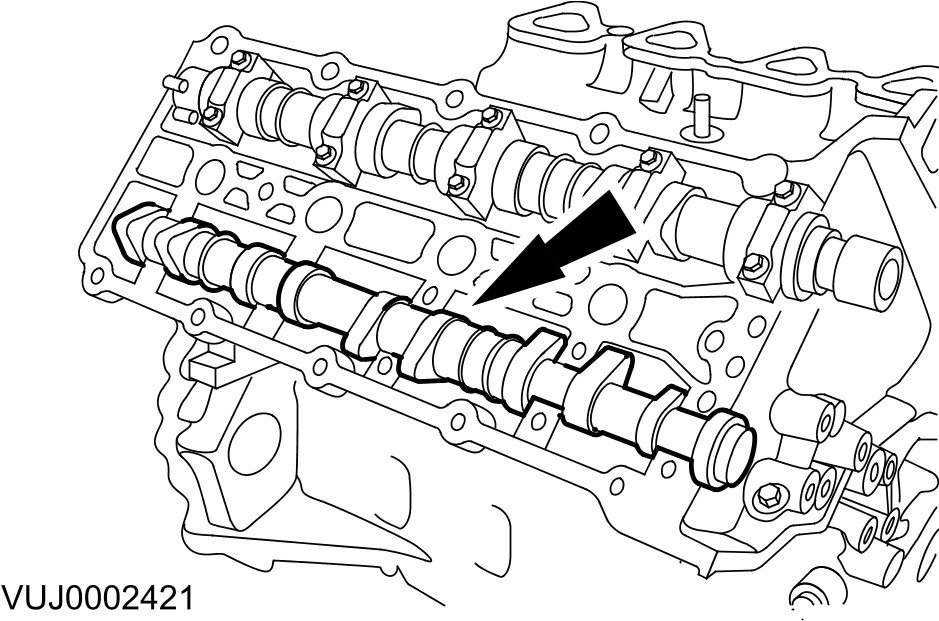
41 Install the right-hand exhaust camshaft.
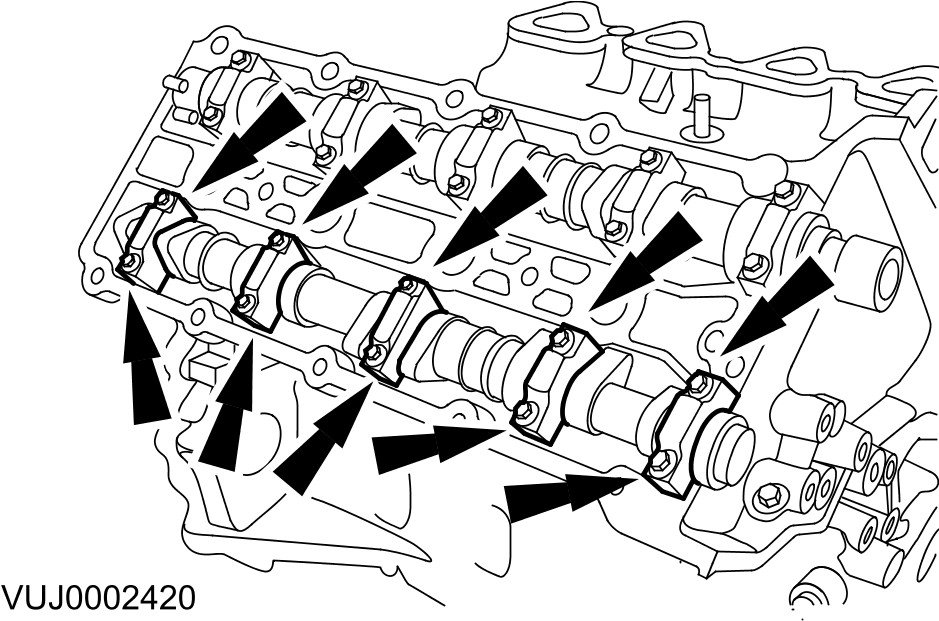
42
CAUTION: Alternate bolt tightening to correctly seat the camshaft bearing caps.
Install the camshaft bearing cap bolts evenly.
- Tighten to 10 Nm.
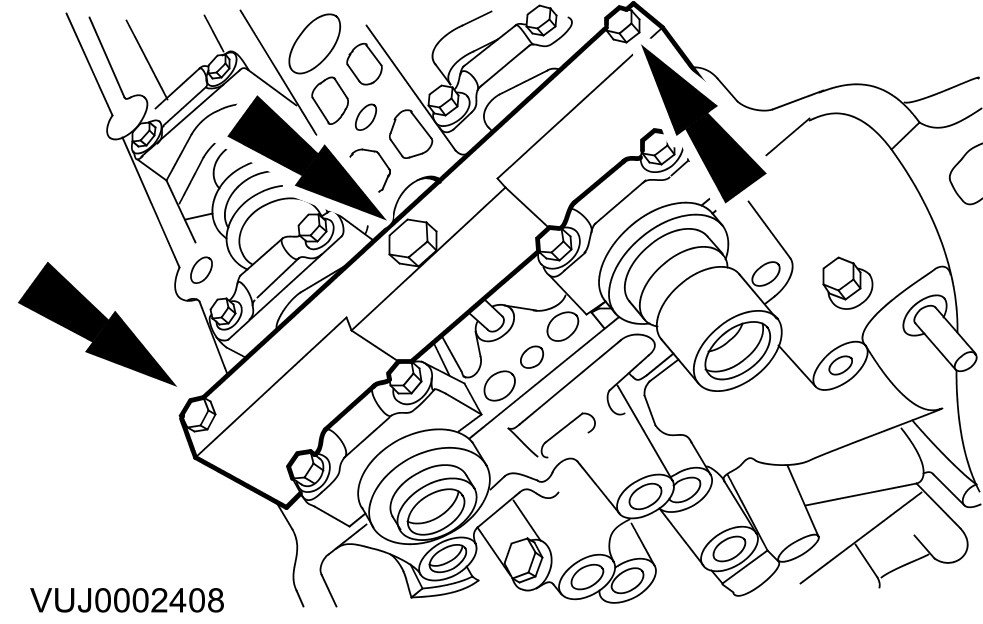
43 Install the camshaft setting tool.
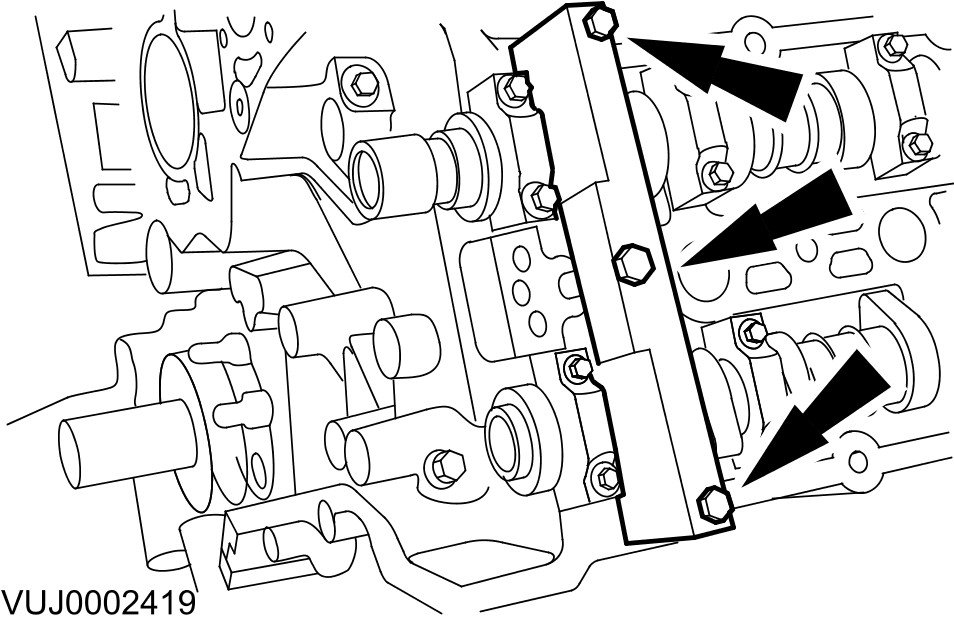
44 Install the camshaft setting tool.
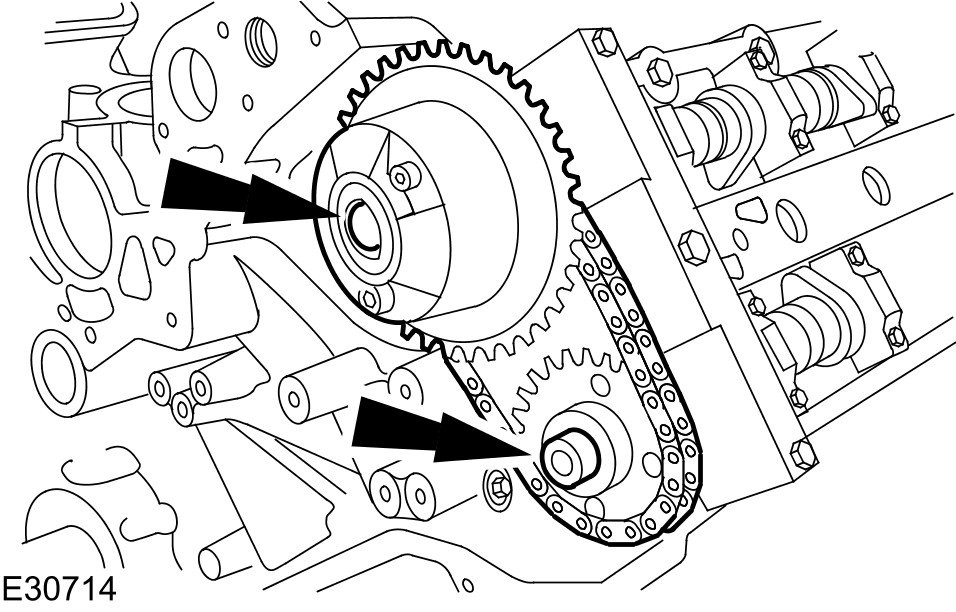
45
CAUTION: Do not tighten the camshaft sprocket retaining bolts.
CAUTION: Make sure the secondary timing chain and camshaft sprockets are free to rotate.
Install the camshaft sprockets.
- Install the secondary timing chain tensioner and secondary timing chain to the camshaft sprockets.
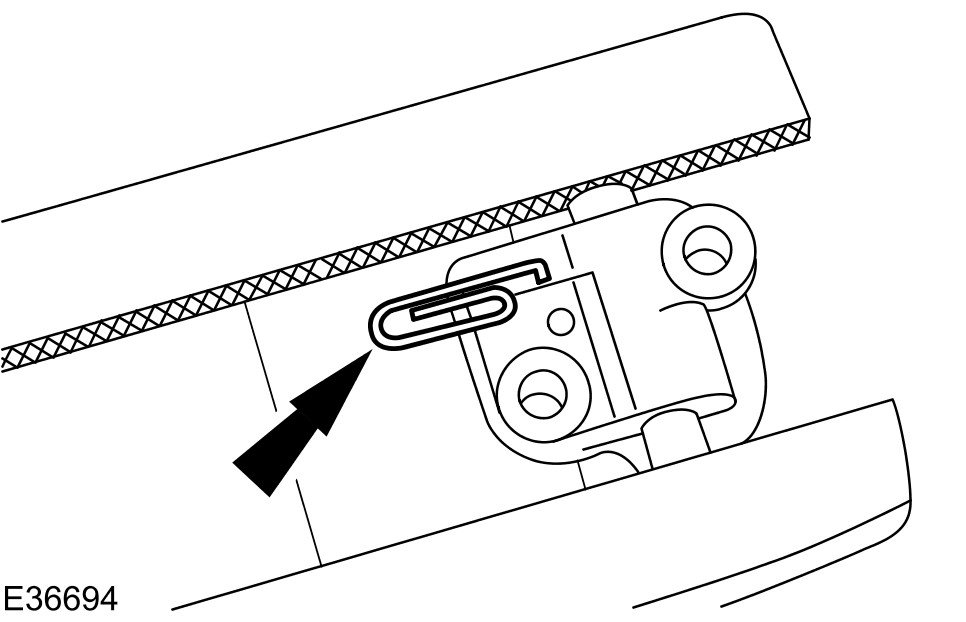
46 Using a suitable tool, retain the left-hand timing chain tensioner piston.
47 Release the tension in the left-hand timing chain tensioner.
- Remove the retaining tool.
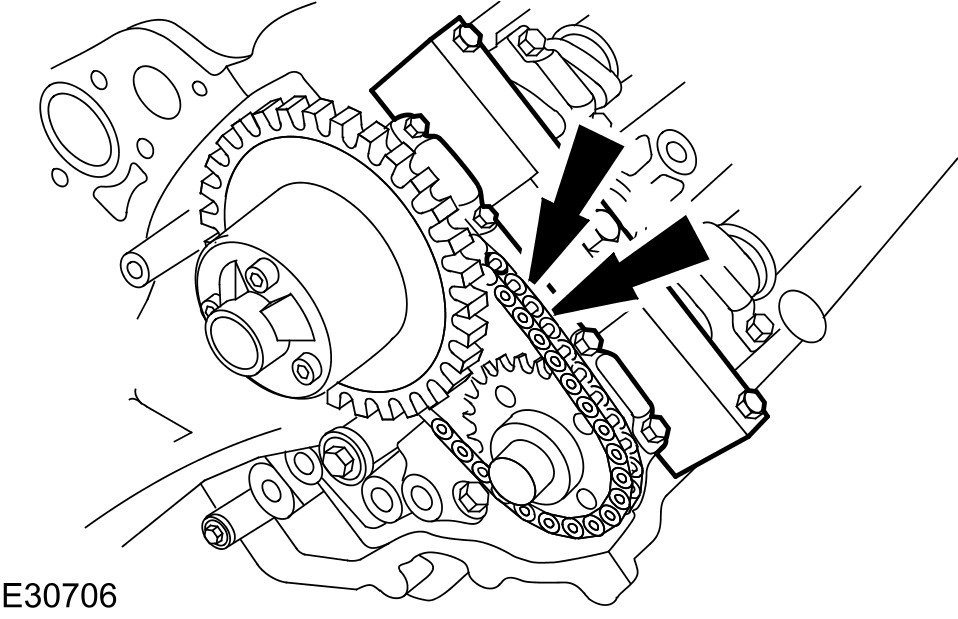
48 Install the secondary timing chain tensioner.
- Tighten to 12 Nm.

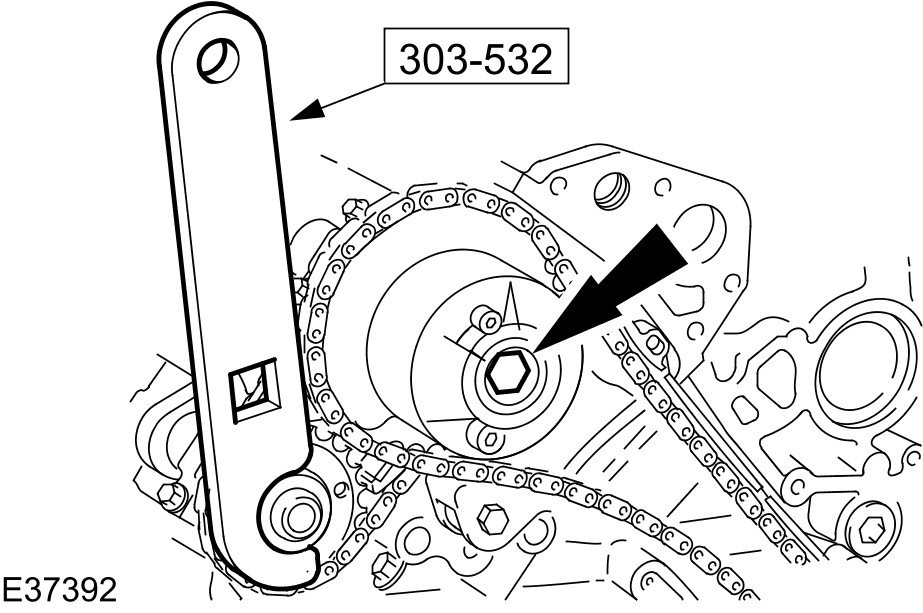
49 Install the timing chain tensioning tool 303-532 to the exhaust camshaft sprocket.
- Reposition the camshaft sprockets for the most advantageous position for use of the tool.
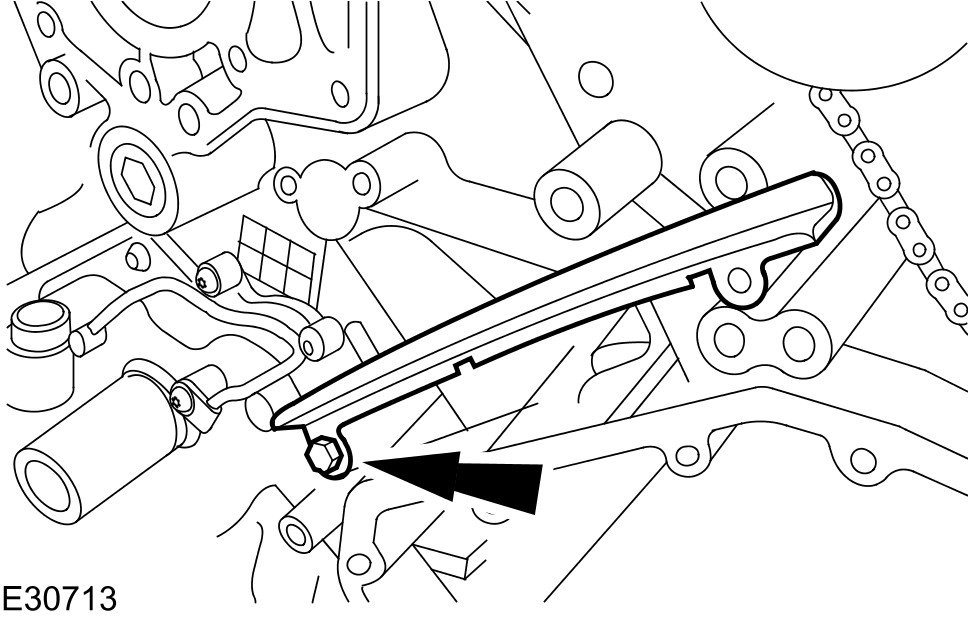
50 Install the primary timing chain tensioner guide.
- Tighten to 12 Nm.
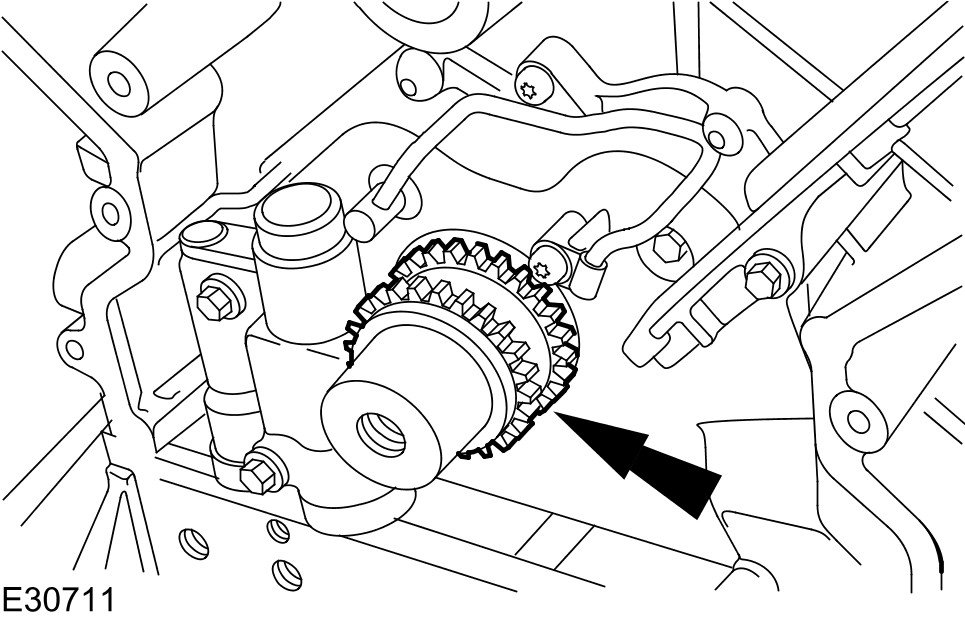
51 Install the crankshaft sprocket.

52
CAUTION: Make sure the timing chain slack is on the tensioned side of the timing chain.
Install the primary timing chain.
- Install the primary chain over the crankshaft sprocket and the intake sprocket.
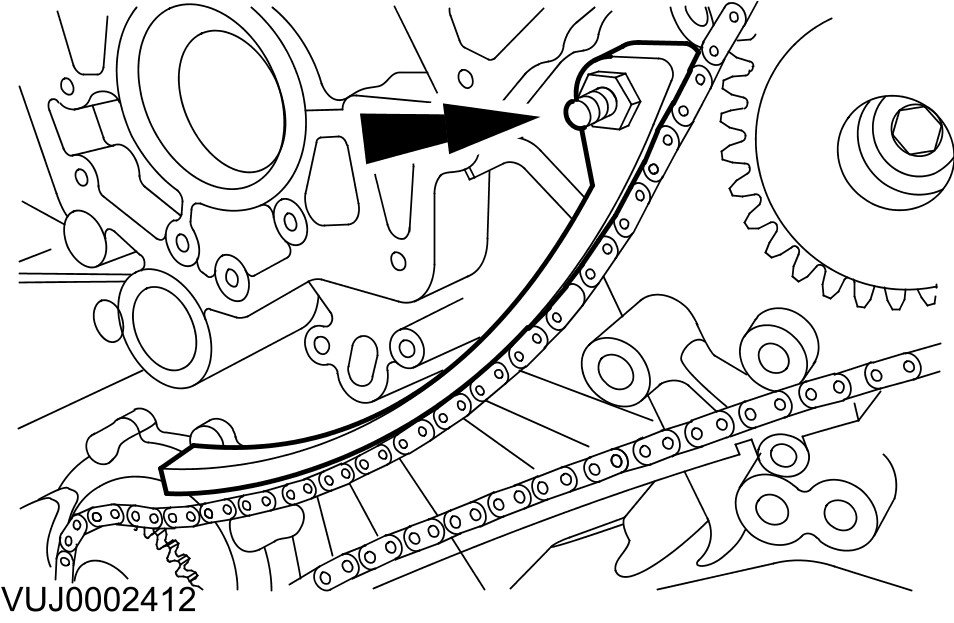
53 Install the primary timing chain tensioner guide.
- Tighten to 12 Nm.
54
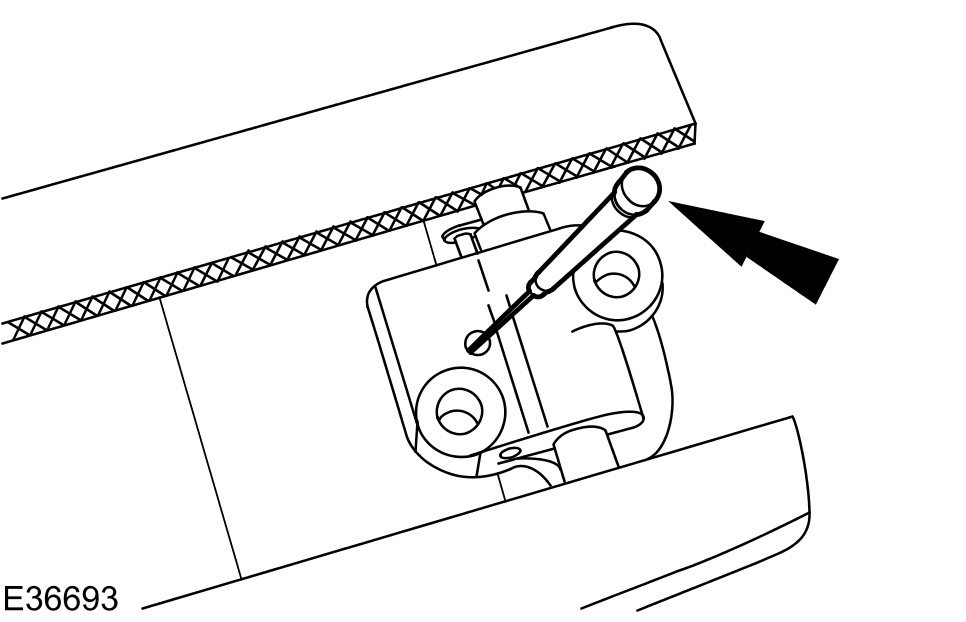
CAUTION: During timing chain tensioner compression, do not release the ratchet stem until the timing chain tensioner piston is fully bottomed in its bore or damage to the ratchet stem will result.
Using a suitable tool, hold the left-hand timing chain tensioner ratchet lock mechanism away from the ratchet stem.
55
NOTE:
The timing chain tensioner piston should retract with minimal force. If binding occurs, reposition the timing chain tensioner to eliminate side loading.
Slowly compress the left-hand timing chain tensioner.
56
NOTE:
The retaining tool must remain in the timing chain tensioner until the timing chain tensioner is installed to the engine with the piston bottomed in the bore.
Using a suitable tool, retain the left-hand timing chain tensioner piston.
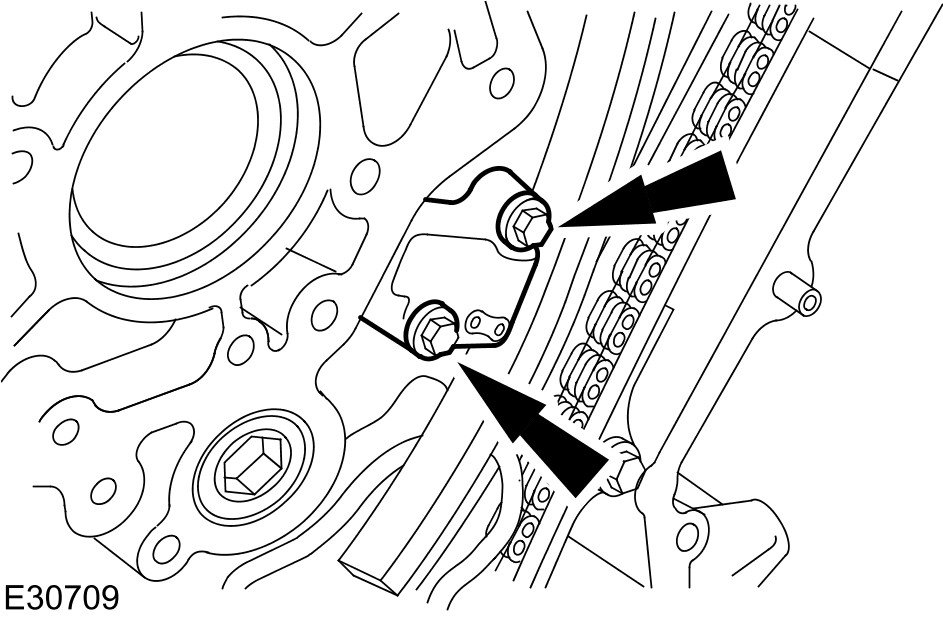
57 Install the primary timing chain tensioner assembly.
- Tighten to 12 Nm.
58 Release the tension in the left-hand timing chain tensioner.
- Remove the retaining tool.
59
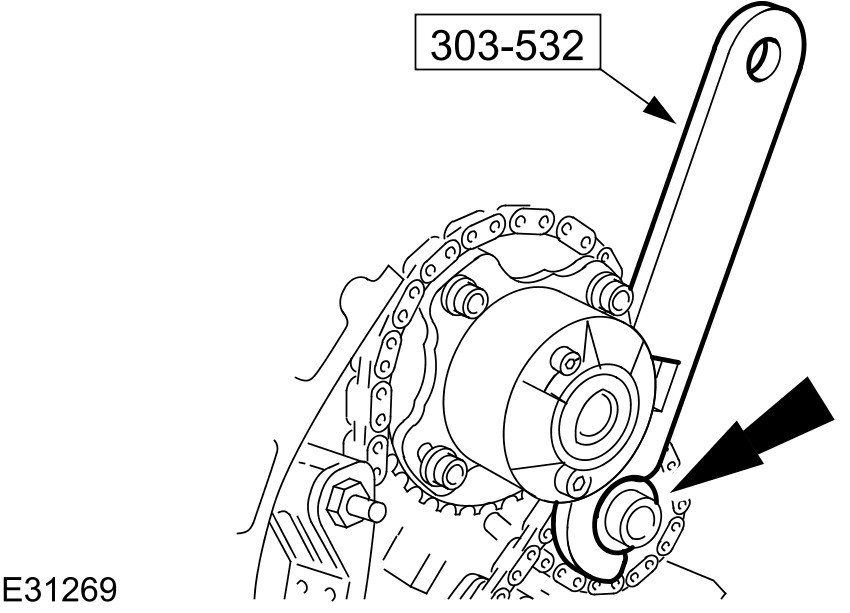
CAUTION: While applying the opposing force to sprocket and chain, tighten the sprocket bolt.
Using the special tool apply force to the tool in an anti-clockwise direction to tension the primary timing chain on its drive side.
- Tighten to 120 Nm.
60
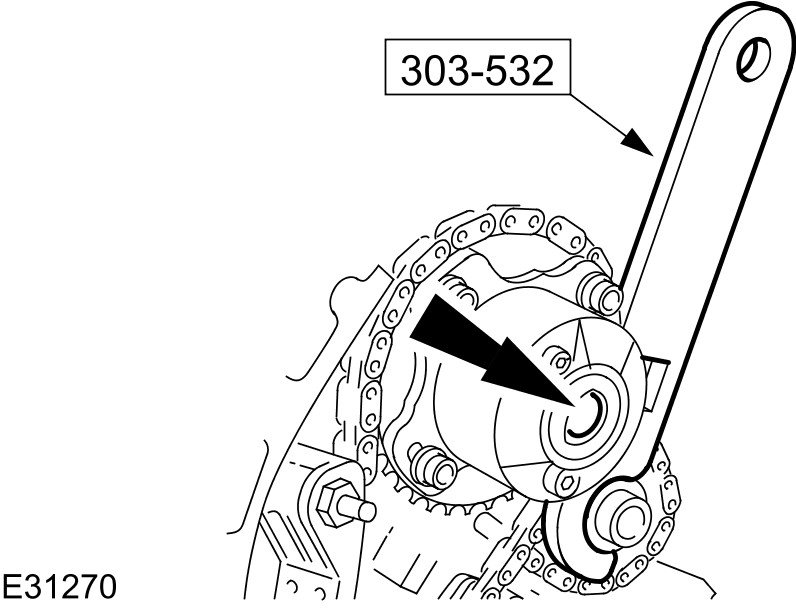
CAUTION: While applying the opposing force to sprocket and chain, tighten the sprocket bolt.
Using the special tool apply force to the tool in an anti-clockwise direction.
- Tighten to 120 Nm.
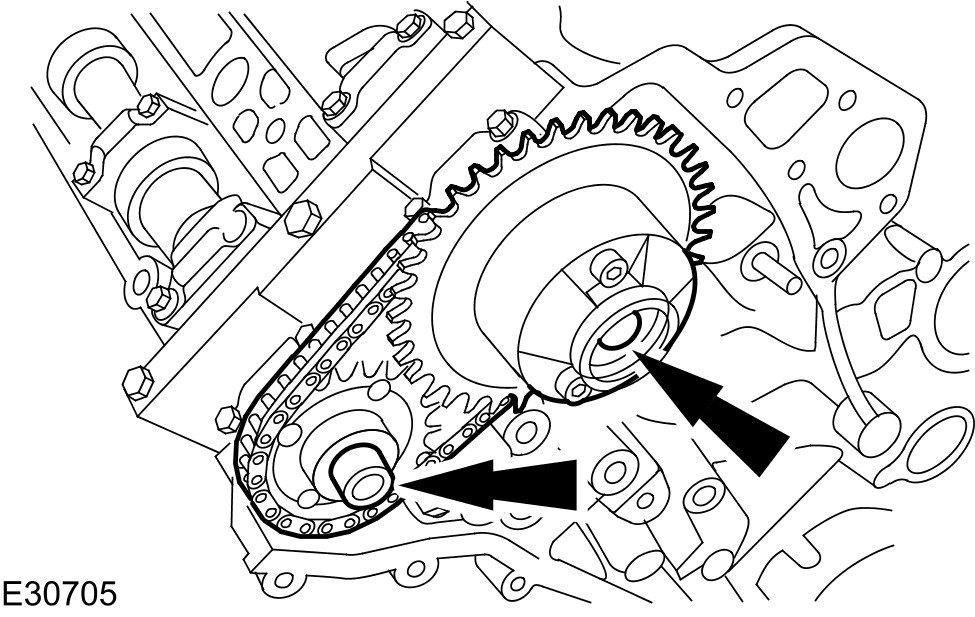
61
CAUTION: Do not tighten the camshaft sprocket retaining bolts.
CAUTION: Make sure the secondary timing chain and camshaft sprockets are free to rotate.
Install the camshaft sprockets.
- Install the secondary timing chain tensioner and secondary timing chain to the camshaft sprockets.
62 Using a suitable tool, retain the right-hand timing chain tensioner piston.
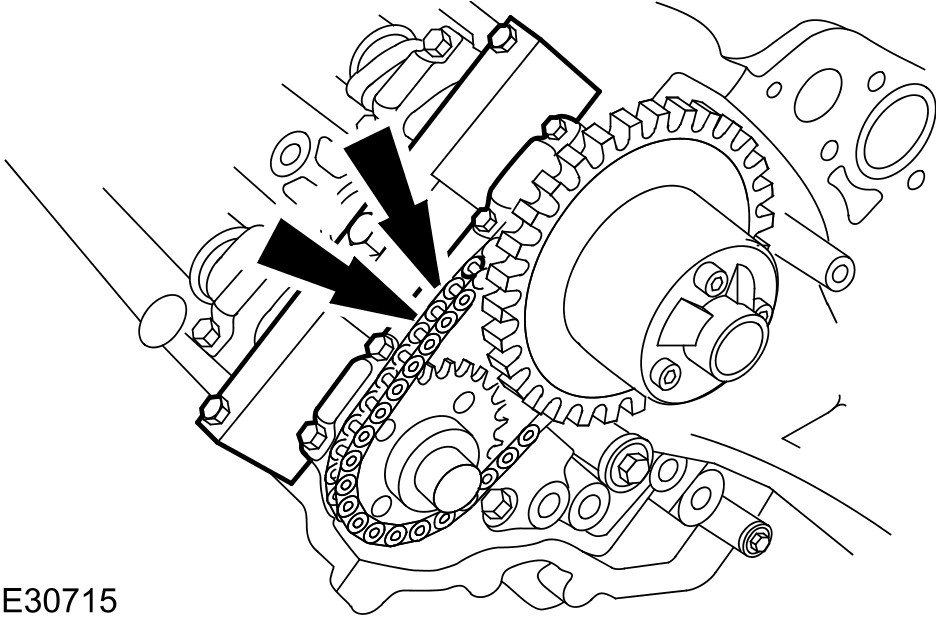
63 Install the secondary timing chain tensioner retaining bolts.
- Tighten to 12 Nm.
64 Release the tension in the right-hand timing chain tensioner.
- Remove the retaining tool.
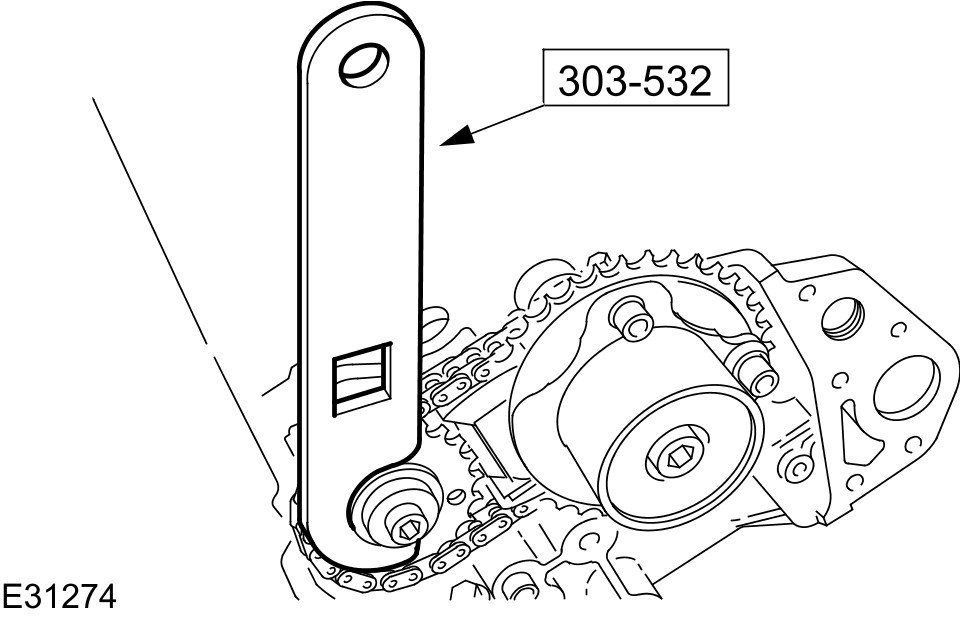
65 Install the timing chain tensioning tool 303-532 to the exhaust camshaft sprocket.
- Reposition the camshaft sprockets for the most advantageous position for use of the tool.
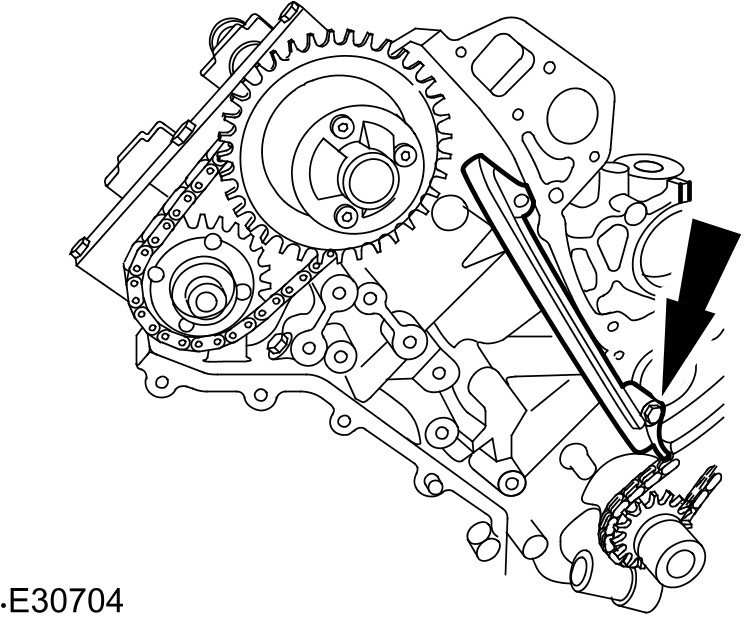
66 Install the primary timing chain guide.
- Tighten to 12 Nm.
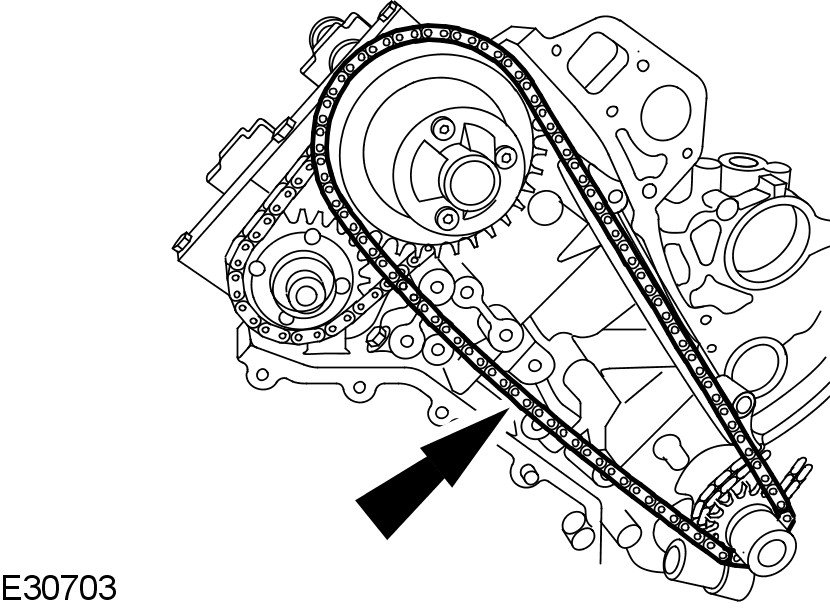
67
CAUTION: Make sure the timing chain slack is on the tensioned side of the timing chain.
Install the primary timing chain.
- Install the primary chain over the crankshaft sprocket and the intake sprocket.
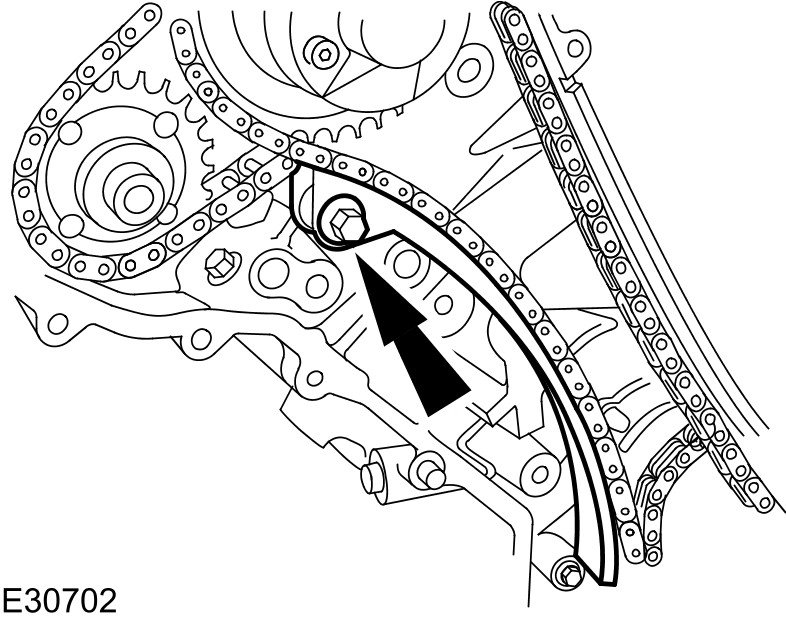
68 Install the primary timing chain tensioner guide.
- Tighten to 12 Nm.
69
CAUTION: During timing chain tensioner compression, do not release the ratchet stem until the timing chain tensioner piston is fully bottomed in its bore or damage to the ratchet stem will result.
Using a suitable tool, hold the right-hand timing chain tensioner ratchet lock mechanism away from the ratchet stem.
70
NOTE:
The timing chain tensioner piston should retract with minimal force. If binding occurs, reposition the timing chain tensioner to eliminate side loading.
Slowly compress the right-hand timing chain tensioner.
71
NOTE:
The retaining tool must remain in the timing chain tensioner until the timing chain tensioner is installed to the engine with the piston bottomed in the bore.
Using a suitable tool, retain the right-hand timing chain tensioner piston.
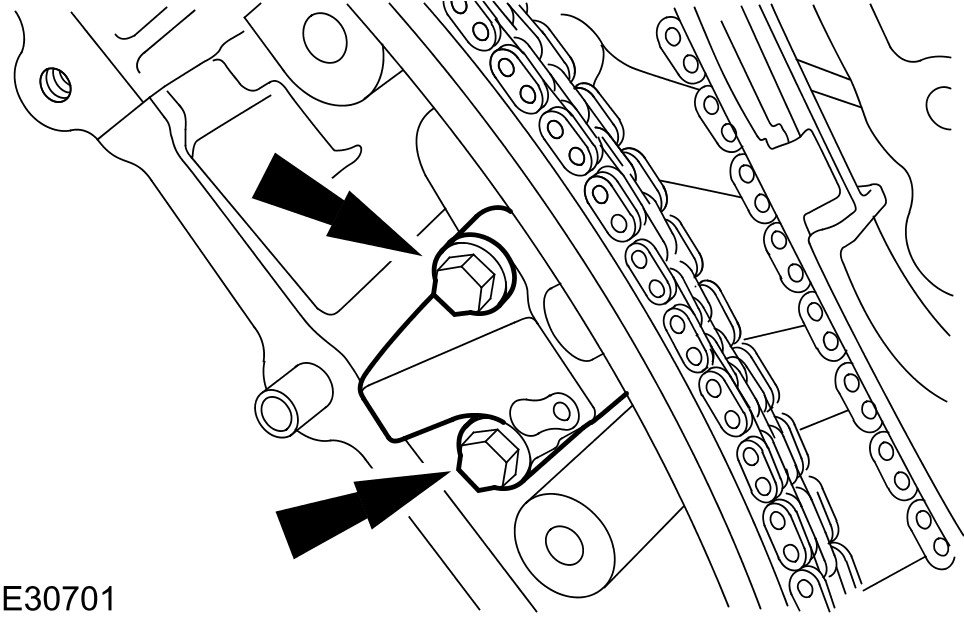
72 Install the primary timing chain tensioner assembly.
- Tighten to 12 Nm.
73 Release the tension in the right-hand timing chain tensioner.
- Remove the retaining tool.
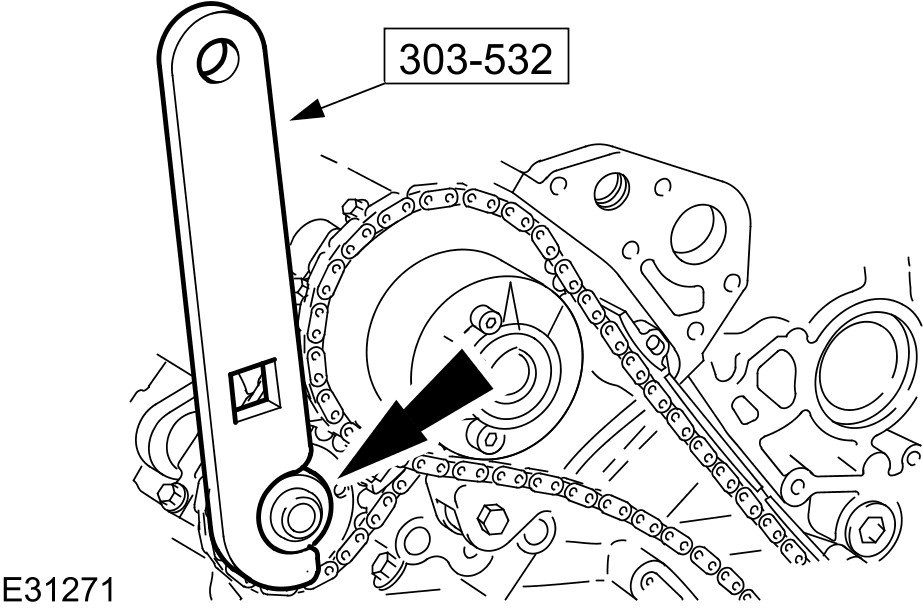
74
CAUTION: While applying the opposing force to sprocket and chain, tighten the sprocket bolt.
Using the special tool apply force to the tool in an anti-clockwise direction to tension the primary timing chain on its drive side.
- Tighten to 120 Nm.
75
CAUTION: While applying the opposing force to sprocket and chain, tighten the sprocket bolt.
Using the special tool apply force to the tool in an anti-clockwise direction.
- Tighten to 120 Nm.
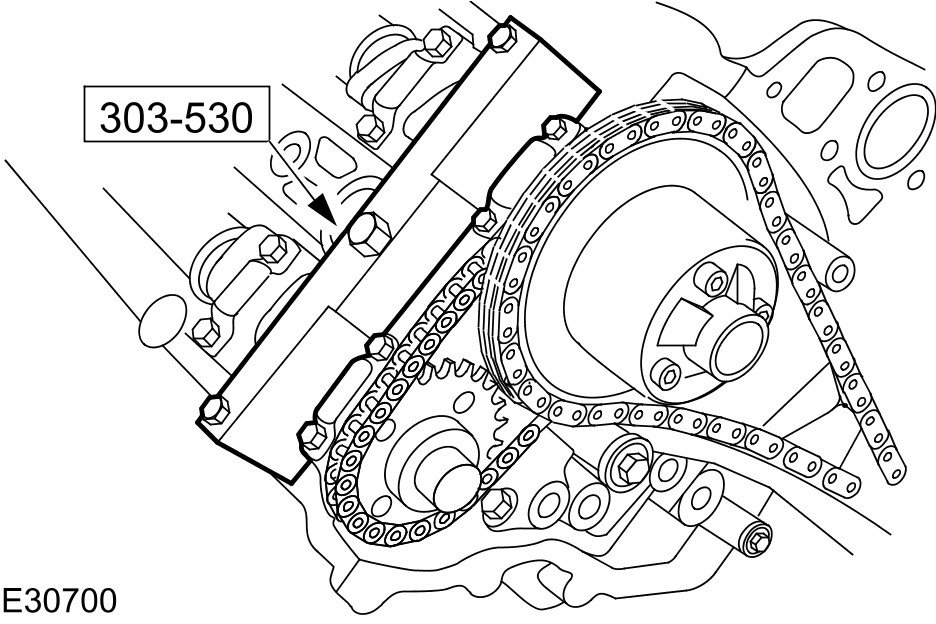
76 Remove the special tool from the right-hand cylinder head.
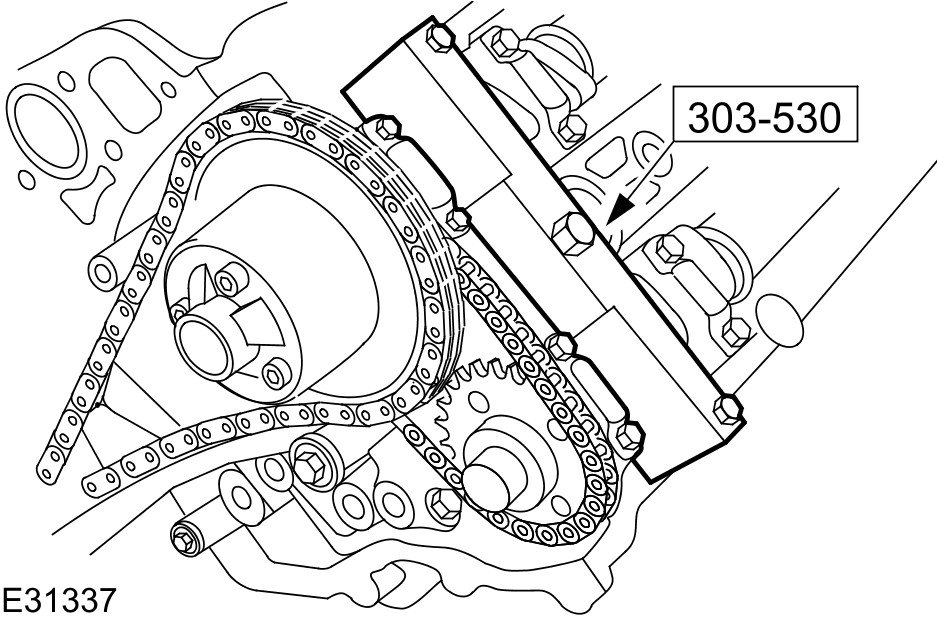
77 Remove the special tool from the left-hand cylinder head.
Vehicles without supercharger
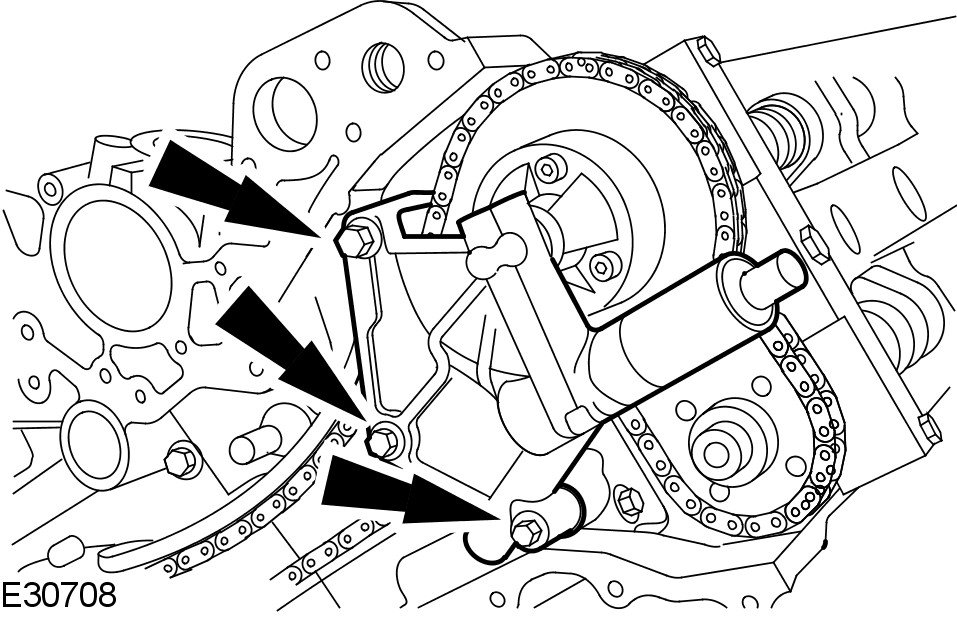
78 Install the left-hand variable camshaft timing oil control unit housing.
- Install new O-ring seals.
- Tighten to 22 Nm.
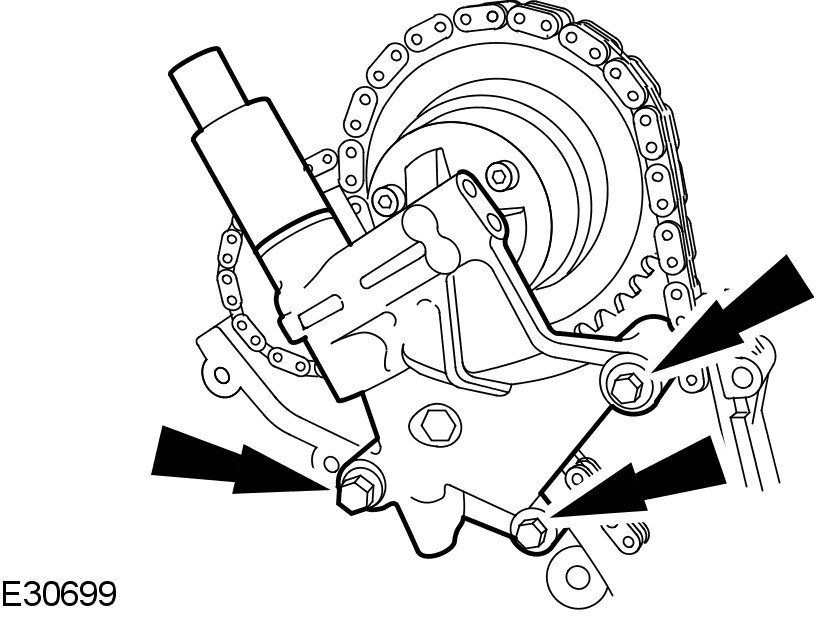
79 Install the right-hand variable camshaft timing oil control unit housing.
- Install new O-ring seals.
- Tighten to 22 Nm.