Fluid Filter - A/T: Service and Repair
Fluid Pan, Gasket and Filter
Removal
1 Disconnect the battery ground cable. For additional information, refer to Specifications [1][2]Battery
2
WARNING: Do not work on or under a vehicle supported only by a jack. Always support the vehicle on safety stands.
Raise and support the vehicle.
3 Drain the transmission. For additional information, refer to Transmission Fluid Drain and Refill Transmission Fluid Drain and Refill
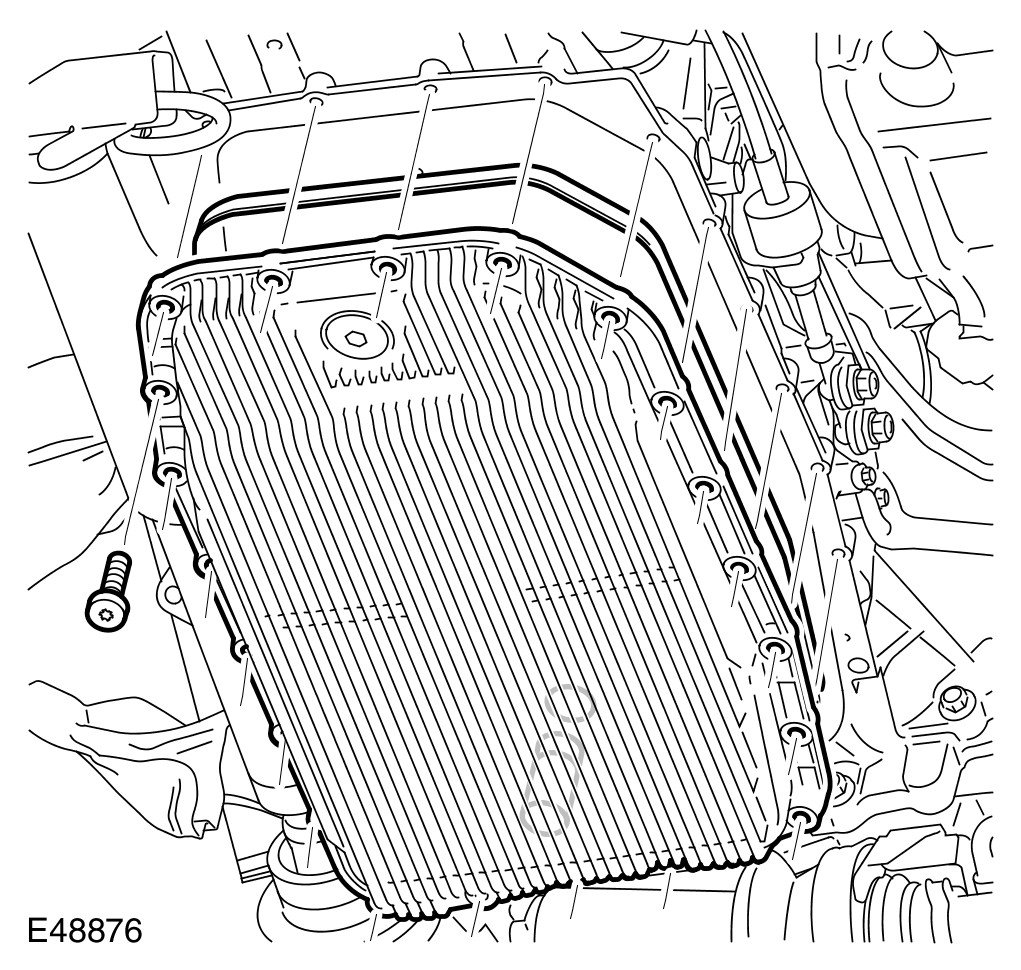
4 Remove the fluid pan.
- Position a container to collect the fluid spillage.
- Remove the 21 Torx screws.
- Remove and if necessary, discard the seal.
- Discard the O-ring seal.
Installation
1 Install the fluid pan.
- Clean the components.
- Install the seal.
- Install a new O-ring seal.
- Tighten the Torx screws to 8 Nm (6 lb.ft).
2 Connect the battery ground cable. For additional information, refer to Specifications [1][2]Battery
3 Refill the transmission with fluid. For additional information, refer to Transmission Fluid Drain and Refill Transmission Fluid Drain and Refill