Evaporator Core: Service and Repair
Evaporator
This is a "Trustmark Authoring Standards (TAS) Repair Procedure"
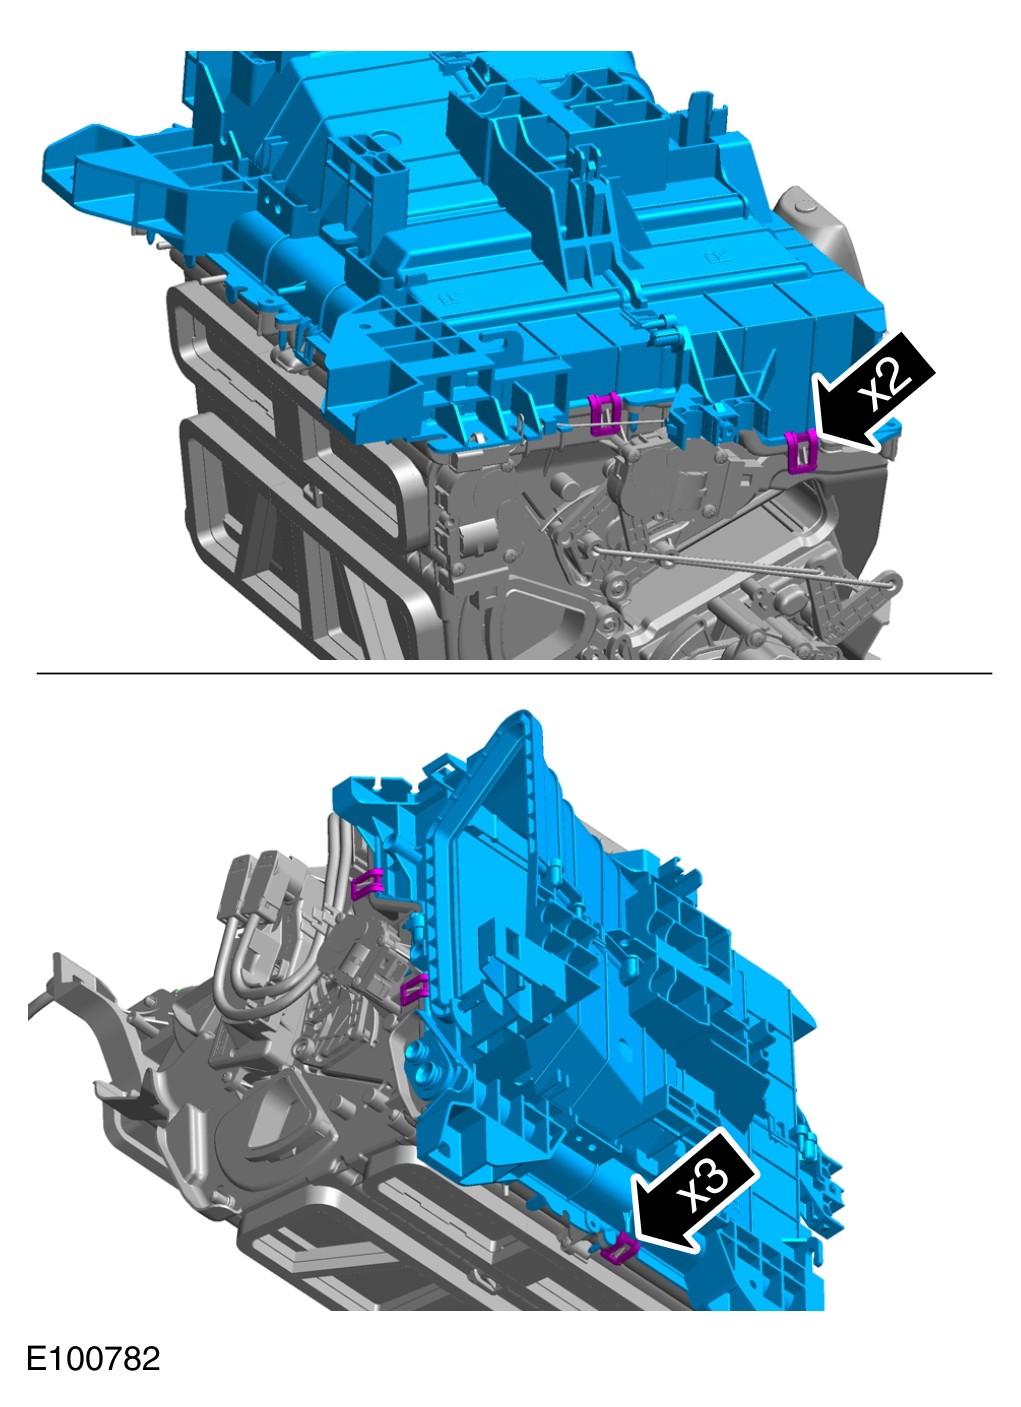
- TAS style procedures can be identified by steps that have no accompanying step text and the magenta color of the electrical connectors and fasteners such as nuts, bolts, clamps or clips.
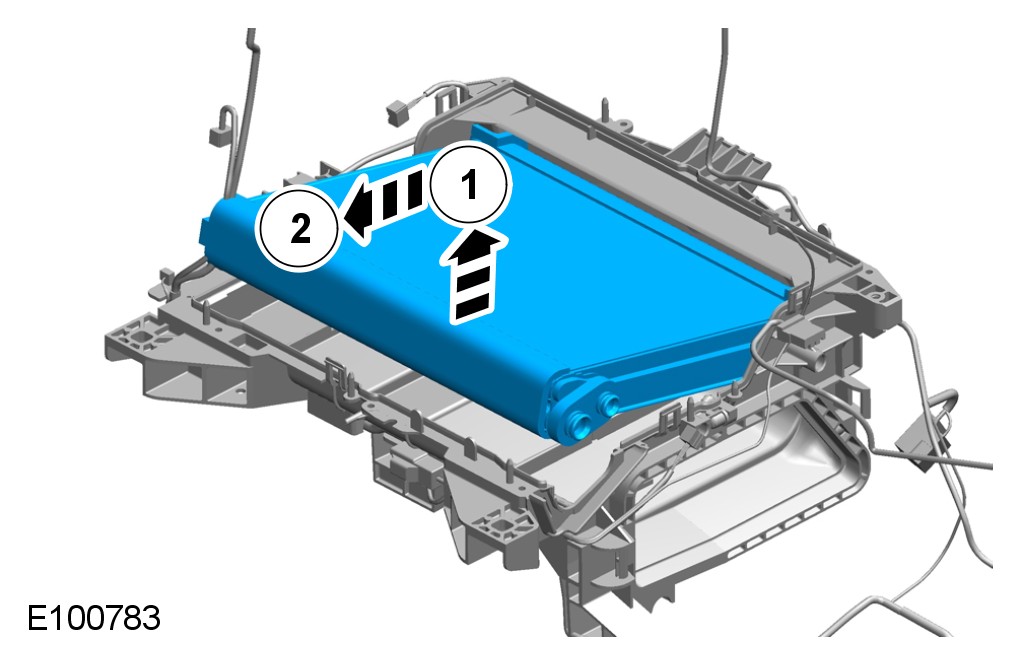
- TAS removal and installation procedures use a sequence of color illustrations to indicate the order to be followed when removing/disassembling or installing/assembling a component.
- Many of the TAS procedures will have the installation information within the removal steps.
- The TAS color illustrations use a variety of symbols to indicate important details of the procedures. It is important to understand these symbols in order to properly used the TAS procedures.
Refer to How to Use TAS Procedures and TAS Symbol Glossary at Vehicle | Description and Operation for additional information on these TAS procedures.
For additional information, refer to How to Use TAS Procedures How to Use TAS Procedures
For additional information, refer to TAS Symbol Glossary TAS Symbols Glossary
Removal
CAUTION: Take extra care not to damage the clips or screw threads. Failure to follow this instruction may result in damage to the climate control assembly.
NOTE:
Removal steps in this procedure may contain installation details.
All vehicles
WARNING: Make sure to support the vehicle with axle stands.
1 Raise and support the vehicle.
For additional information, refer to Battery Disconnect and Connect Battery Disconnect and Connect
For additional information, refer to Thermostatic Expansion Valve Service and Repair
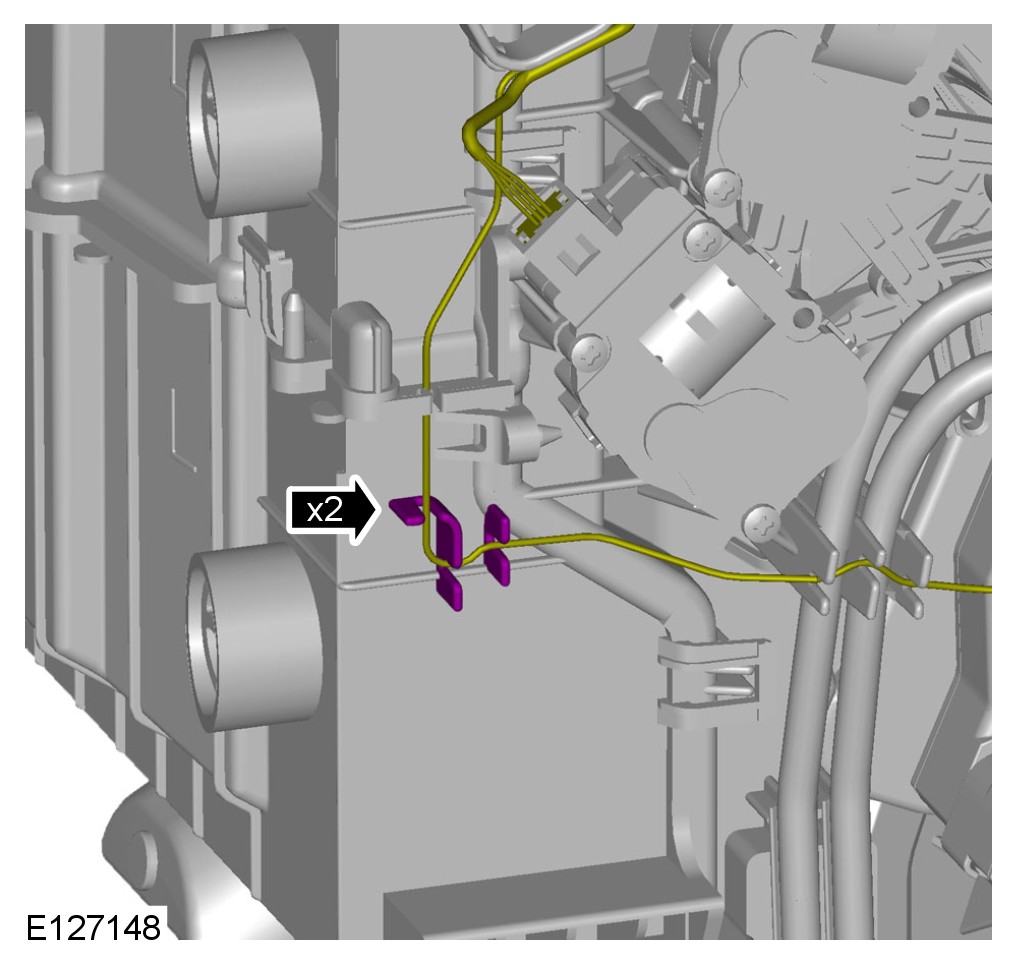
Right-hand drive vehicles

Torque to: 1.5 Nm

Torque to: 1.5 Nm
Left-hand drive vehicles


Torque to: 1.5 Nm
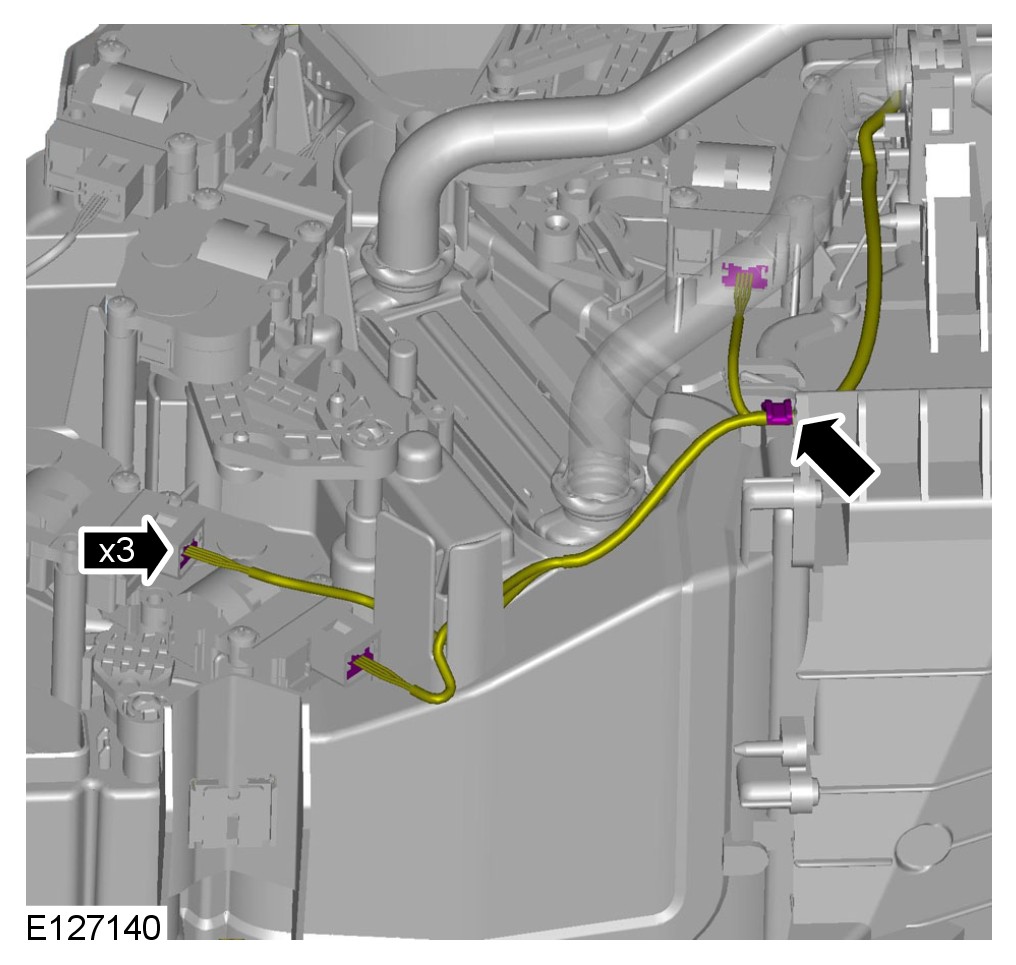
All vehicles

NOTE:
LHD illustration shown, RHD is similar.

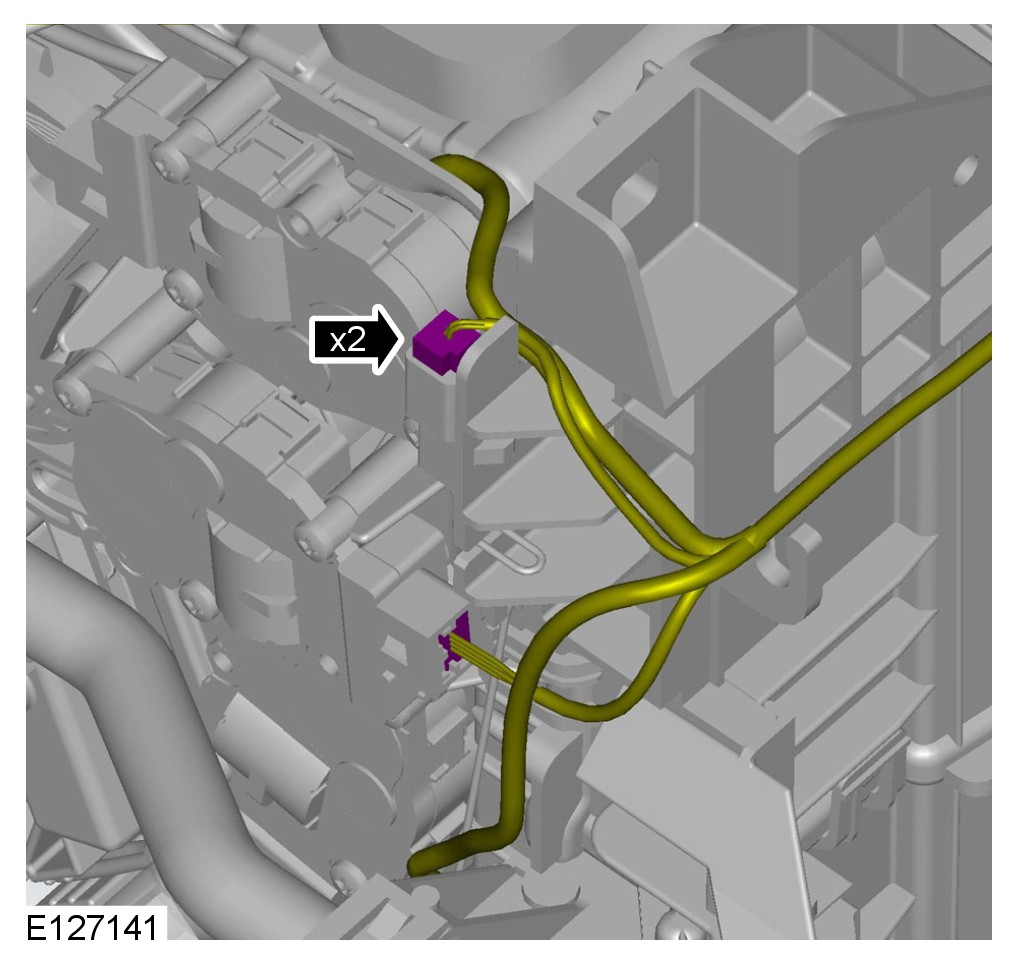
NOTE:
LHD illustration shown, RHD is similar.

NOTE:
LHD illustration shown, RHD is similar.

NOTE:
LHD illustration shown, RHD is similar.

NOTE:
LHD illustration shown, RHD is similar.

NOTE:
LHD illustration shown, RHD is similar.
Vehicles with diesel engine
NOTE:
LHD illustration shown, RHD is similar.
Right-hand drive vehicles
All vehicles

NOTE:
LHD illustration shown, RHD is similar.
Torque to: 1.5 Nm

NOTE:
LHD illustration shown, RHD is similar.
Torque to: 9 Nm
Left-hand drive vehicles

Torque to: 1.5 Nm
All vehicles
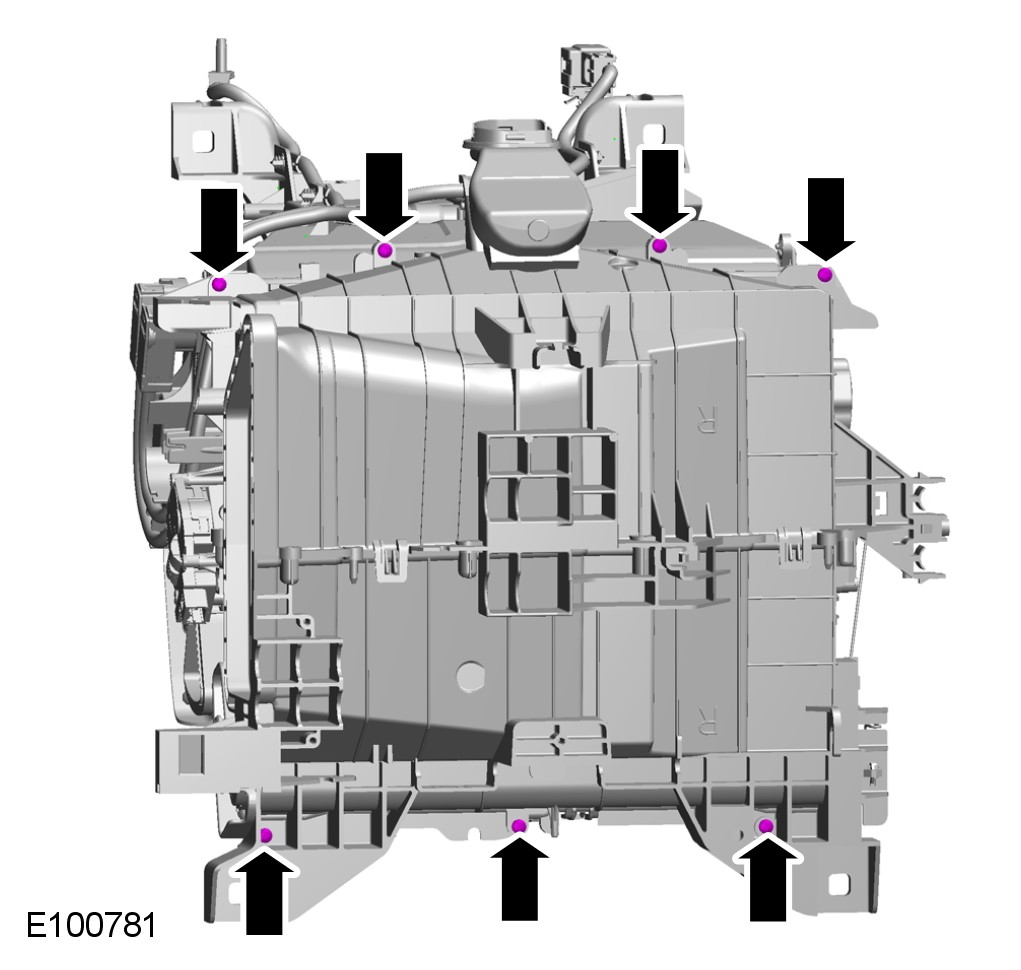
NOTE:
Some variation in the illustrations may occur, but the essential information is always correct.
Torque to: 1.5 Nm
NOTE:
Some variation in the illustrations may occur, but the essential information is always correct.
WARNING: Only use moderate force when installing the sensor.
CAUTION: Make sure the evaporator temperature sensor harness does not become trapped.
CAUTION: Make sure that the sensor is correctly installed.
NOTE:
Some variation in the illustrations may occur, but the essential information is always correct.
Installation
1 To install, reverse the removal procedure.