Procedure
2.46L (TBI) Engine1987 Jeep Wrangler/YJ vehicles equipped with 2.46L (TBI) engines, have built-in compensating circuits.
The compensating circuits adjust automatically to different altitudes.
NO AJUSTMENTS ARE NECESSARY when changing the altitude at which the vehicle is being operated.
4.2L Engine
1987 Jeep Wrangler/YJ vehicles equipped with 4.2L engines does not automatically adjust to different altitudes.
These vehicles REQUIRE ADJUSTMENT when operating the vehicle at altitudes different from the altitudes for which it was built.
This adjustment procedure is written to coincide with the specifications found on the Vehicle Emission Control Information label.
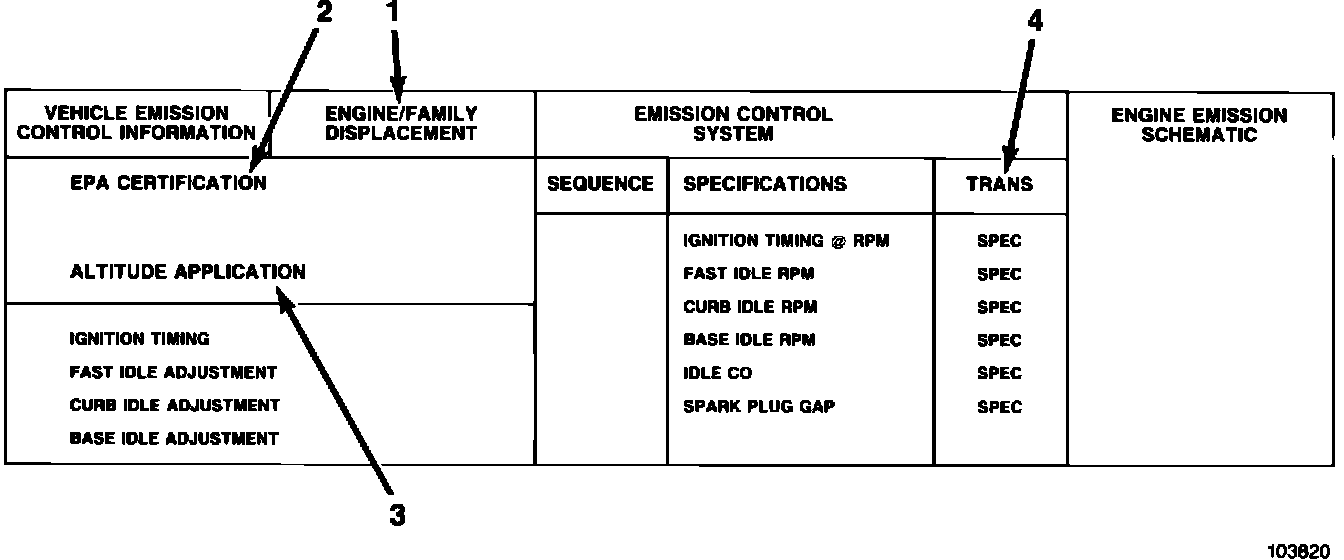
Specified positions on the label are called out on sample labels in these instructions. The positions, (1) (2) (3) and (4) list the vehicle specifications that determine the particular adjustment.
The following information can be identified at these positions on the sample label:
Position Information
1 Engine Type
2 EPA Certification
3 Altitude Application
4 Transmission Type
Vehicles With 4.2L Engines and Automatic Transmissions Built for Operation BELOW 4,000 Feet Now Being Operated ABOVE 4,000 Feet
1. Open the hood and support with the rod.
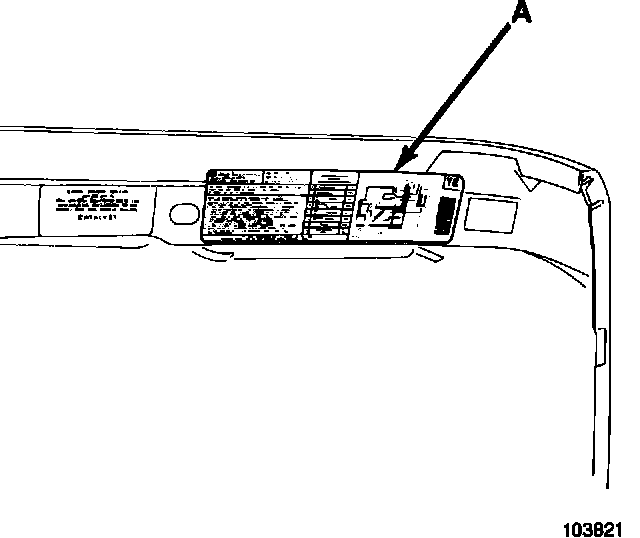
2. Check the Vehicle Emission Control Information label (A) located on the underside at the front of the hood.
3. Locate positions (1) (2) (3) and (4).
4. Verify that the vehicle is equipped as follows:
1. 4.2L Engine (258 cu.in.)
2. 49-State/California/Canada
3. For Operation BELOW 4,000 Feet
4. Automatic Transmission
NOTE: If it is not so equipped, proceed to the subsequent section for proper adjustment.
5. Disconnect the battery ground cable.
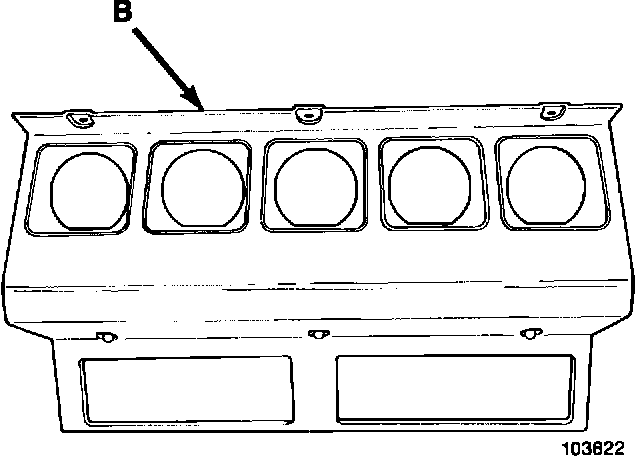
6. Remove the radio bezel (B).
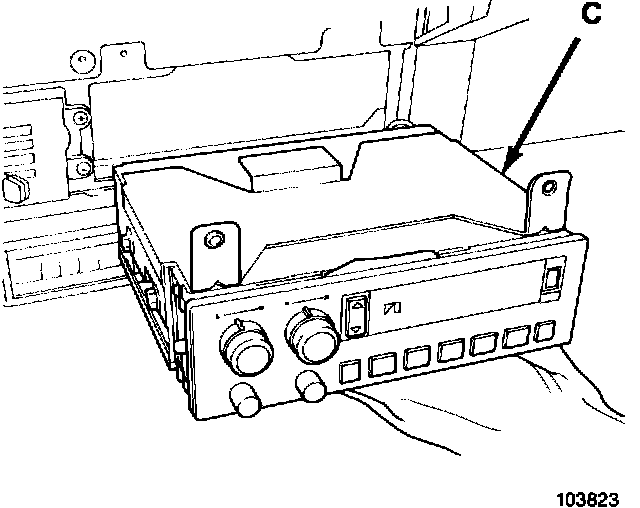
7. Remove the radio (C).
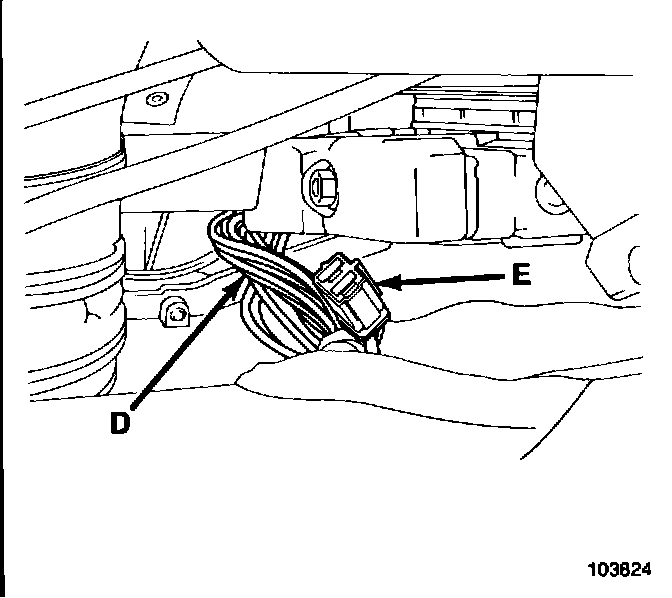
NOTE: This will give access to the MCU harness (D) the two terminal connector (E).
8. Remove the tape from the two terminal connector.
NOTE: It is located on the MCU harness.
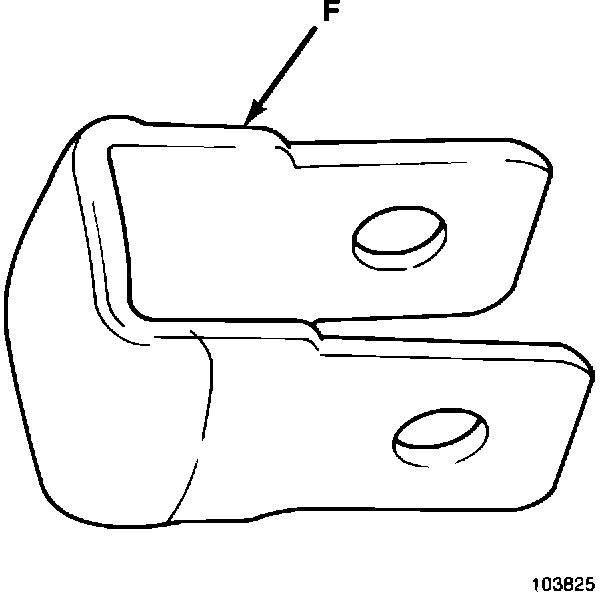
9. Connect the jumper wire (F), P/N 318 6890, to the two-terminal connector (E).
10. Install the radio.
11. Install the radio bezel.
12. Connect the battery ground cable.
13. Set the ignition timing to 16~ BTDC.
14. Reset the idle speeds to the settings specified on the original Vehicle Emission Control Information label.
15. Attach the Vehicle Emission Control Information Update label, P/N EF 8980 010 600. Position the Update label next to the original label.
16. Stow the support rod and close the hood.
NOTE: Whenever this vehicle is returned to operation BELOW 4,000 feet, remove the MCU jumper wire, reset the ignition timing to 9~ BTDC, reset the idle speed to the original specification, and, remove the Vehicle Emission Control Information Update label.