Water Pump: Service and Repair
CAUTION: If the water pump is replaced because of mechanical damage, the fan blades and viscous fan drive should also be inspected. These components could have been damaged due to excessive vibration.The water pump can be removed without discharging the air conditioning system (if equipped).
Fig. 19:
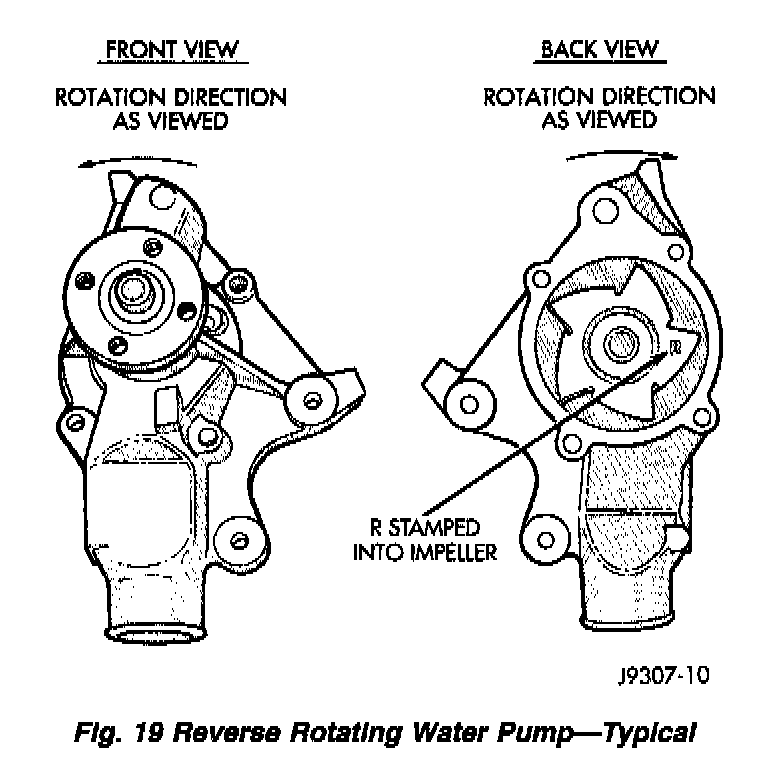
CAUTION: All engines have a reverse (counterclockwise) rotating water pump. The letter R is stamped into the back of the water pump impeller (Fig. 19) to identify. Engines from previous model years, depending upon application, may be equipped with a forward (clockwise) rotating water pump. Installation of the wrong water pump will cause engine over heating.
The water pump impeller is pressed on the rear of the pump shaft and bearing assembly. The water pump is serviced only as a complete assembly.
WARNING: DO NOT REMOVE THE BLOCK DRAIN PLUG(S) OR LOOSEN RADIATOR DRAINCOCK WITH THE SYSTEM HOT AND UNDER PRESSURE. SERIOUS BURNS FROM COOLANT CAN OCCUR.
DO NOT WASTE reusable coolant. If the solution is clean, drain coolant into a clean container for reuse.
REMOVAL
(1) Disconnect battery negative cable.
(2) Drain cooling system. Refer to Cooling System Draining and Filling.
(3) Remove upper radiator hose.
Fig. 20:
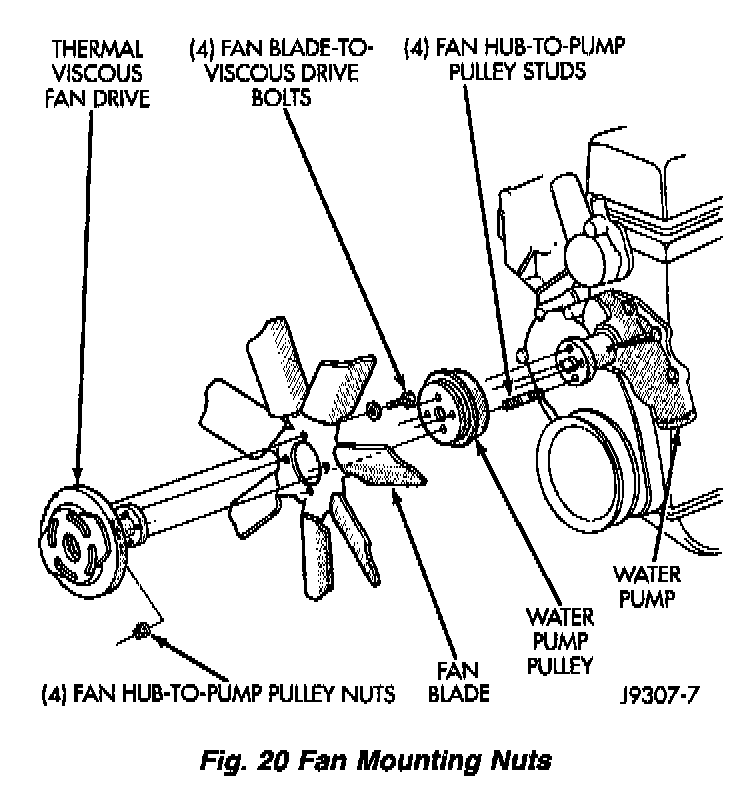
(4) Loosen (but do not remove at this time) the four fan hub-to-water pump pulley mounting nuts (Fig. 20).
(5) Remove accessory drive belt. (Refer to Engine).
(6) Disconnect electric cooling fan connector (if equipped).
(7) Unbolt fan shroud.
(8) Remove the four fan hub-to-water pump pulley nuts and remove fan and shroud together.
CAUTION: After removing fan blade/viscous fan drive assembly, do not place thermal viscous fan drive in horizontal position. If stored horizontally, silicone fluid in viscous fan drive could drain into its bearing assembly and contaminate lubricant.
Fig. 21:
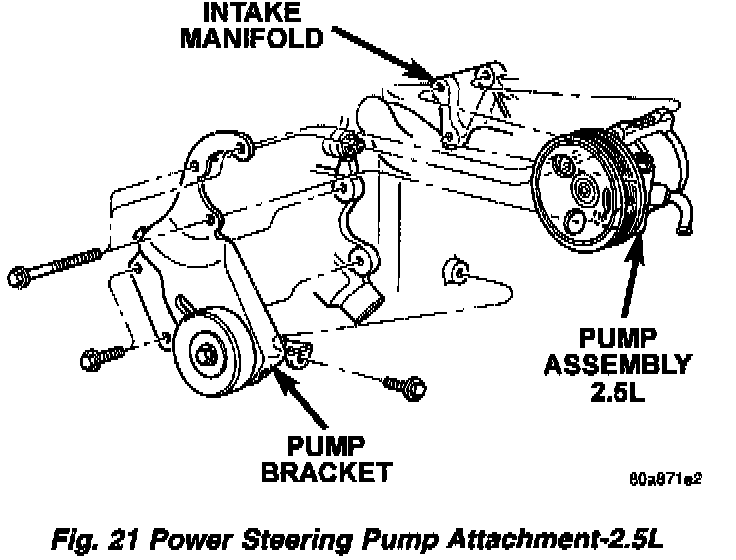
(9) Remove power steering pump and bracket (Fig. 21), refer to Steering and Suspension for correct procedure.
(10) Remove lower radiator hose from water pump. Remove heater hose from water pump pipe.
Fig. 22:
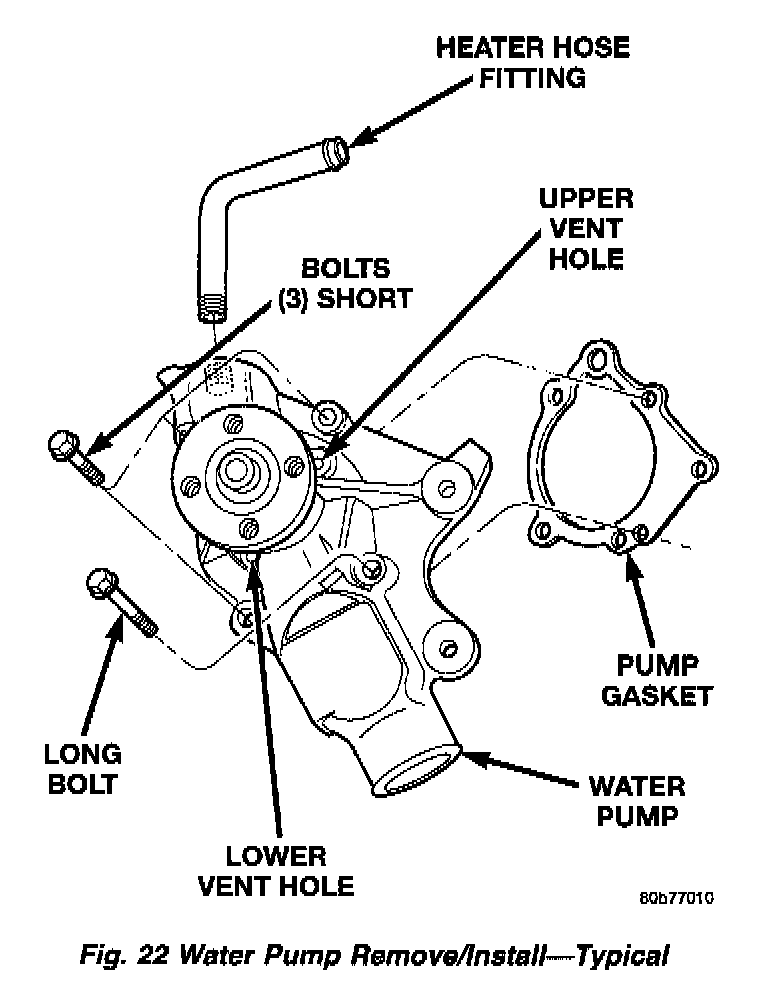
(11) Remove the four pump mounting bolts (Fig. 22) and remove pump from vehicle. Discard old gasket. Note that one of the four bolts is longer than the other bolts.
(12) If pump is to be replaced, the heater hose fitting must be removed. Note position of fitting before removal.
INSTALLATION
(1) If pump is being replaced, install the heater hose pipe to the pump. Use a sealant on the fitting such as Mopar Thread Sealant With Teflon. Refer to the directions on the package.
(2) Clean the gasket mating surfaces. If the original pump is used, remove any deposits or other foreign material. Inspect the cylinder block and water pump mating surfaces for erosion or damage from cavitation.
(3) Install the gasket and water pump. The silicone bead on the gasket should be facing the water pump. Also, the gasket is installed dry. Tighten mounting bolts to 23 Nm (17 ft. lbs.) torque. Rotate the shaft by hand to be sure it turns freely.
(4) Connect the radiator and heater hoses to the water pump.
(5) Install power steering pump and bracket. Refer to Steering and Suspension.
(6) Position water pump pulley to water pump hub.
(7) Install shroud and fan together and install four nuts to water pump hub studs. Tighten nuts to 27 Nm (20 ft. lbs.) torque.
(8) Install and tighten upper fan shroud nuts to 4 Nm (31 inch lbs.).
(9) Connect electric fan connector (if equipped).
CAUTION: When installing the accessory drive belt, the belt MUST be routed correctly. If not, the engine may overheat due to the water pump rotating in the wrong direction. Refer to the Belt Removal and Installation in Engine for appropriate belt routing. You may also refer to the Belt Routing Label in the vehicle engine compartment.
(10) Install and tension accessory drive belt, refer to Engine.
(11) Install upper radiator hose.
(12) Fill cooling system with coolant and check for leaks. Refer to Refilling Cooling System.
(13) Connect battery negative cable.
(14) Start and warm the engine. Check for leaks.