Evaporator Core: Service and Repair
HVAC Housing And Evaporator:
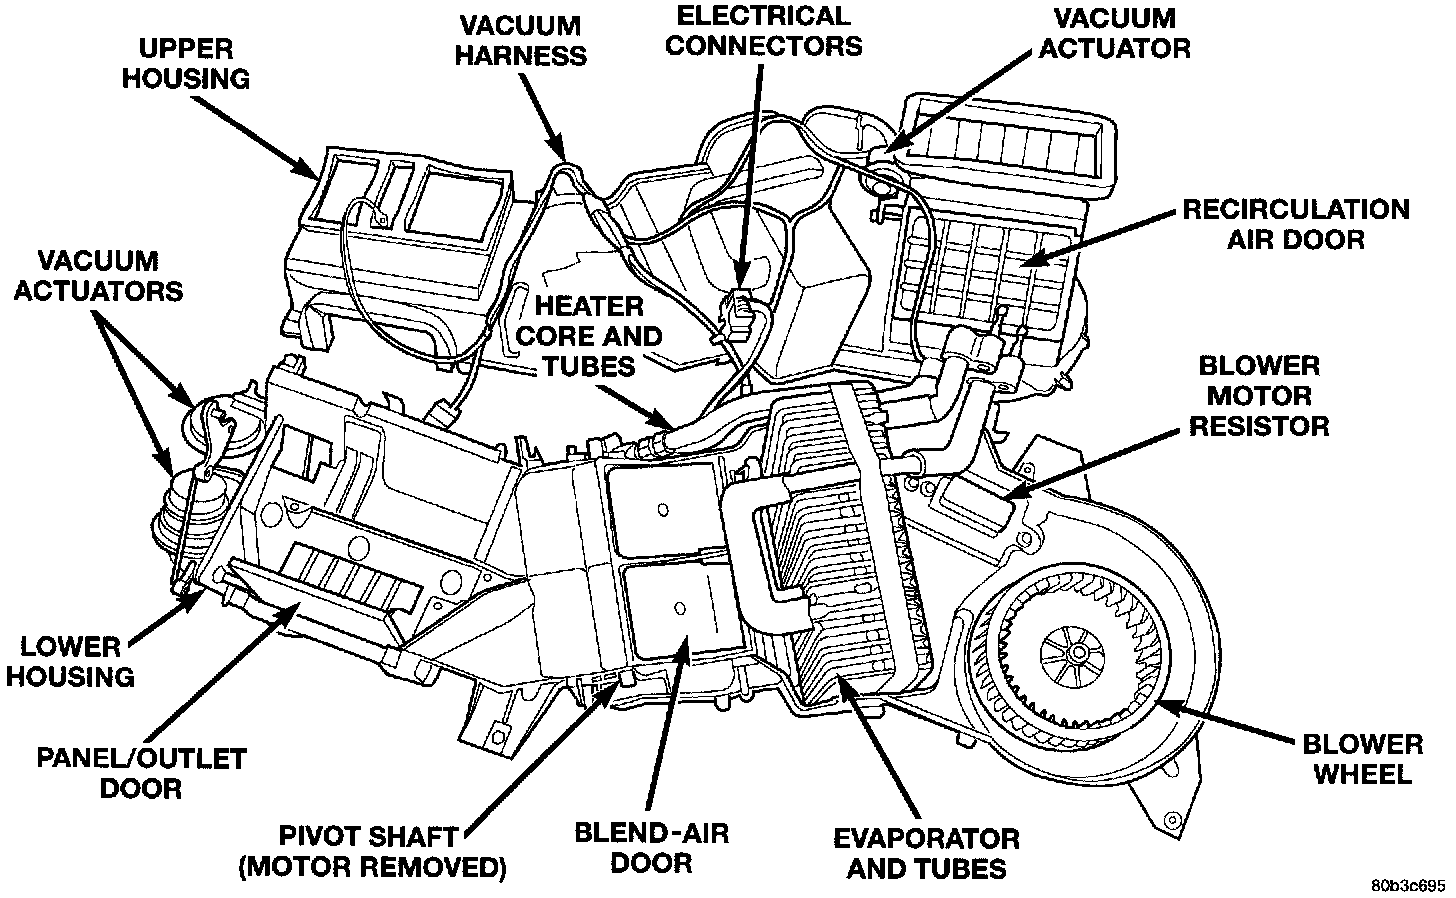
WARNING: ON VEHICLES EQUIPPED WITH AIRBAGS, REFER TO AIRBAGS SYSTEMS BEFORE ATTEMPTING ANY STEERING WHEEL, STEERING COLUMN, OR INSTRUMENT PANEL COMPONENT DIAGNOSIS OR SERVICE. FAILURE TO TAKE THE PROPER PRE CAUTIONS COULD RESULT IN ACCIDENTAL AIR-BAG DEPLOYMENT AND POSSIBLE PERSONAL INJURY.
REMOVAL AND INSTALLATION
1. Remove the heater-A/C housing from the vehicle. For these procedures, refer to "Heating and Air Conditioning : Housing Assembly HVAC : Service and Repair" Service and Repair
2. Place the heater-A/C housing on the work bench.
3. Remove the defroster duct from the heater-A/C housing.
4. Remove the defrost door linkage from the top half the housing to enable separation of the two parts.
5. Remove the screws and clips fastening the upper and lower heater-A/C housing halves.
6. Remove the top half of the housing.
7. Lift the evaporator coil unit out of the lower half of the heater-A/C housing.
8. Reverse the removal procedures to install. Be certain that the evaporator foam insulator wrap is reinstalled. Be certain that each of the door pivot pins align with the pivot holes in the heater-A/C housing. Tighten the heater-A/C housing screws to 2.2 Nm (20 in. lbs.).
NOTE: If the evaporator is replaced, add 60 milliliters (2 fluid ounces) of refrigerant oil to the refrigerant system.