Accumulator HVAC: Service and Repair
REMOVALWARNING: REVIEW THE WARNINGS AND CAUTIONS BEFORE PERFORMING THE FOLLOWING OPERATION.
1. Disconnect and isolate the battery negative cable.
2. Remove the a/c low pressure switch from the accumulator.
3. Recover the refrigerant from the refrigerant system.
4. Disconnect the accumulator line from the evaporator outlet. Install plugs in, or tape over all of the opened refrigerant line fittings.
5. Remove the nut that secures the suction line to the accumulator. Install plugs in, or tape over all of the opened refrigerant line fittings.
Fig.8 Accumulator And Low Pressure Switch:
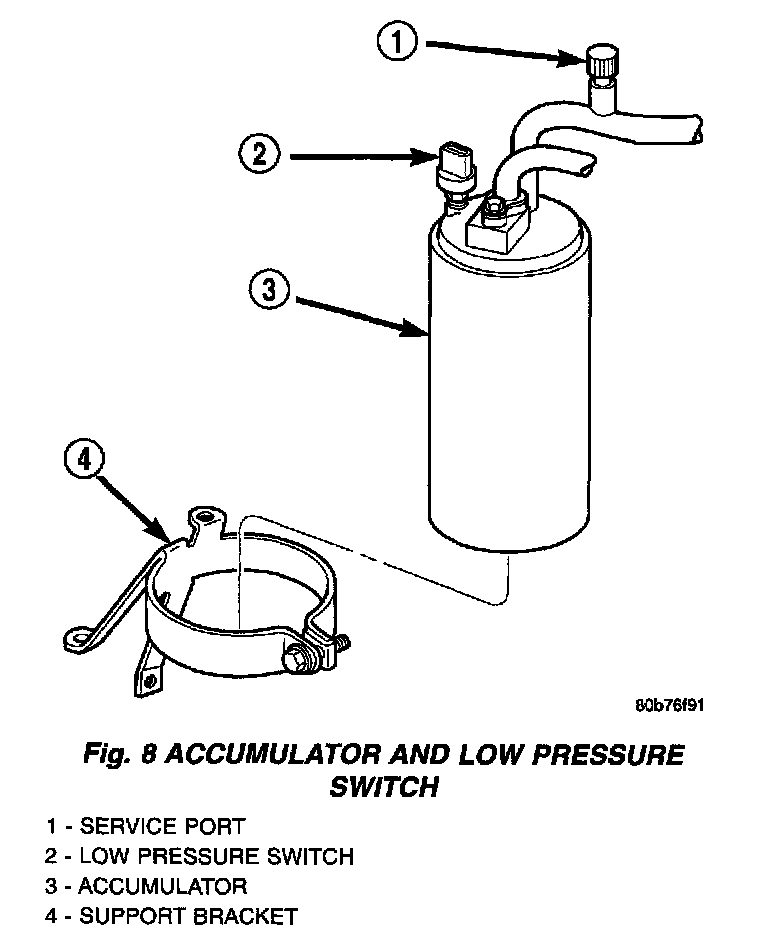
6. Loosen the screw that clamps the band of the accumulator support bracket around the accumulator.
7. Remove the accumulator from the support bracket.
INSTALLATION
WARNING: REVIEW THE WARNINGS AND CAUTIONS BEFORE PERFORMING THE FOLLOWING OPERATION.
Any kinks or sharp bends in the refrigerant plumbing will reduce the capacity of the entire air conditioning system. Kinks and sharp bends reduce the flow of refrigerant in the system. A good rule for the flexible hose refrigerant lines is to keep the radius of all bends at least ten times the diameter of the hose. In addition, the flexible hose refrigerant lines should be routed so they are at least 80 millimeters (3 inches) from the exhaust manifold.
High pressures are produced in the refrigerant system when the air conditioning compressor is operating. Extreme care must be exercised to make sure that each of the refrigerant system connections is pressure-tight and leak free. It is a good practice to inspect all flexible hose refrigerant lines at least once a year to make sure they are in good condition and properly routed.
1. Install the accumulator through the band of the support bracket. Be certain that the index tab on the side of the accumulator is aligned with the notch in the support bracket band.
2. Tighten the clamp screw in the support bracket band to 12 Nm (105 in. lbs.).
3. Remove the tape or plugs from the suction line fitting and the accumulator fitting. Install the suction line fitting to the accumulator. Tighten the mounting bolt to 28 Nm (250 in. lbs.).
4. Remove the tape or plugs from the accumulator line and the evaporator outlet. Install the accumulator line to the evaporator. Tighten the retaining nut to 28 Nm (250 in. lbs.).
5. Install the a/c low pressure switch onto the accumulator fitting.
6. Connect the battery negative cable.
7. Evacuate the refrigerant system.
8. Charge the refrigerant system.
NOTE: If the accumulator is replaced, add 120 milliliters (4 fluid ounces) of refrigerant oil to the refrigerant system. Use only refrigerant oil of the type recommended for the compressor in the vehicle.