Shift Interlock: Service and Repair
REMOVAL1. Lower the steering column.

2. Disconnect the brake transmission shift interlock (BTSI) cable solenoid electrical connector (Fig. 72).
3. With the ignition switch in the "RUN" position depress the BTSI cable locking tab, located on top of the cable connector (Fig. 72) at the steering column and pull the BTS1 cable straight out.
4. Disengage the wire connector at the solenoid on the cable
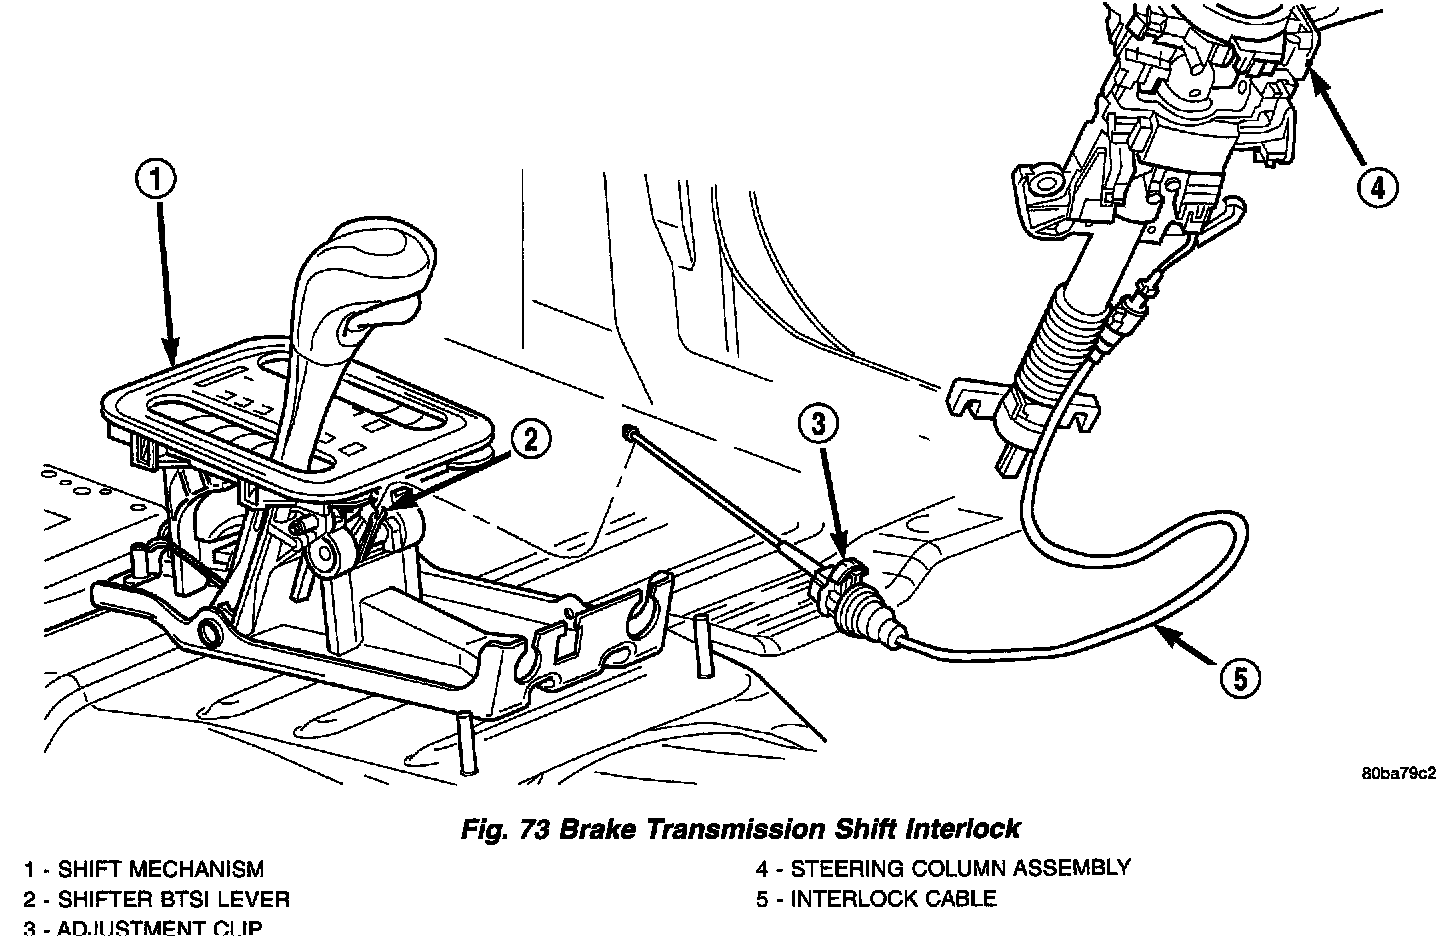
5. Remove the transmission shift interlock cable from steering column (Fig. 73).
6. Remove the floor console and related trim.
7. Disconnect the BTSI cable from the shift BTSI lever and remove the cable from the shifter assembly bracket.
8. Release the BTSI cable from any remaining clips.
9. Remove BTSI cable from the vehicle.
INSTALLATION
NOTE: The gearshift cable must be secured into position and properly adjusted before the installation of the Brake Transmission Interlock Cable (BTSI).
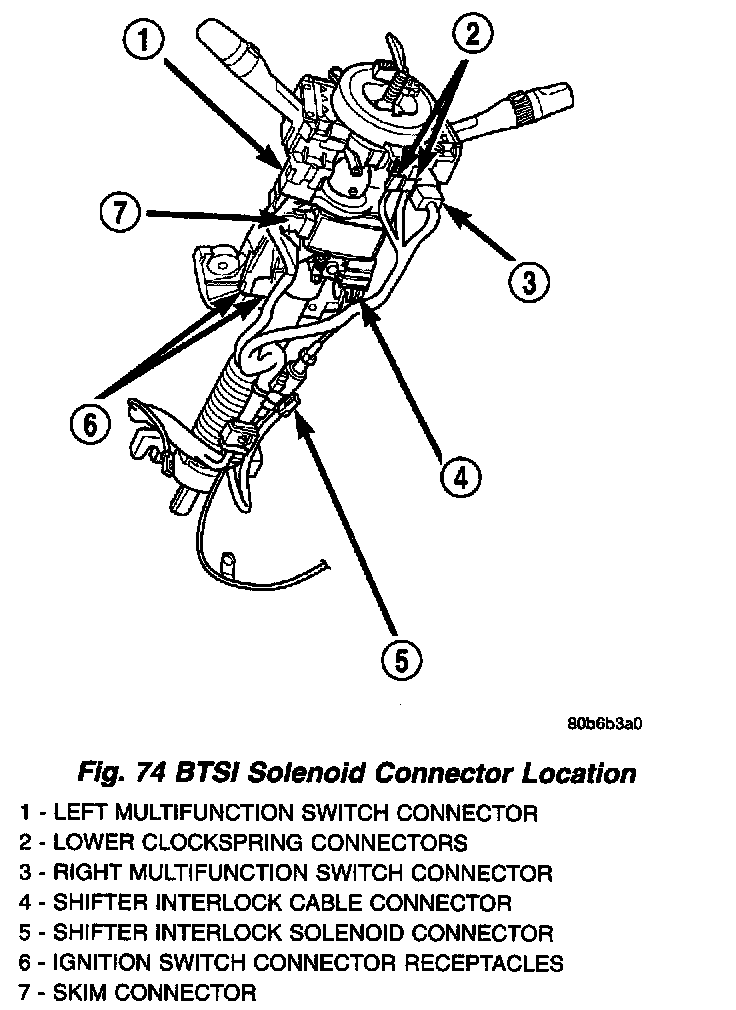
1. Push the BTSI cable straight into the square mounting hole in the steering column until cable snaps in place (Fig. 74).
2. Snap BTSI cable solenoid tie strap into hole in steering column tube.
3. Engage the wiring connector from brake light switch into BTSI cable solenoid housing.
4. Route BTSI cable to the shifter mechanism.
5. Install the BTSI cable end fitting into shifter BTSI lever.
6. Snap BTSI cable adjuster ears into floor shifter bracket and
7. Place the ignition key cylinder in the LOCK position.
8. Push the cable adjuster lock clamp downward to lock it.
9. Test the BTSI cable operation.
10. Install the floor console and related trim.