License Plate Lamp: Service and Repair
REMOVALNorth America
1. Disconnect and isolate the battery negative cable.
Fig.48 License Plate Lamp Unit Remove/Install:
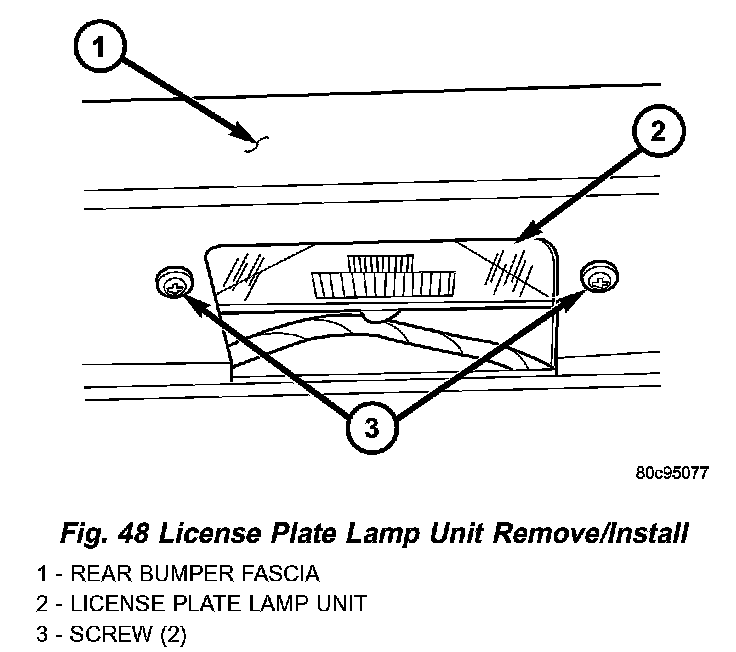
2. Remove the two screws that secure the license plate lamp unit to the rear bumper fascia (Fig. 48).
3. Pull the license plate lamp unit down and out through the mounting hole in the rear bumper fascia far enough to access and disconnect the wire harness connector for the lamp socket pigtail wire.
4. Remove the license plate lamp unit from the rear bumper fascia.
Rest-Of-World
1. Disconnect and isolate the battery negative cable.
2. Remove the bulb and socket unit from the license plate lamp unit housing that is being removed. (Refer to LAMPS/LIGHTING - EXTERIOR/LICENSE PLATE LAMP BULB - REMOVAL - REST-OF-WORLD).
Fig.49 License Plate Lamp Bulb Remove/Install - Rest-Of-World:
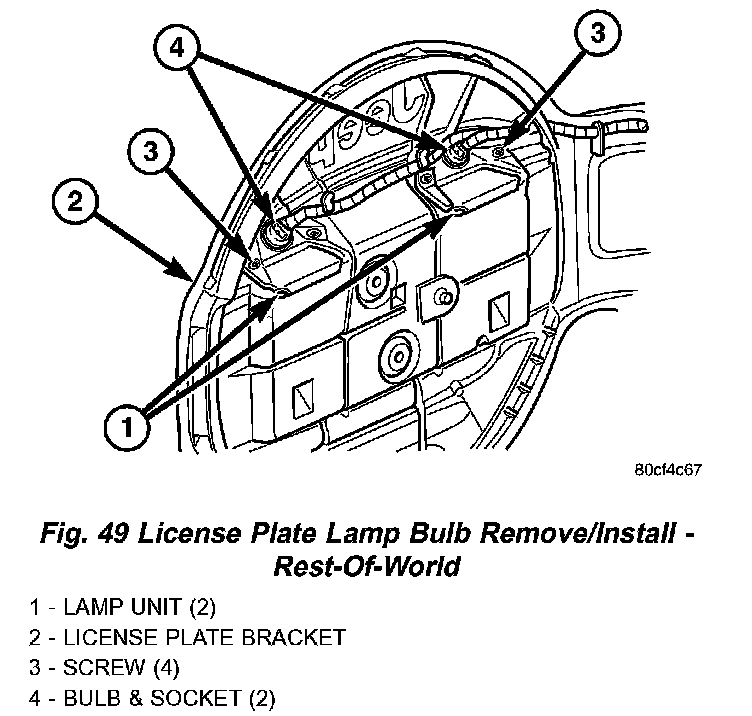
3. Remove the two screws that secure the license plate lamp unit to the back of the license plate bracket (Fig. 49).
4. Remove the license plate lamp unit from the back of the license plate bracket.
INSTALLATION
North America
1. Position the license plate lamp unit to the rear bumper fascia.
2. Reconnect the wire harness connector for the license plate lamp unit to the lamp socket pigtail wire.
3. Position the license plate lamp unit into the mounting hole in the rear bumper fascia (Fig. 48).
4. Install and tighten the two screws that secure the license plate lamp unit housing to the rear bumper fascia. Tighten the screws to 2 Nm (20 in. lbs.).
5. Reconnect the battery negative cable.
Rest-Of-World
1. Position the license plate lamp unit onto the back of the license plate bracket (Fig. 49).
2. Install and tighten the two screws that secure the license plate lamp unit to the back of the license plate bracket. Tighten the screws to 2 Nm (20 in. lbs.).
3. Reinstall the bulb and socket unit into the license plate lamp unit housing that is being replaced. (Refer to LAMPS/LIGHTING - EXTERIOR/LICENSE PLATE LAMP BULB - INSTALLATION - REST-OF-WORLD).
4. Reconnect the battery negative cable.