Line-A/C Liquid
LINE-A/C LIQUIDNOTE: 4.7L engine shown in illustration. 3.7L and 5.7L engines similar.
REMOVAL
WARNING: REFER TO THE APPLICABLE WARNINGS AND CAUTIONS FOR THIS SYSTEM BEFORE PERFORMING THE FOLLOWING OPERATION. FAILURE TO FOLLOW THE WARNINGS AND CAUTIONS COULD RESULT IN POSSIBLE PERSONAL INJURY OR DEATH.
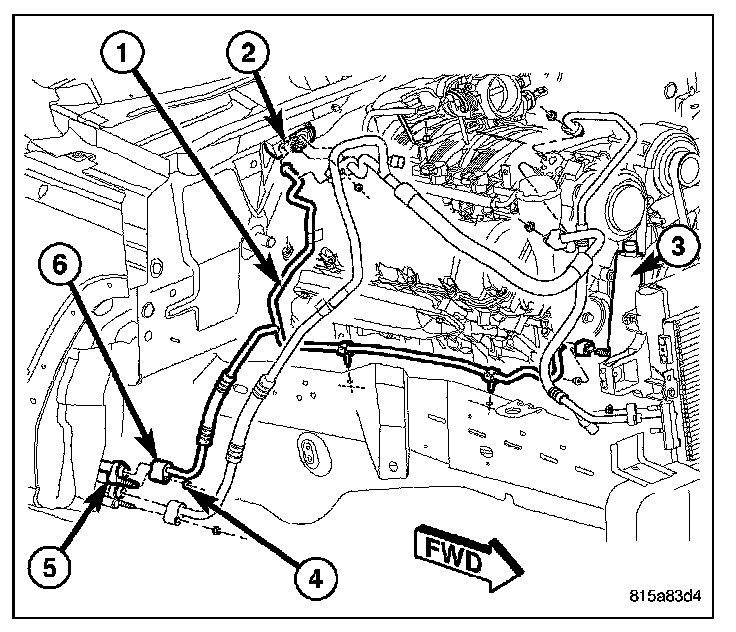
1. Recover the refrigerant from the refrigerant system.
2. Disconnect and isolate the negative battery cable.
3. Raise and support the vehicle.
4. Remove the nut (4) that secures the tapping block of the liquid line extension tube (6) to the underbody liquid line (5).
5. Disconnect the liquid line extension tube from the underbody liquid line and remove and discard the O-ring seal.
6. Lower the vehicle.
7. Disconnect the A/C liquid line (1) from the front A/C expansion valve (2) and the receiver/drier (3) and remove the A/C liquid line from the engine compartment.
8. Install plugs in, or tape over the opened refrigerant line fittings and expansion valve and receiver/drier ports.
INSTALLATION
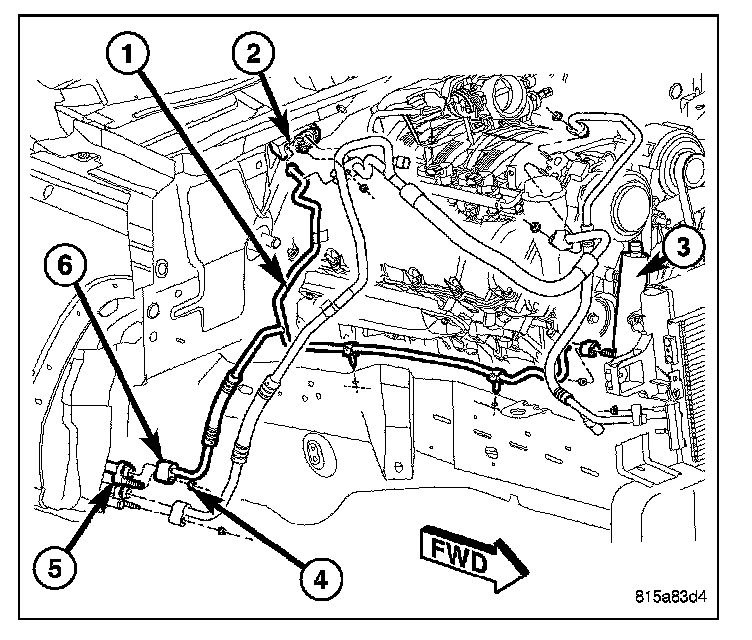
1. Remove the tape or plugs from the opened refrigerant line fittings and expansion valve and receiver/ drier ports.
2. Position the A/C liquid line (1) into the engine compartment and install it to the front A/C expansion valve (2) and the receiver/drier (3).
3. Raise and support the vehicle.
4. Lubricate a new rubber O-ring seal with clean refrigerant oil and install it onto the underbody liquid line fitting. Use only the specified O-ring as it is made of a special material for the R-134a system. Use only refrigerant oil of the type recommended for the A/C compressor in the vehicle.
5. Connect the liquid line extension tube (6) to the underbody liquid line (5) and install the nut (4). Tighten the nut to 20 N.m (15 ft. lbs.).
6. Lower the vehicle.
7. Reconnect the negative battery cable.
8. Evacuate the refrigerant system.
9. Charge the refrigerant system.