Campaign - Digital Clock Loses Time
VOLUME3
GROUP
Campaign
NUMBER
041
MODEL
Sorento
DATE
December 2004
SUBJECT:
SORENTO DIGITAL CLOCK LOSING TIME
This bulletin provides information relating to replacement of the digital clock assembly. Some 2005 Sorento owners may complain of the clock losing time, the affected production range is from 9/3/04 - 12/17/04. The internal clock logic has been upgraded to prevent this from occurring.
Note:
For customer satisfaction, please replace all clocks for dealer stock vehicles within the affected production range.
Please order the clock assembly on an as needed basis. This part number is not eligible for parts return and initial orders will be limited depending upon parts availability.
REMOVAL PROCEDURE:
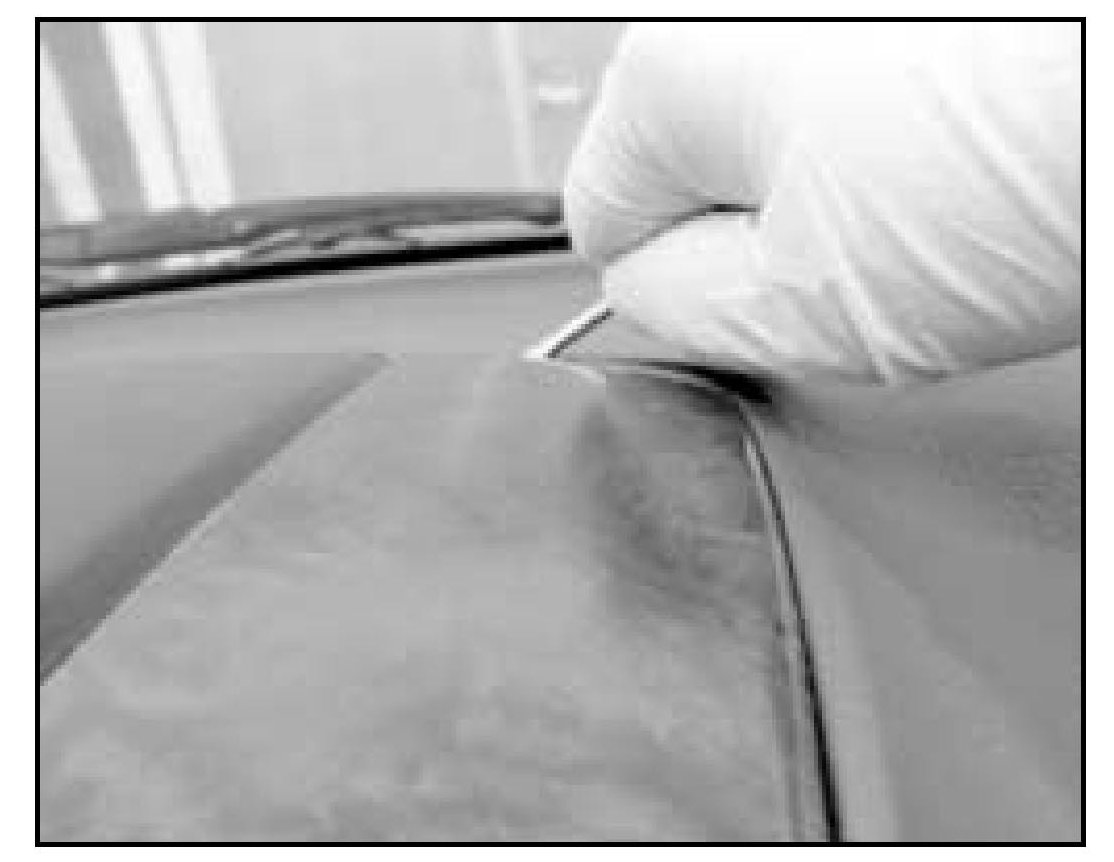
1. Carefully insert a small screwdriver tip into the end of the center vent assembly as shown. Carefully pull back until the retaining clip disengages.
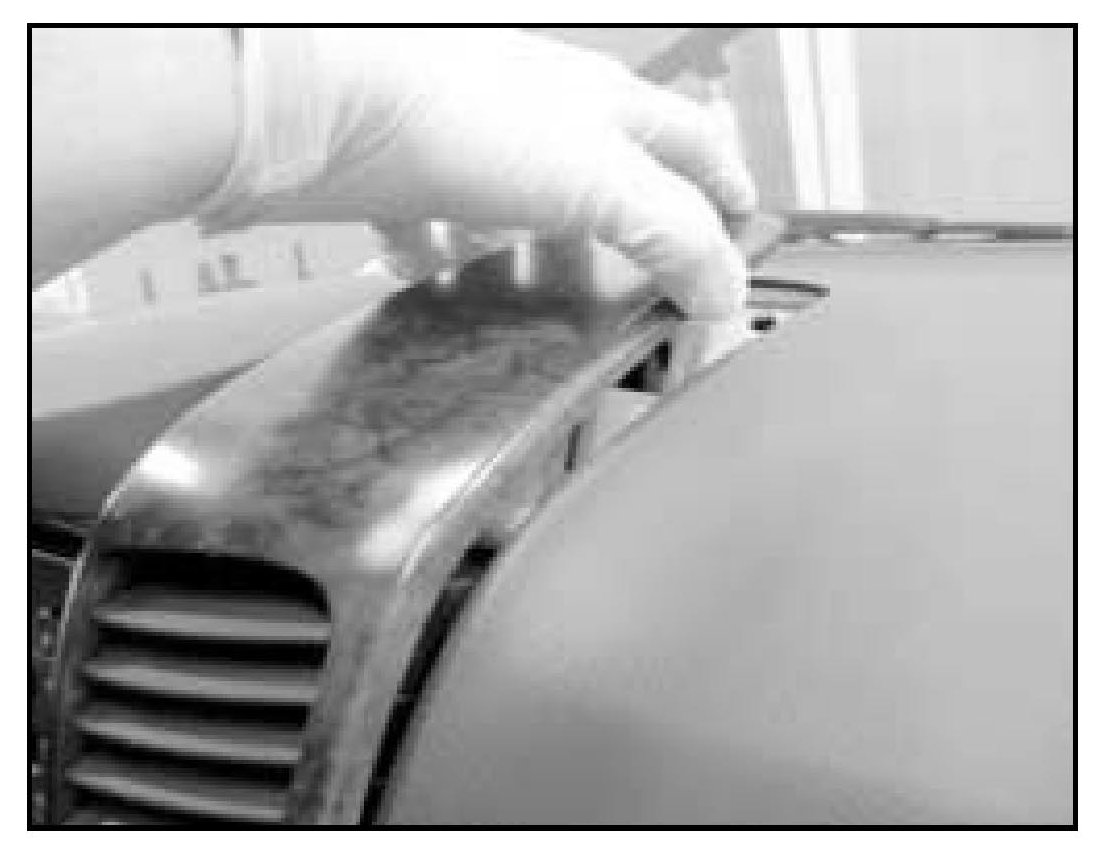
2. Remove the left and right center fascia panels as shown.
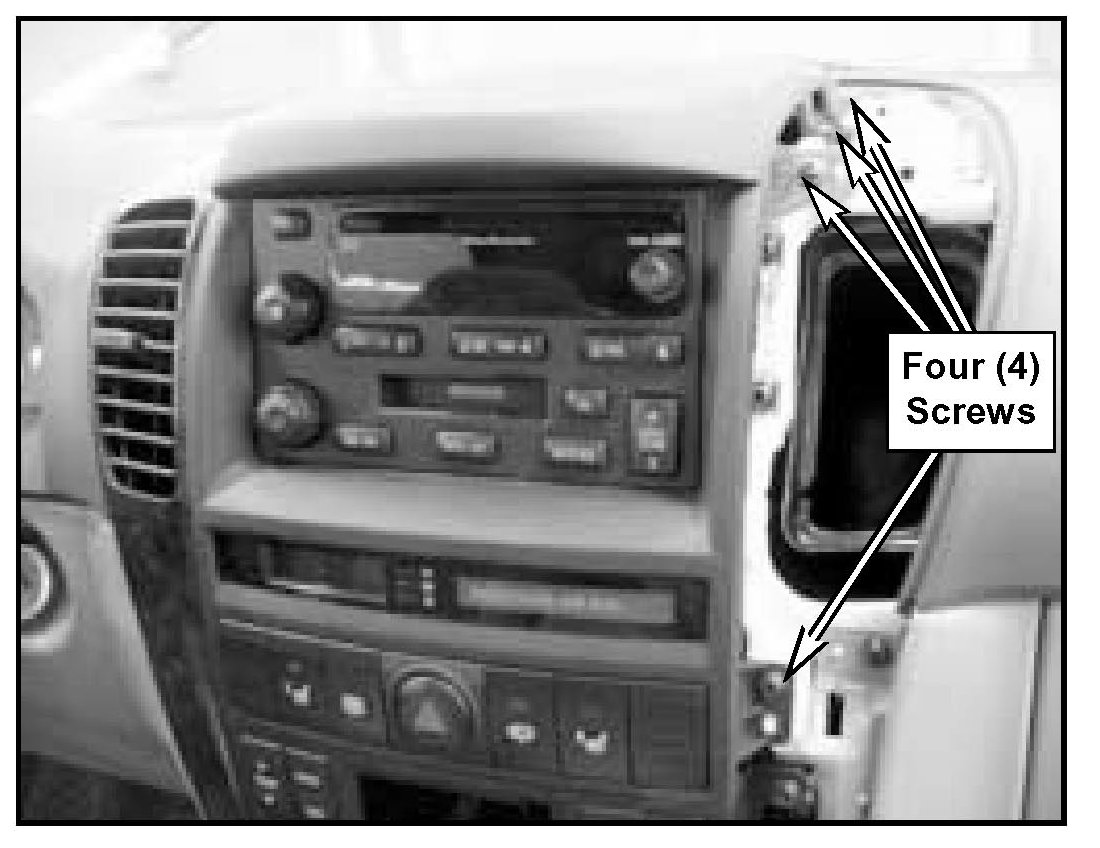
3. Remove four (4) screws on each side of the audio fascia panel.
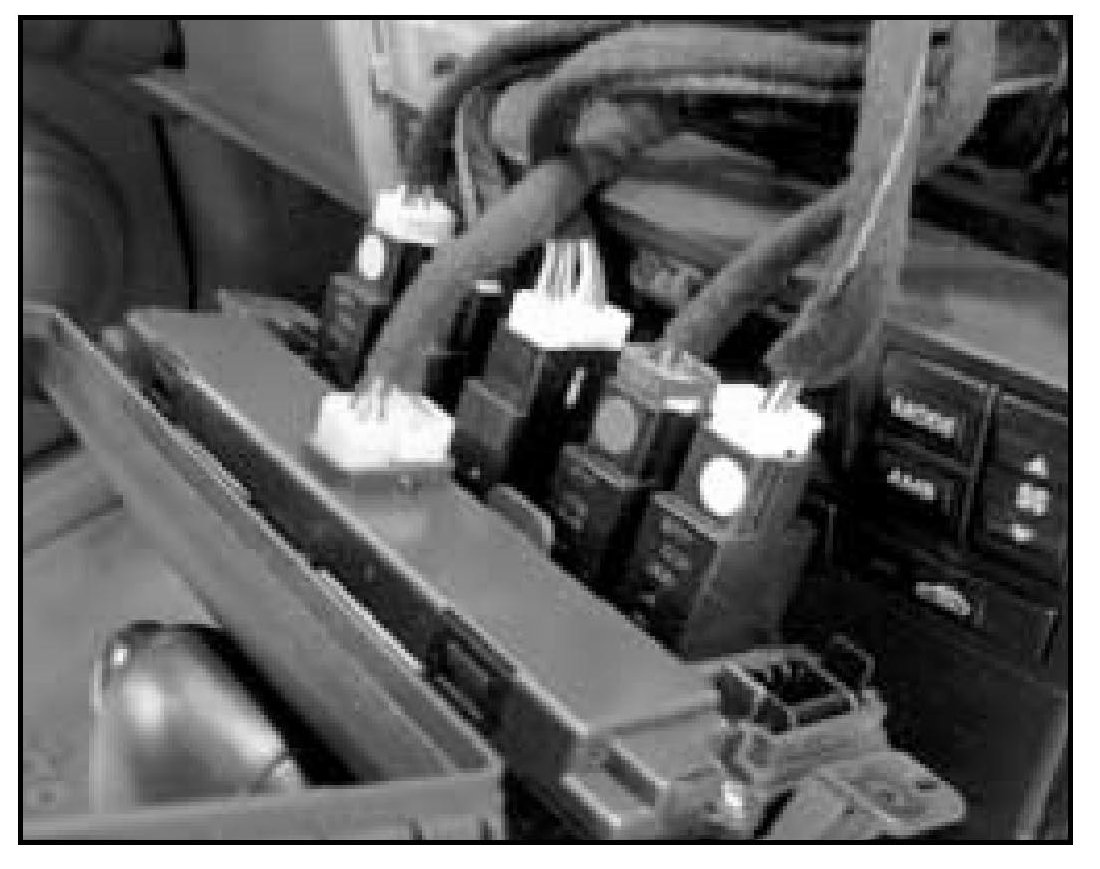
4. Disconnect the electrical connectors from the fascia panel.
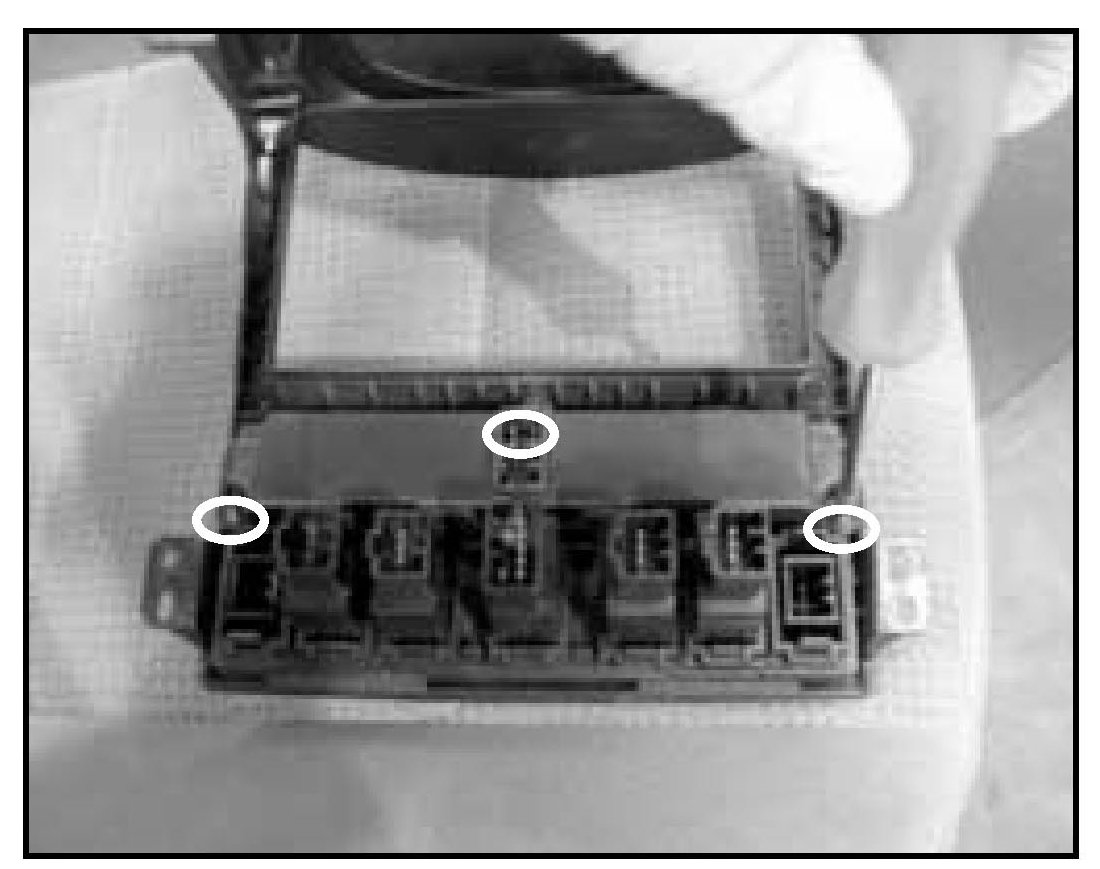
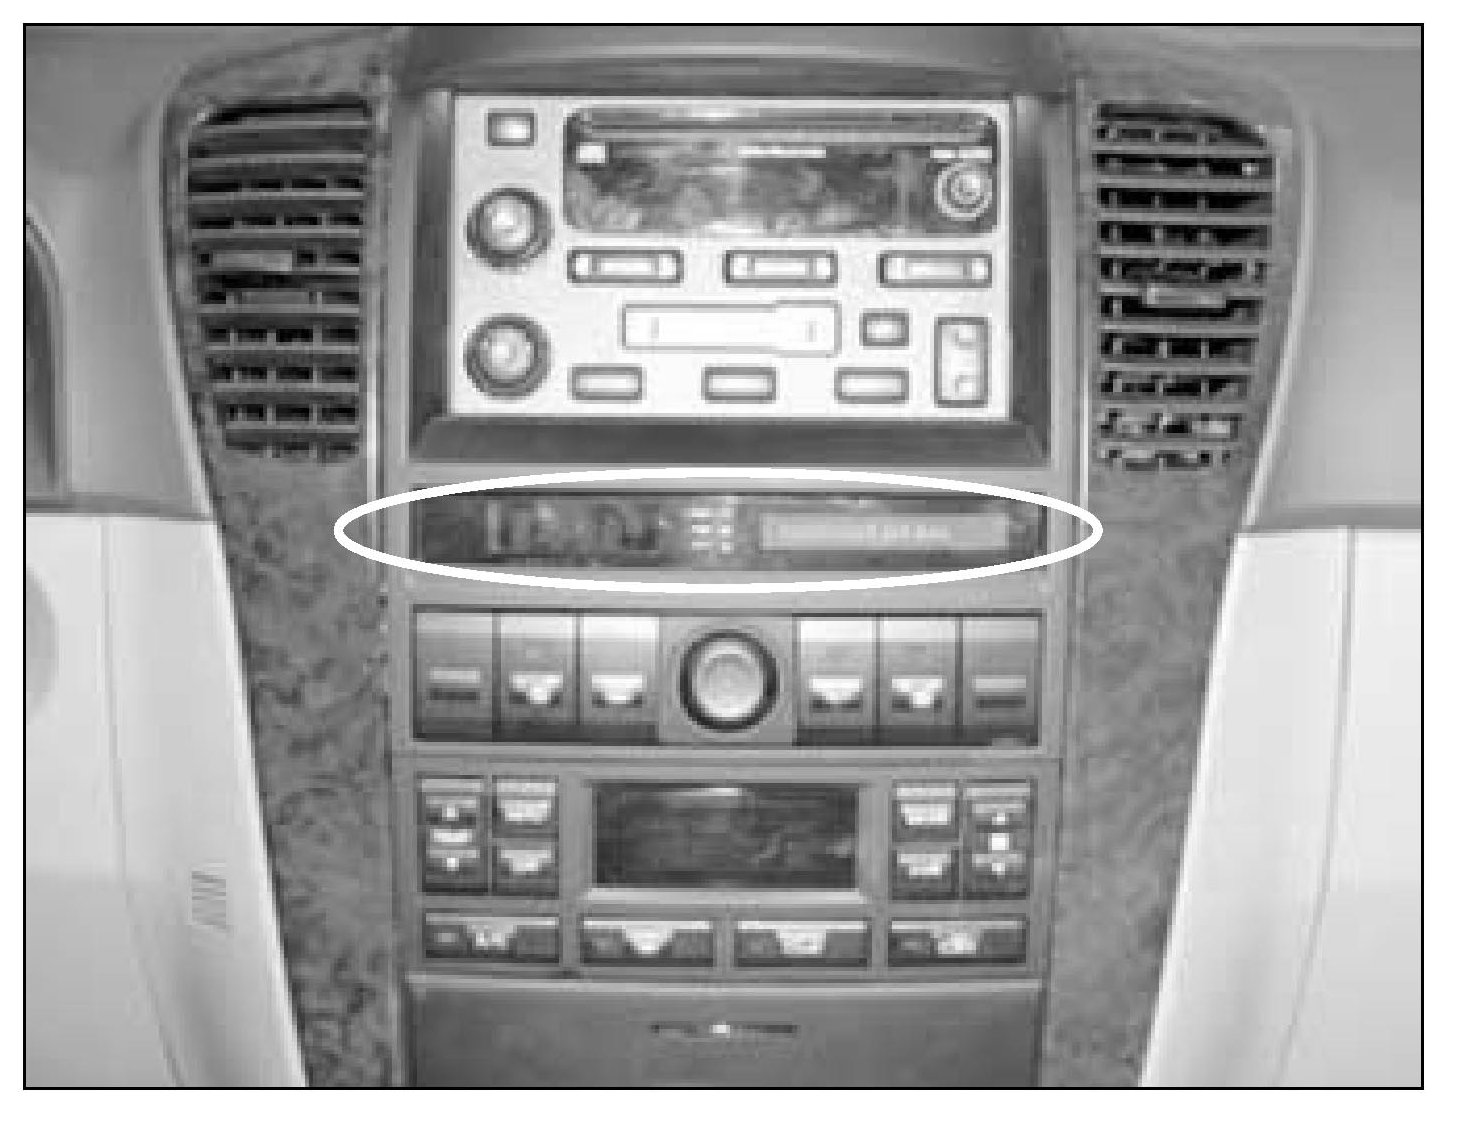
5. Remove three (3) screws from the clock assembly.
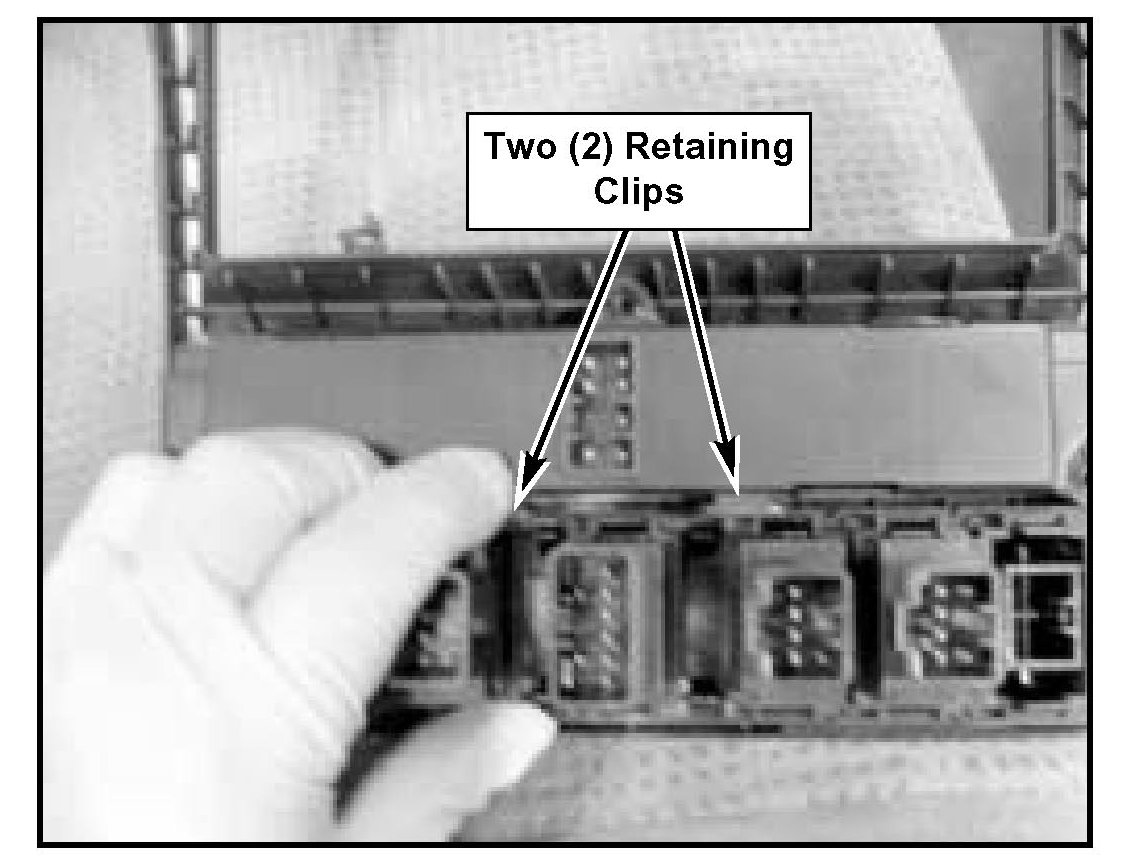
6. Release two (2) retaining clips and remove the clock from the fascia panel.
INSTALLATION PROCEDURE:
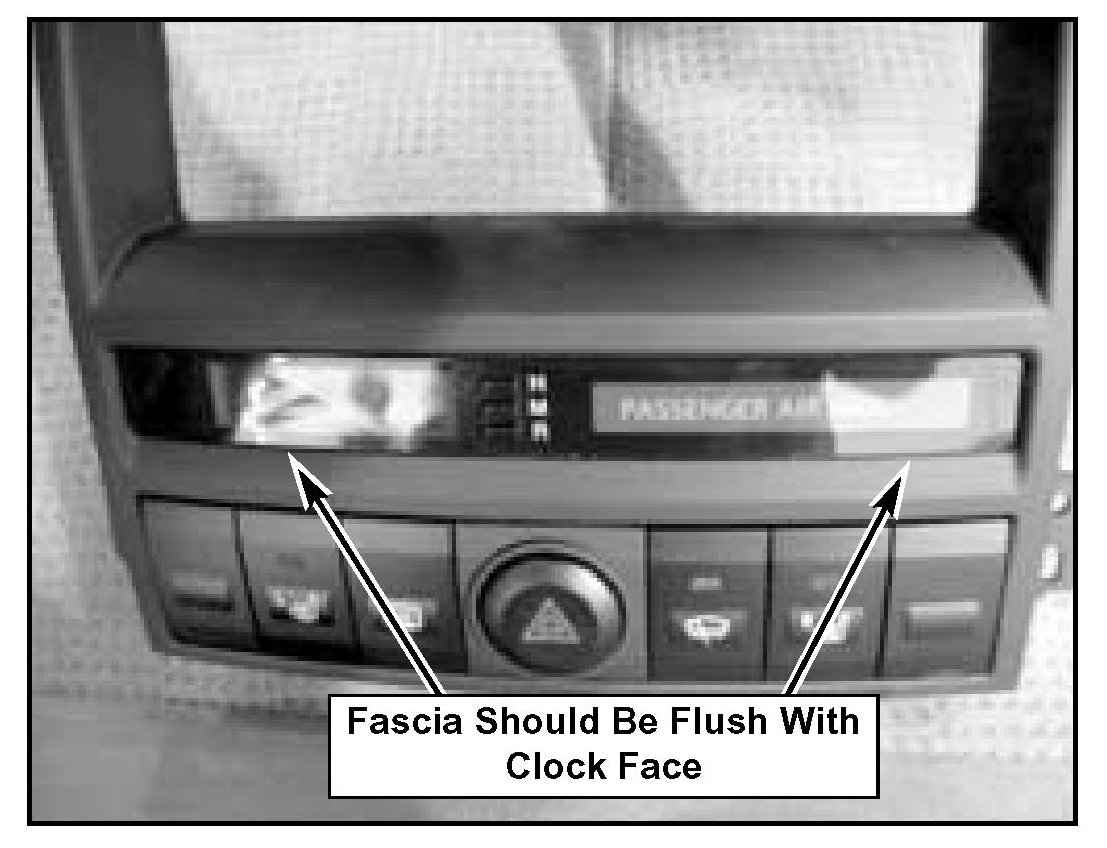
1. Clip the clock assembly onto the fascia panel. Make sure that the clock is flush with the front of the fascia panel.
2. Install three (3) retaining screws for the clock assembly.
3. Connect electrical connectors to the fascia panel. Most electrical connectors are color coded to the sticker on the switch.
*NOTICE
Be careful when connecting the connectors as they can be connected to the wrong switch. Ensure that the connectors are reconnected to their proper locations.
4. Install audio fascia panel, install eight (8) retaining screws and clip the side fascia panels into place.
5. Set the clock to current time.
AFFECTED PRODUCTION RANGE:
2005 Sorento vehicles with production dates between 9/3/04 - 12/17/04.
Note:
Contact your DPSM for a listing of affected VINs.

PART NUMBER INFORMATION:
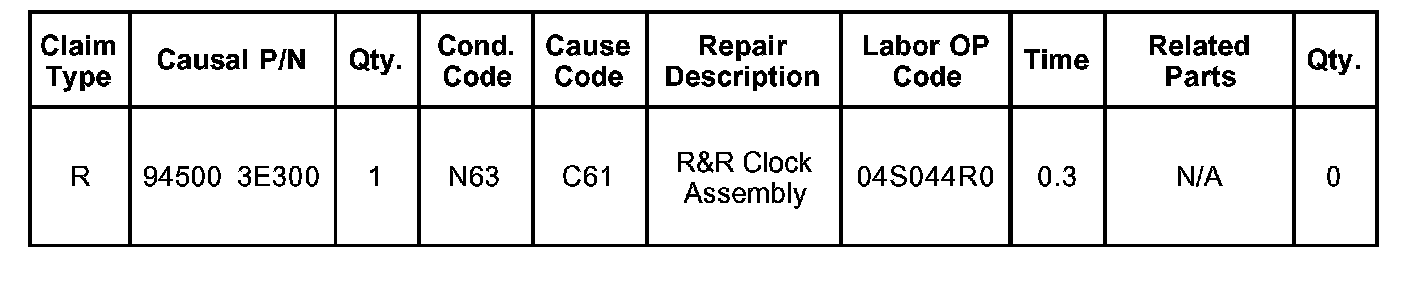
WARRANTY CLAIM INFORMATION: