Repair Procedures
Replacement
1. Disconnect the battery negative cable from the battery and then wait for at least 30 seconds.
2. Turn the steering wheel so that the front wheels can face straight ahead.
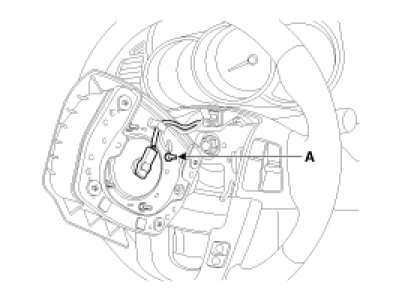
3. Loosen the torx bolts which are located on the both side of the steering wheel.
4. Disconnect the air bag and horn connector from the air bag module(A) and then remove the air bag module from the steering wheel.
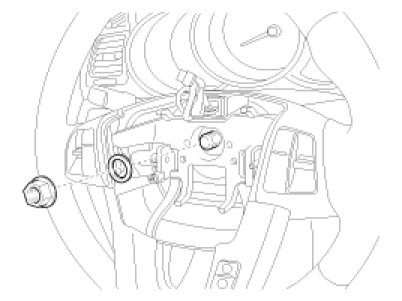
5. Loosen the lock nut & washer then remove the steering wheel.
Tightening torque :
39.2 - 49.0 N.m(4.0 - 5.0 kgf.m, 28.9 - 36.2 lb-ft)
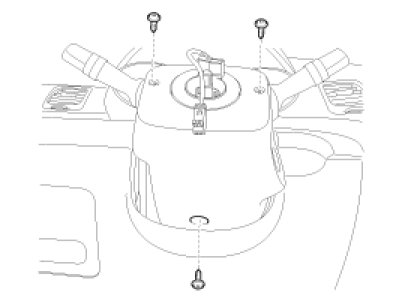
6. Remove the steering column upper and lower shroud.
7. Remove the clock spring(A).
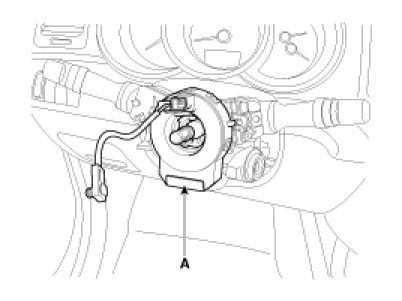
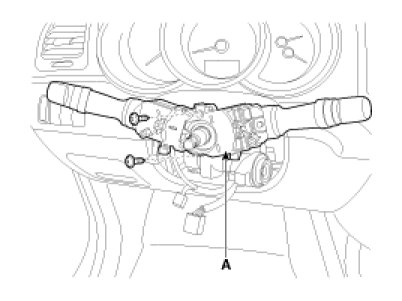
8. Remove the multifunction switches(A).
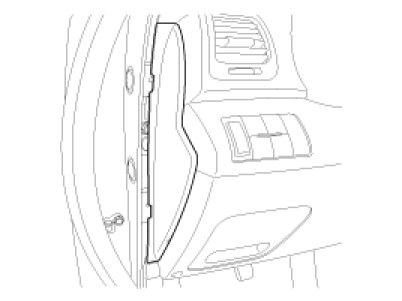
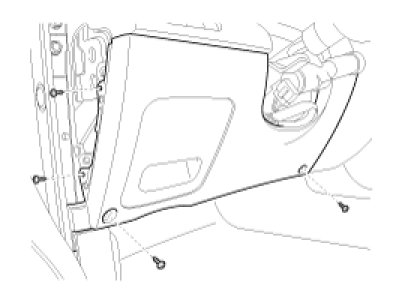
9. Remove the lower crash pad .
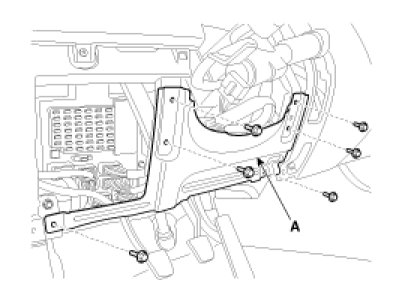
10. Remove the reinforce panel(A) by loosening the mounting bolts.
11. Remove the dust cover(A) by loosening the nuts.
Tightening torque :
3.9 - 5.9N.m(0.4 - 0.6kgf.m, 2.9 - 4.3lb-ft)
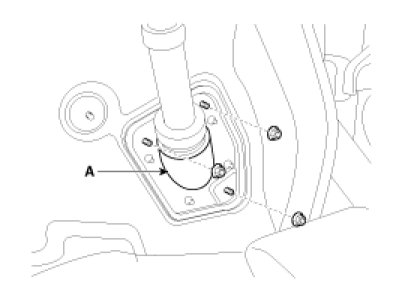
12. Remove the universal joint(A).
Tightening torque :
29.4 - 34.3N.m(3.0 - 3.5kgf.m, 21.5 - 25.3lb-ft)
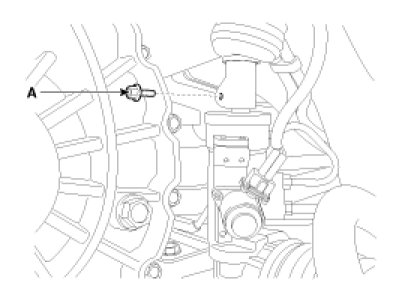
13. Remove the steering column(A) by loosening the mounting bolts & nuts.
Tightening torque :
12.7 - 17.7 N.m(1.3 - 1.8 kgf.m, 9.4 - 13.0 lb-ft)
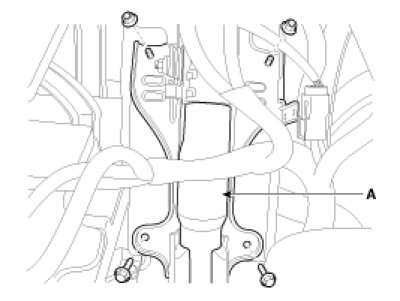
14. Installation is the reverse of the removal.
CAUTION:
When installing the clock spring, refer the RT group to prevent the damage of clock spring inner cable.
Disassembly
1. Make a groove in the head of the Break Off Bolts (A). This can be done with a cut-off wheel of with a chisel.
2. Loosen the special bolt using a screw driver and then remove the key lock assembly from the steering column assembly.
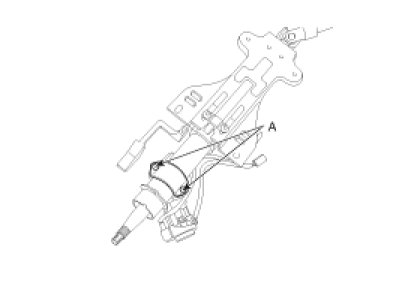
3. Reassembly is the reverse of disassembly. Use new Break Off Bolts when installing the Key Lock Assembly.
Inspection
1. Check the steering column for damage and deformation.
2. Check the connection for play, damage and smooth operation.
3. Check the joint bearing for damage and wear.
4. Check the tilt bracket for damage and cracks.
5. Check the key lock assembly for proper operation and replace it if necessary.