Heater Matrix
Heater Matrix
Service repair No - 80.20.29
Remove
1. Remove HEVAC assembly.
2. Invert HEVAC assembly.
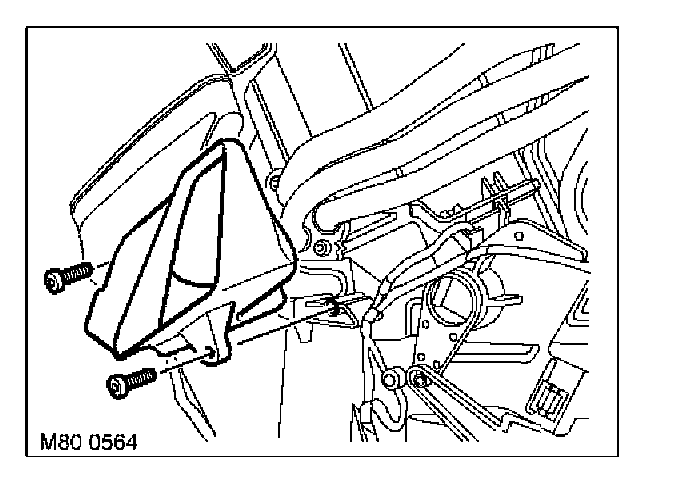
3. Remove 2 Torx screws securing LH heating duct elbow to HEVAC assembly. Remove elbow.
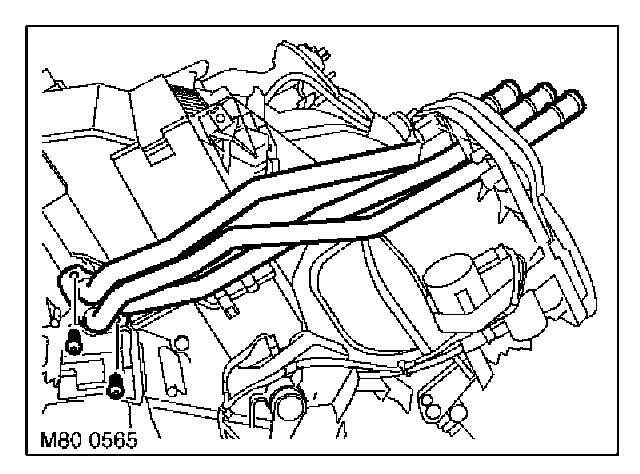
4. Remove 2 Torx screws securing heating pipes to matrix, release and remove pipes. Discard 'O' rings.
CAUTION: Always fit plugs to open connections to prevent contamination.
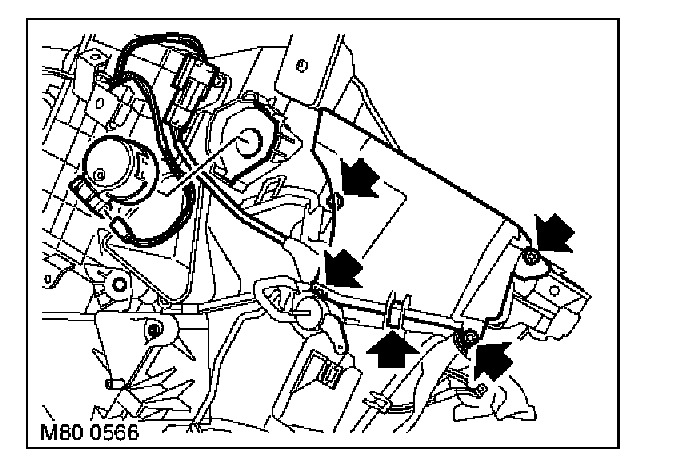
5. Remove 4 Torx screws and spring clip from RH heating duct elbow. Remove elbow.
6. Disconnect multiplug from evaporator sensor.
7. Disconnect multiplug and remove rear air vent motor.
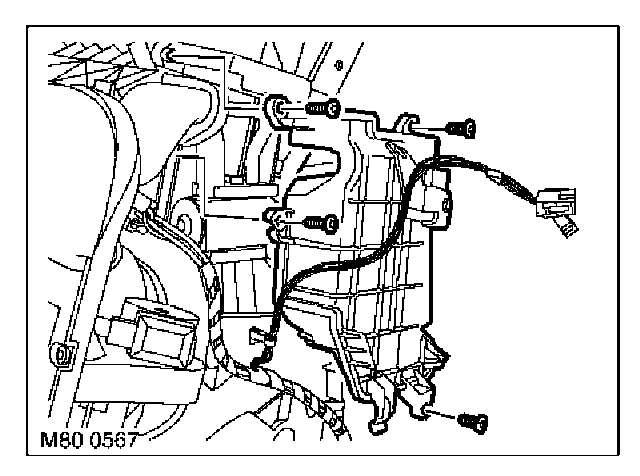
8. Remove 4 Torx screws securing TXV cover and position aside.
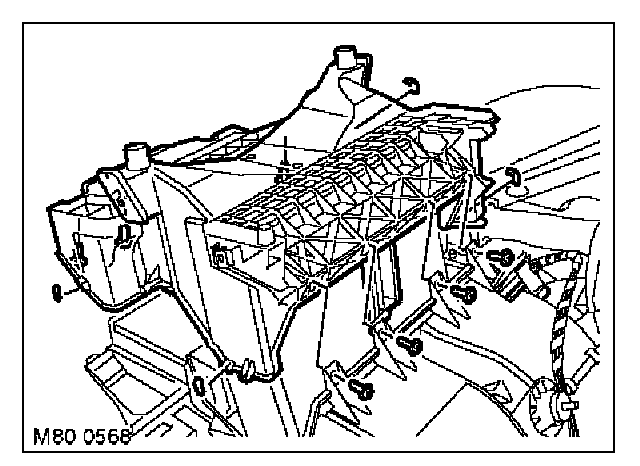
9. Remove 7 Torx screws and 3 spring clips from lower HEVAC access panel.
10. Release 2 clips and remove access panel.
11. Remove matrix.
Refit
1. Fit matrix to HEVAC assembly position access panel secure with clips and screws.
2. Fit and secure TXV cover.
3. Fit motor to heating assembly connect multiplug.
4. Connect multiplug to evaporator sensor.
5. Position RH heating duct elbow to HEVAC assembly secure with cup and screws.
6. Clean heating pipes and matrix mating faces.
7. Fit new 'O' rings to heating pipes, position pipes to matrix fit bolts and tighten to 10 Nm (7 lbf.ft).
8. Position LH heating duct elbow to HEVAC assembly secure with screws.
9. Fit HEVAC assembly to fascia.