Blower Motor: Service and Repair
Blower Assy:

OVERHAUL
1. REMOVE FRONT DOOR SCUFF PLATE RH
2. REMOVE COWL SIDE TRIM BOARD RH
3. REMOVE INSTRUMENT PANEL UNDER COVER NO.2
4. REMOVE GLOVE COMPARTMENT DOOR SUB-ASSEMBLY
5. REMOVE INSTRUMENT PANEL ORNAMENT
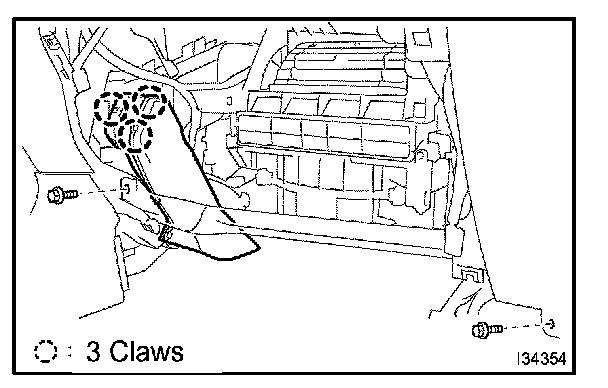
6. REMOVE AIR DUCT NO.2
a. Remove the 2 bolts and disconnect the Instrument panel safety pad sub-assembly.
b. Release the 3 claw fittings and remove the air duct No.2.
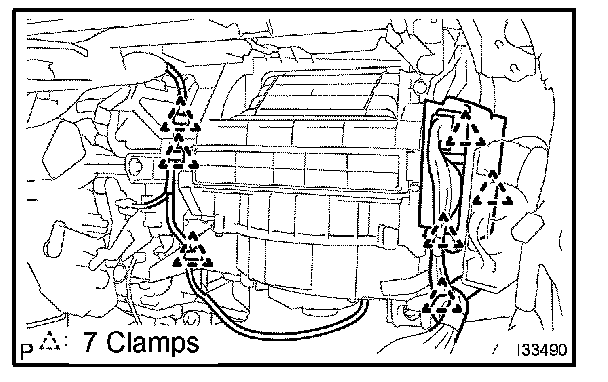
7. REMOVE BLOWER ASSEMBLY
a. Release the 7 clamps and disconnect the connectors.
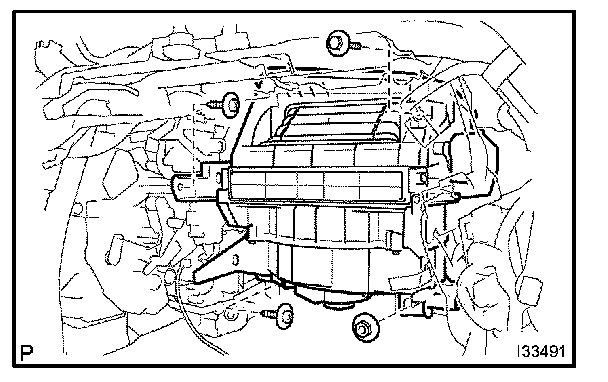
b. Remove the bolt, the 2 screws and the nut.
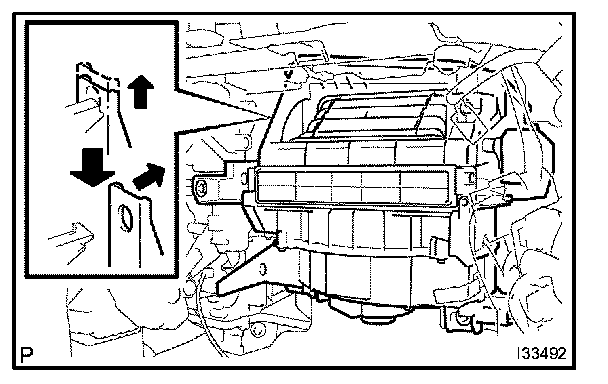
c. Release the claw fitting and remove the blower assembly.
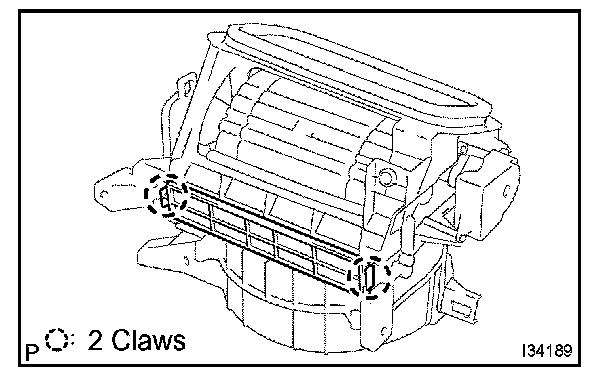
8. REMOVE FILTER SUB-ASSEMBLY
a. Release the 2 claw fittings and remove the air filter sub-assembly.
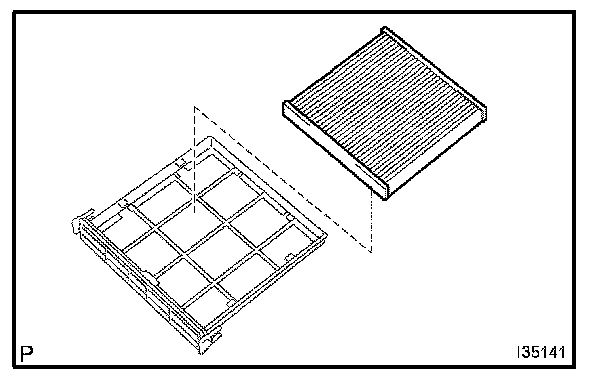
9. REMOVE CLEAN AIR FILTER
a. Remove the air refiner element from the air filter cover plate.
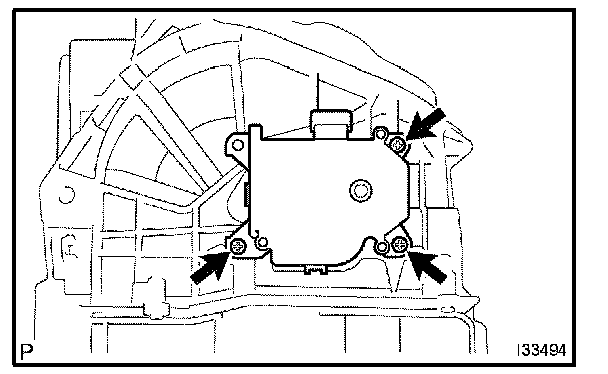
10. REMOVE DAMPER SERVO SUB-ASSEMBLY
a. Remove the 3 screws and the blower damper servo sub-assembly.
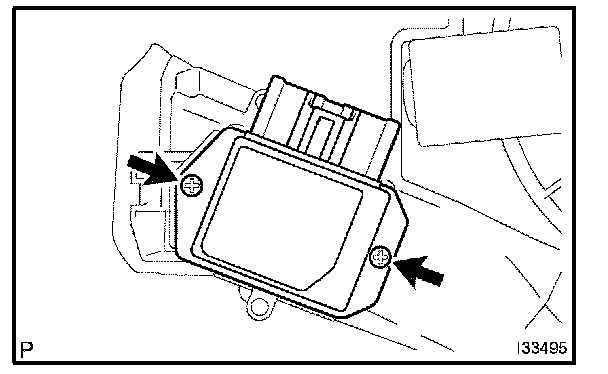
11. REMOVE BLOWER MOTOR CONTROL
a. Remove the 2 screws and the blower motor control.
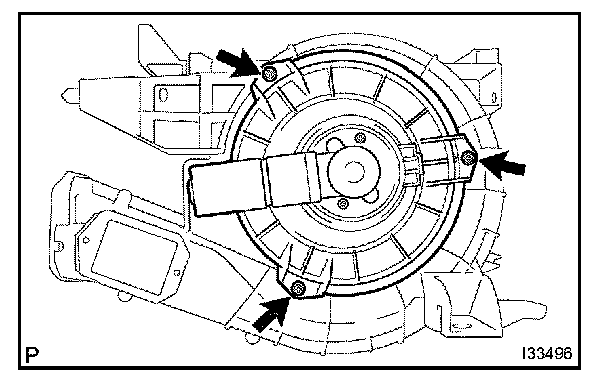
12. REMOVE COOLING UNIT MOTOR SUB-ASSEMBLY W/FAN
a. Remove the 3 screws and the cooling unit motor sub-assembly w/ fan.
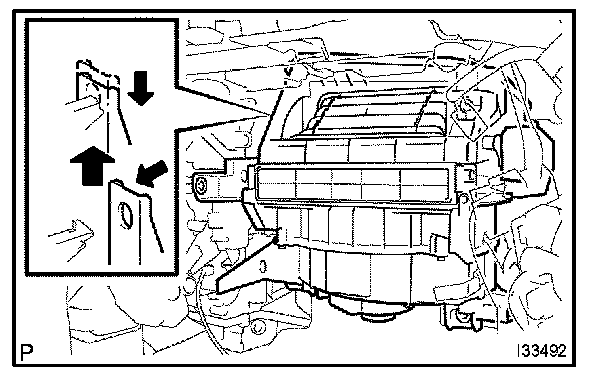
13. INSTALL BLOWER ASSEMBLY
a. Install the blower assembly with the claw fitting.
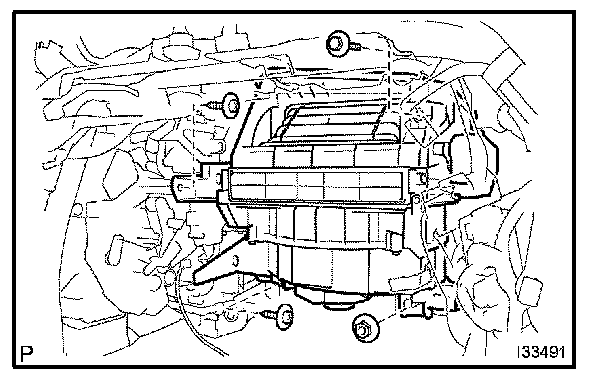
b. Install the bolt, the 2 screws and the nut.
Torque: 9.8 N.m (100 kgf.cm, 87 in..lbf)(Bolt)
5.4 N.m (55 kgf.cm, 48 in..lbf) (Nut)
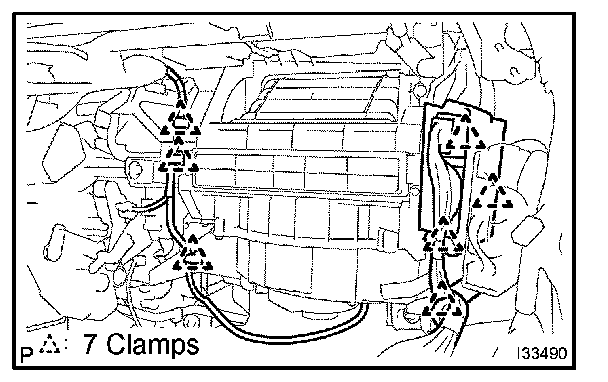
c. Install the 7 clamps and connect the connectors.