Condenser HVAC: Service and Repair
REMOVAL1. DISCONNECT CABLE FROM NEGATIVE BATTERY TERMINAL
CAUTION: Wait at least 90 seconds after disconnecting the cable from the negative (-) battery terminal to prevent airbag and seat belt pretensioner activation.
HINT: At the time of installation, perform initialization.
NOTE: Certain systems need to be initialized after disconnecting and reconnecting the cable from the negative (-) battery terminal.
2. DISCHARGE REFRIGERANT FROM REFRIGERANT SYSTEM
3. REMOVE A/T OIL COOLER ASSEMBLY
4. REMOVE ENGINE UNDER COVER
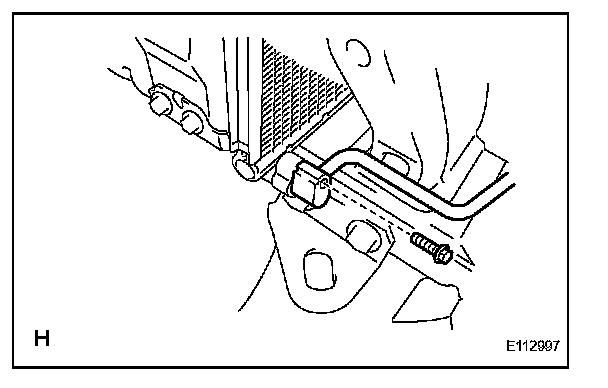
5. REMOVE DISCHARGE TUBE

a. Remove the bolt and disconnect the discharge tube from condenser.
Torque: 10 N.m (100 kgf.cm, 7 ft.lbf)
b. Loosen the nut and remove the discharge tube.
Torque:22 N.m (225 kgf.cm, 16 ft.lbf)
NOTE: Seal the openings of the disconnected parts using vinyl tape to prevent moisture and foreign matter from entering them.
HINT: At the time of installation, lubricate 2 new O-rings with compressor oil and install them on the discharge tube.
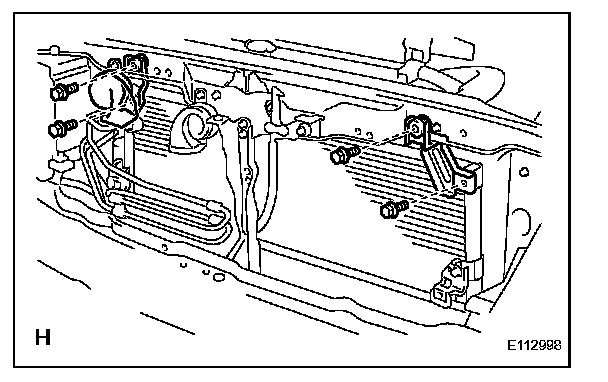
6. DISCONNECT LIQUID TUBE
a. Remove the bolt and disconnect the liquid tube.
Torque: 10 N.m (100 kgf.cm, 7 ft.lbf)
NOTE: Seal the openings of the disconnected parts using vinyl tape to prevent moisture and foreign matter from entering them.
HINT: At the time of installation, lubricate a new O-ring with compressor oil and install them on the liquid tube.
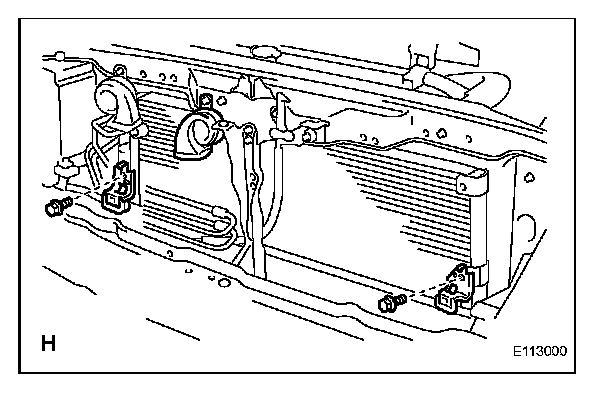
7. REMOVE COOLER CONDENSER ASSEMBLY
a. Remove the 4 bolts and 2 upper brackets.
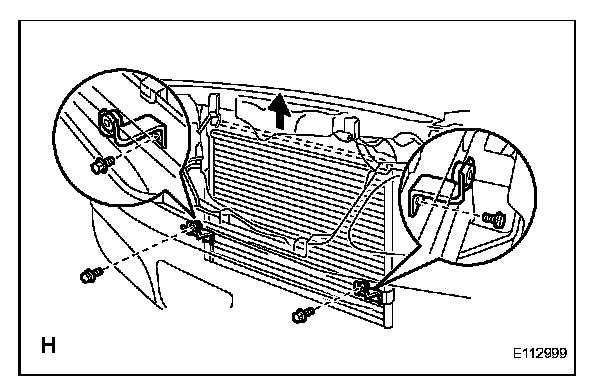
b. Lift up the condenser, and then remove the 4 bolts and 2 lower brackets.
c. Remove the 2 bolts and 2 center brackets.
d. Remove the condenser.
HINT: At the time of installation, refer to the following item. If the condenser is replaced, add compressor oil to the new condenser.
Add oil amount: 40 cc (1.4 fl.oz.)
Compressor oil: ND-OIL 8 or equivalent
INSTALLATION
Installation is in the reverse order of removal.