Compressor HVAC: Service and Repair
Electric Inverter Compressor:
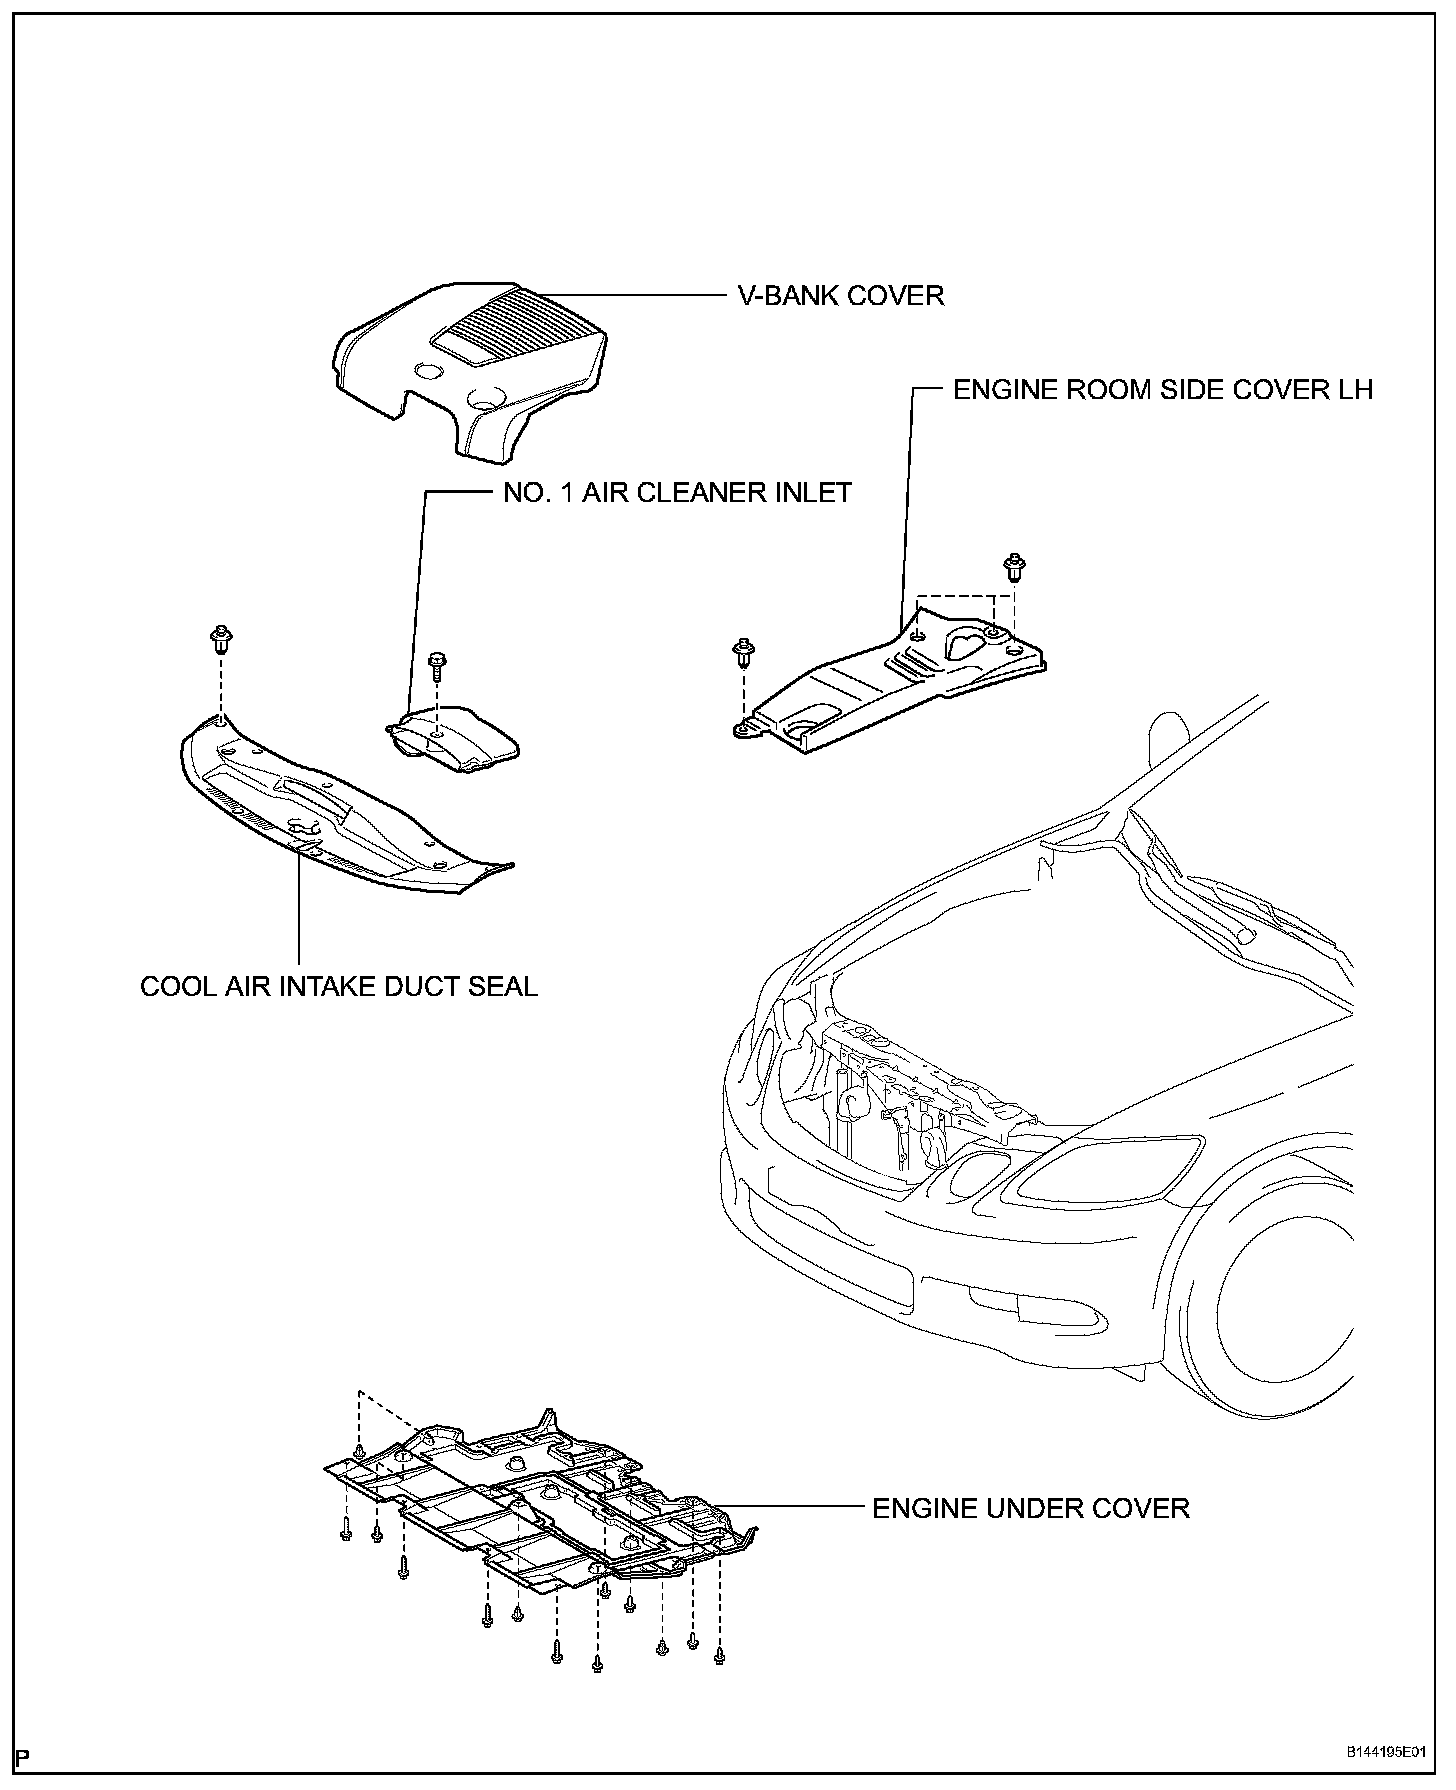
Electric Inverter Compressor:
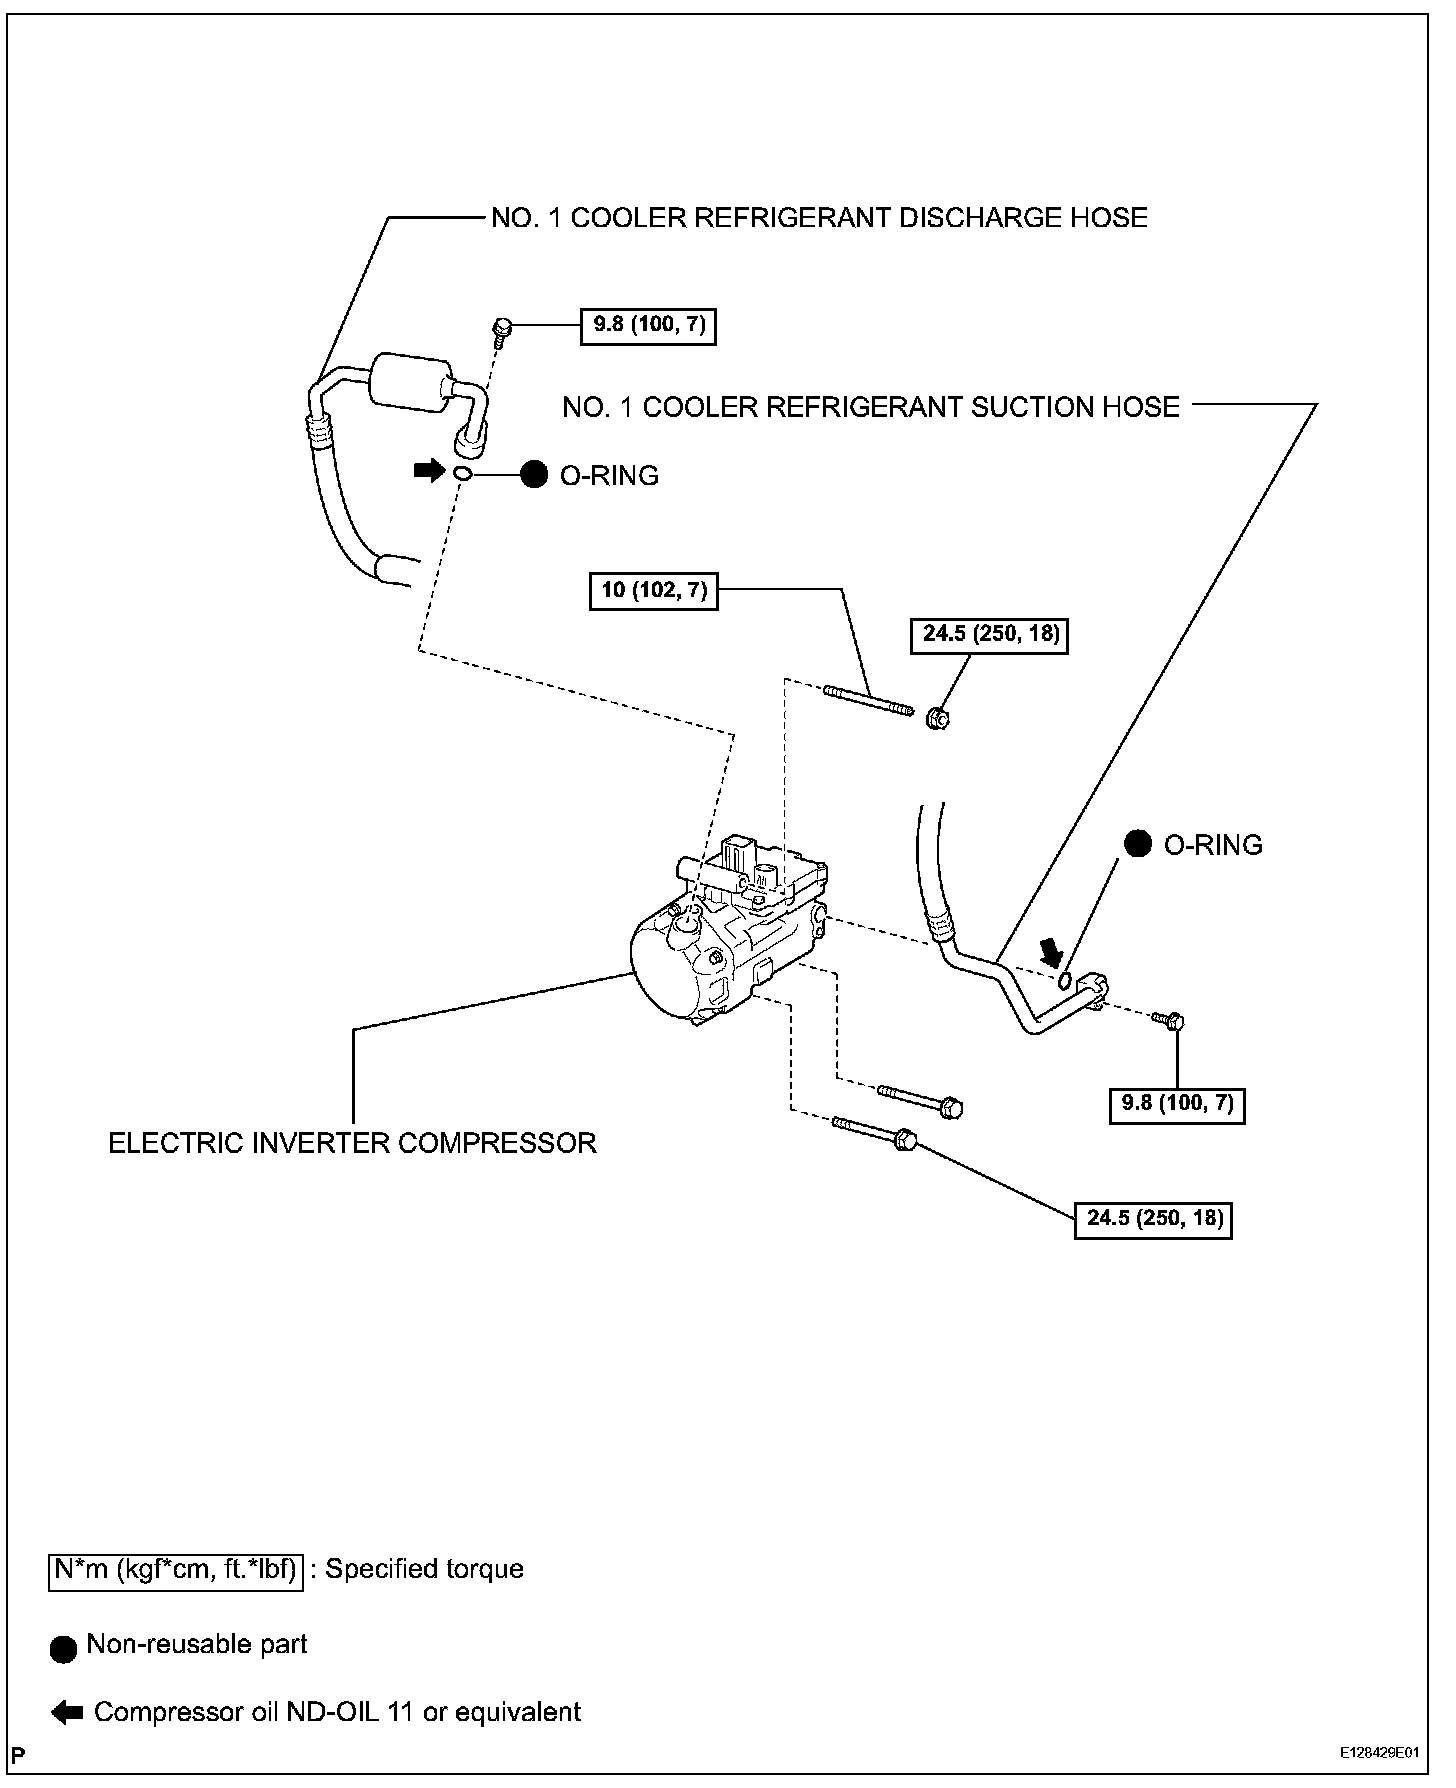
ELECTRIC INVERTER COMPRESSOR
REMOVAL
1. DISCHARGE REFRIGERANT FROM REFRIGERATION SYSTEM
2. DISCONNECT CABLE FROM NEGATIVE BATTERY TERMINAL
CAUTION: Wait at least 90 seconds after disconnecting the cable from the negative (-) battery terminal to prevent airbag and seat belt pretensioner activation.
3. REMOVE COOL AIR INTAKE DUCT SEAL
4. REMOVE ENGINE ROOM SIDE COVER LH
5. REMOVE V-BANK COVER
6. REMOVE ENGINE UNDER COVER
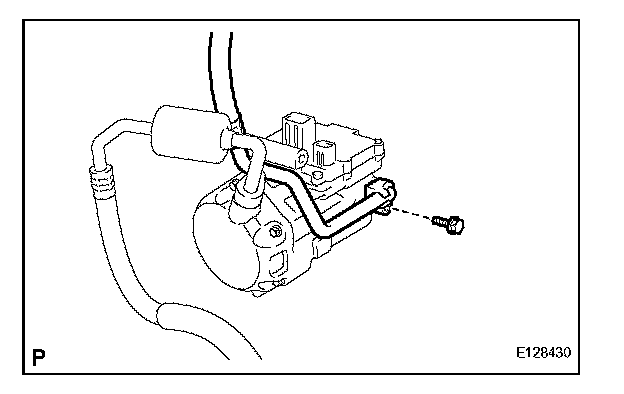
7. DISCONNECT NO.1 COOLER REFRIGERANT SUCTION HOSE
a. Remove the bolt and disconnect the cooler refrigerant suction hose from the cooler compressor.
b. Remove the O-ring from the cooler refrigerant suction hose.
NOTE: Seal the openings of the disconnected parts using vinyl tape to prevent moisture and foreign matter from entering them.
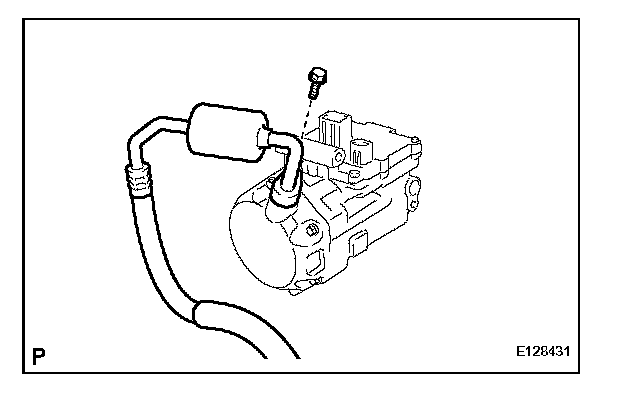
8. DISCONNECT NO.1 COOLER REFRIGERANT DISCHARGE HOSE
a. Remove the bolt and disconnect the cooler refrigerant discharge hose from the cooler compressor.
b. Remove the O-ring from the cooler refrigerant discharge hose.
NOTE: Seal the openings of the disconnected parts using vinyl tape to prevent moisture and foreign matter from entering them.
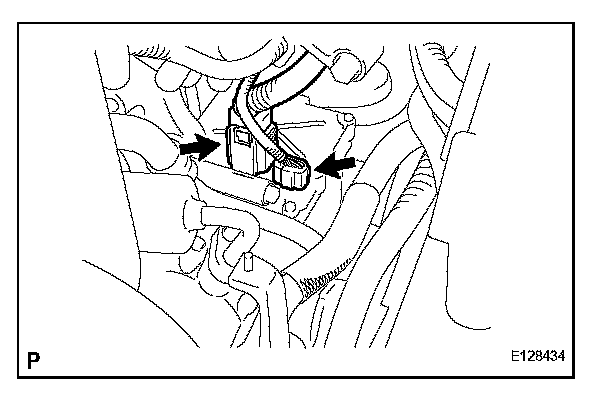
9. REMOVE ELECTRIC INVERTER COMPRESSOR
a. Disconnect the connectors.
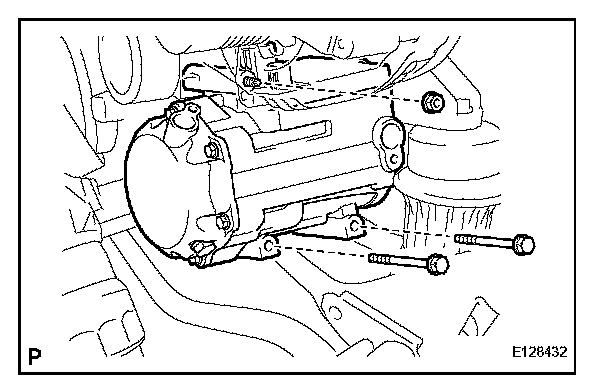
b. Remove the 2 bolts, nut and compressor.
INSTALLATION
1. ADJUST COMPRESSOR OIL
a. When replacing the compressor and magnetic clutch with a new one, gradually discharge the refrigerant gas from the service valve, and drain the following amount of oil from the new compressor and magnetic clutch before installation.
Standard: (Oil capacity inside the new compressor and magnetic clutch: 120 + 15 cc (4.1 + 0.51 fl. oz.)) - (Remaining oil amount in the removed compressor and magnetic clutch) = (Oil amount to be removed from the new compressor when replacing)
NOTE:
- When checking the compressor oil level, observe the A/C system's precautions.
- If a new compressor and magnetic clutch is installed without removing some oil remaining in the pipes of the vehicle, the oil amount will be too large. This prevents heat exchange in the refrigerant cycle and causes refrigerant failure.
- If the volume of oil remaining in the removed compressor and magnetic clutch is too small, check for oil leakage.
- Be sure to use ND-OIL 11 or equivalent for compressor oil.
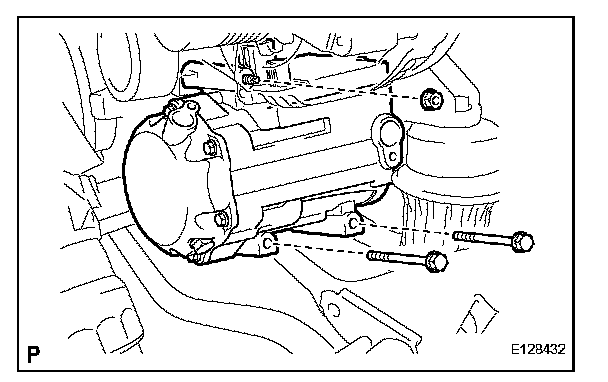
2. INSTALL ELECTRIC INVERTER COMPRESSOR
a. Install the cooler compressor with the 2 bolts and nut.
Torque: 24.5 N.m (250 kgf.cm, 18 ft.lbf)
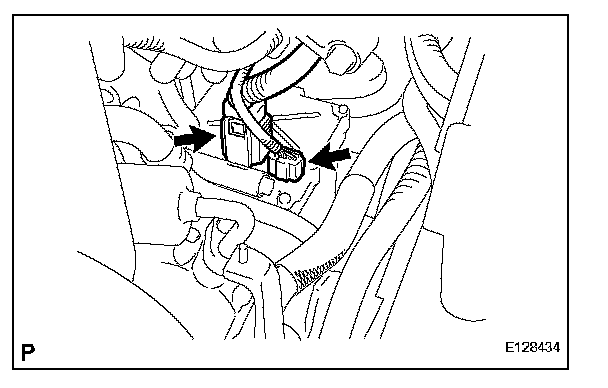
b. Connect the connectors.
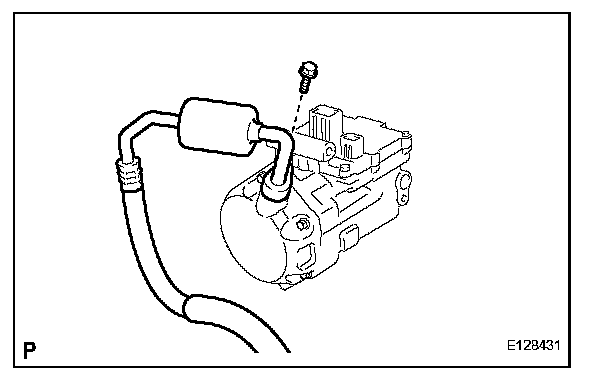
3. CONNECT NO.1 COOLER REFRIGERANT DISCHARGE HOSE
a. Remove the attached vinyl tape from the hose.
b. Sufficiently apply compressor oil to a new O-ring and the fitting surface of the cooler compressor.
Compressor oil: ND-OIL 11 or equivalent
c. Install the O-ring on the cooler refrigerant discharge hose.
d. Connect the cooler refrigerant discharge hose to the cooler compressor with the bolt.
Torque: 9.8 N.m (100 kgf.cm, 7 ft.lbf)
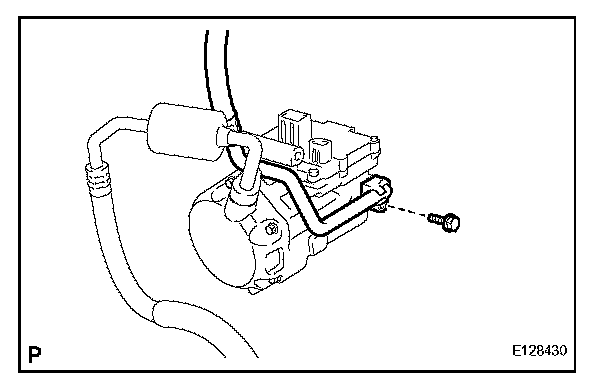
4. CONNECT NO.1 COOLER REFRIGERANT SUCTION HOSE
a. Remove the attached vinyl tape from the hose.
b. Sufficiently apply compressor oil to a new O-ring and the fitting surface of the cooler compressor.
Compressor oil: ND-OIL 11 or equivalent
c. Install the O-ring on the cooler refrigerant suction hose.
d. Connect the cooler refrigerant suction hose to the cooler compressor with the bolt.
Torque: 9.8 N.m (100 kgf.cm, 7 ft.lbf)
5. INSTALL ENGINE UNDER COVER
6. INSTALL V-BANK COVER
7. INSTALL ENGINE ROOM SIDE COVER LH
8. INSTALL COOL AIR INTAKE DUCT SEAL
9. CONNECT CABLE TO NEGATIVE BATTERY TERMINAL
10. CHARGE REFRIGERANT
11. WARM UP ENGINE
12. CHECK FOR LEAKAGE OF REFRIGERANT