Quarter Window Glass: Service and Repair
QUARTER WINDOW GLASSQuarter Window Glass:
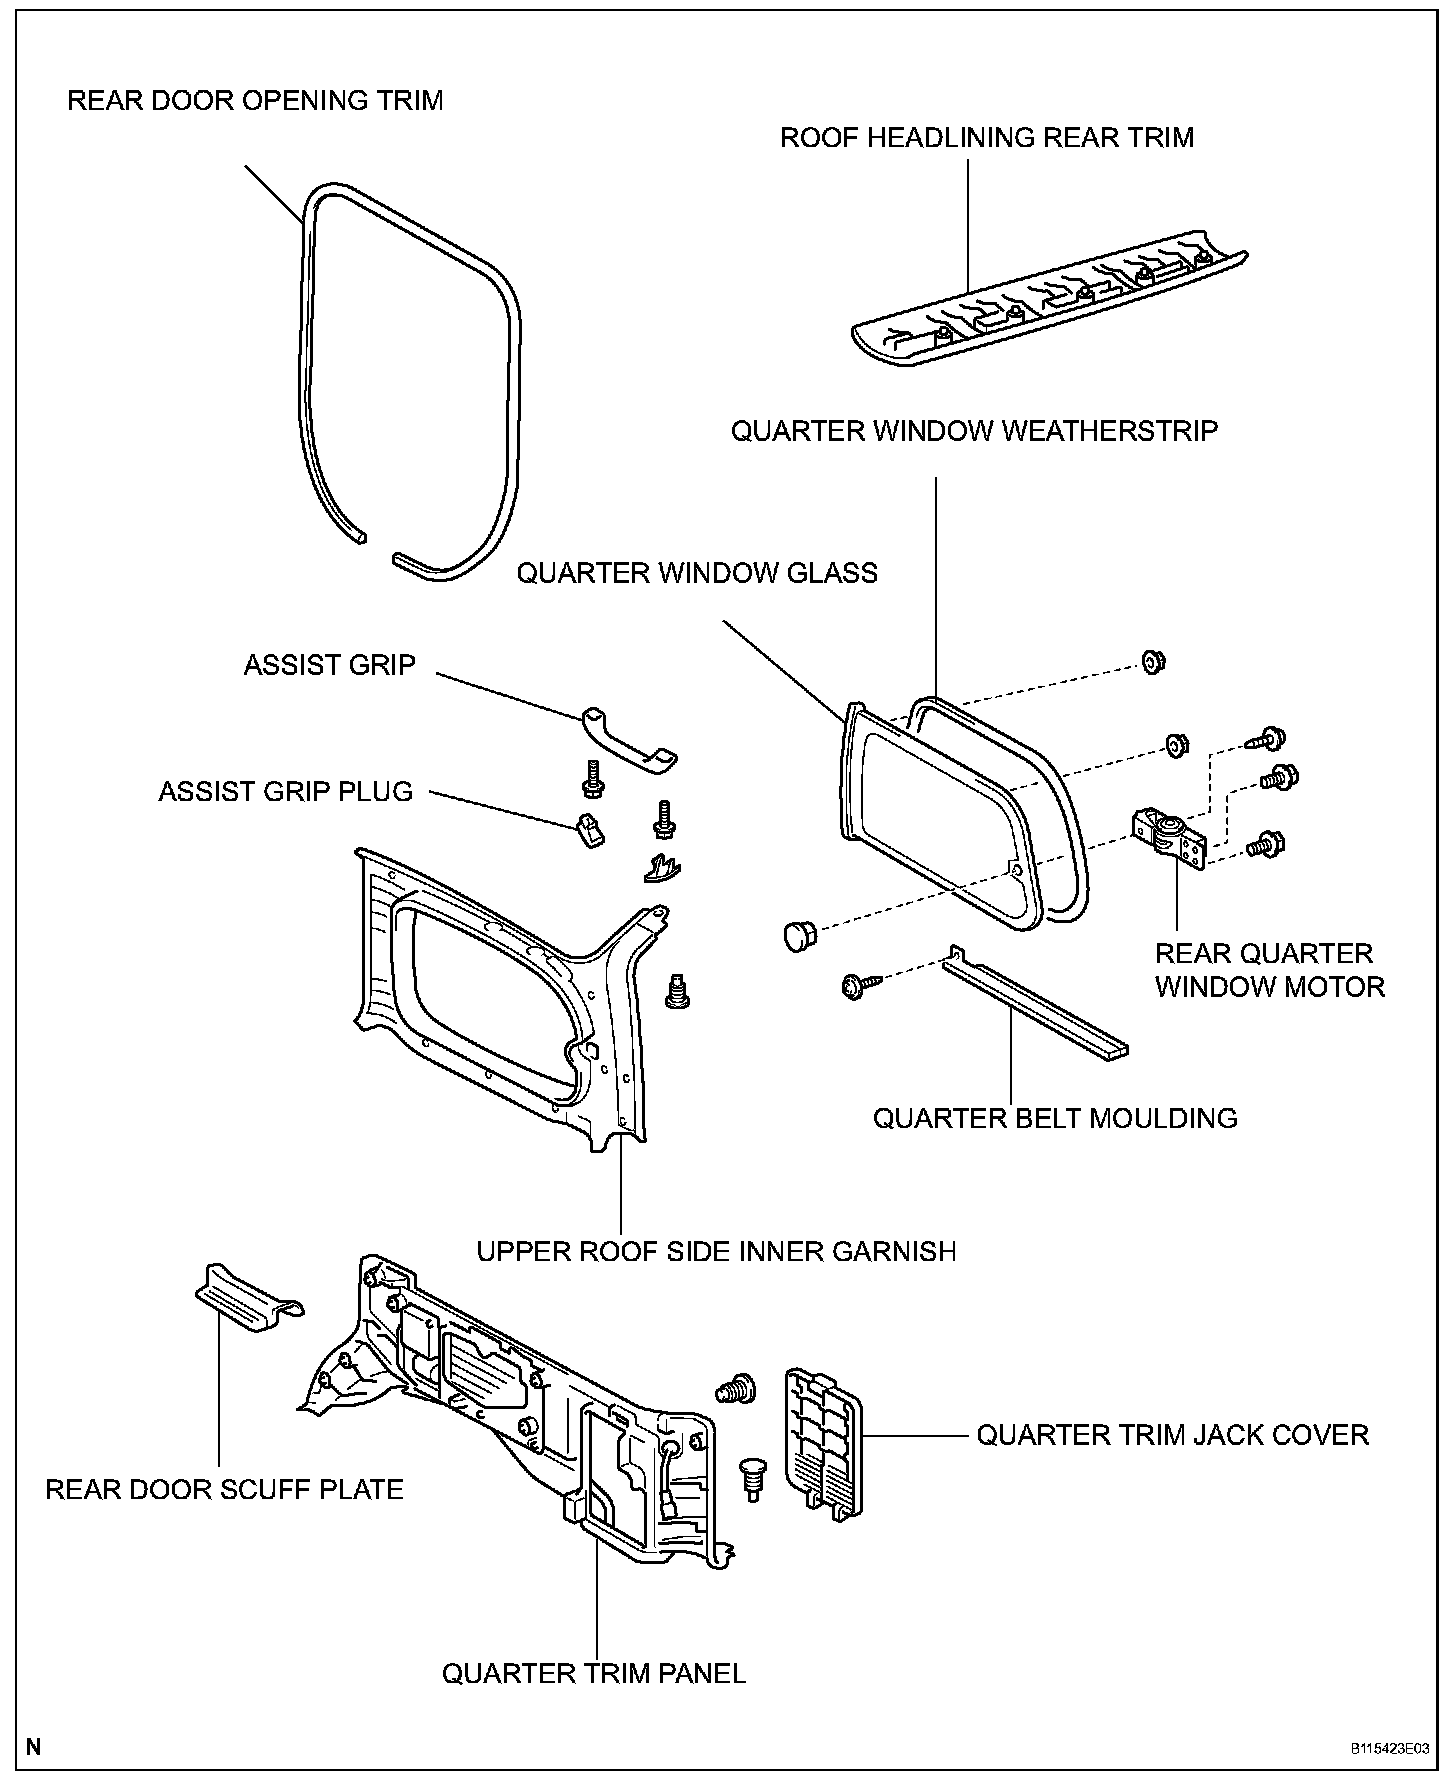
Quarter Window Glass:
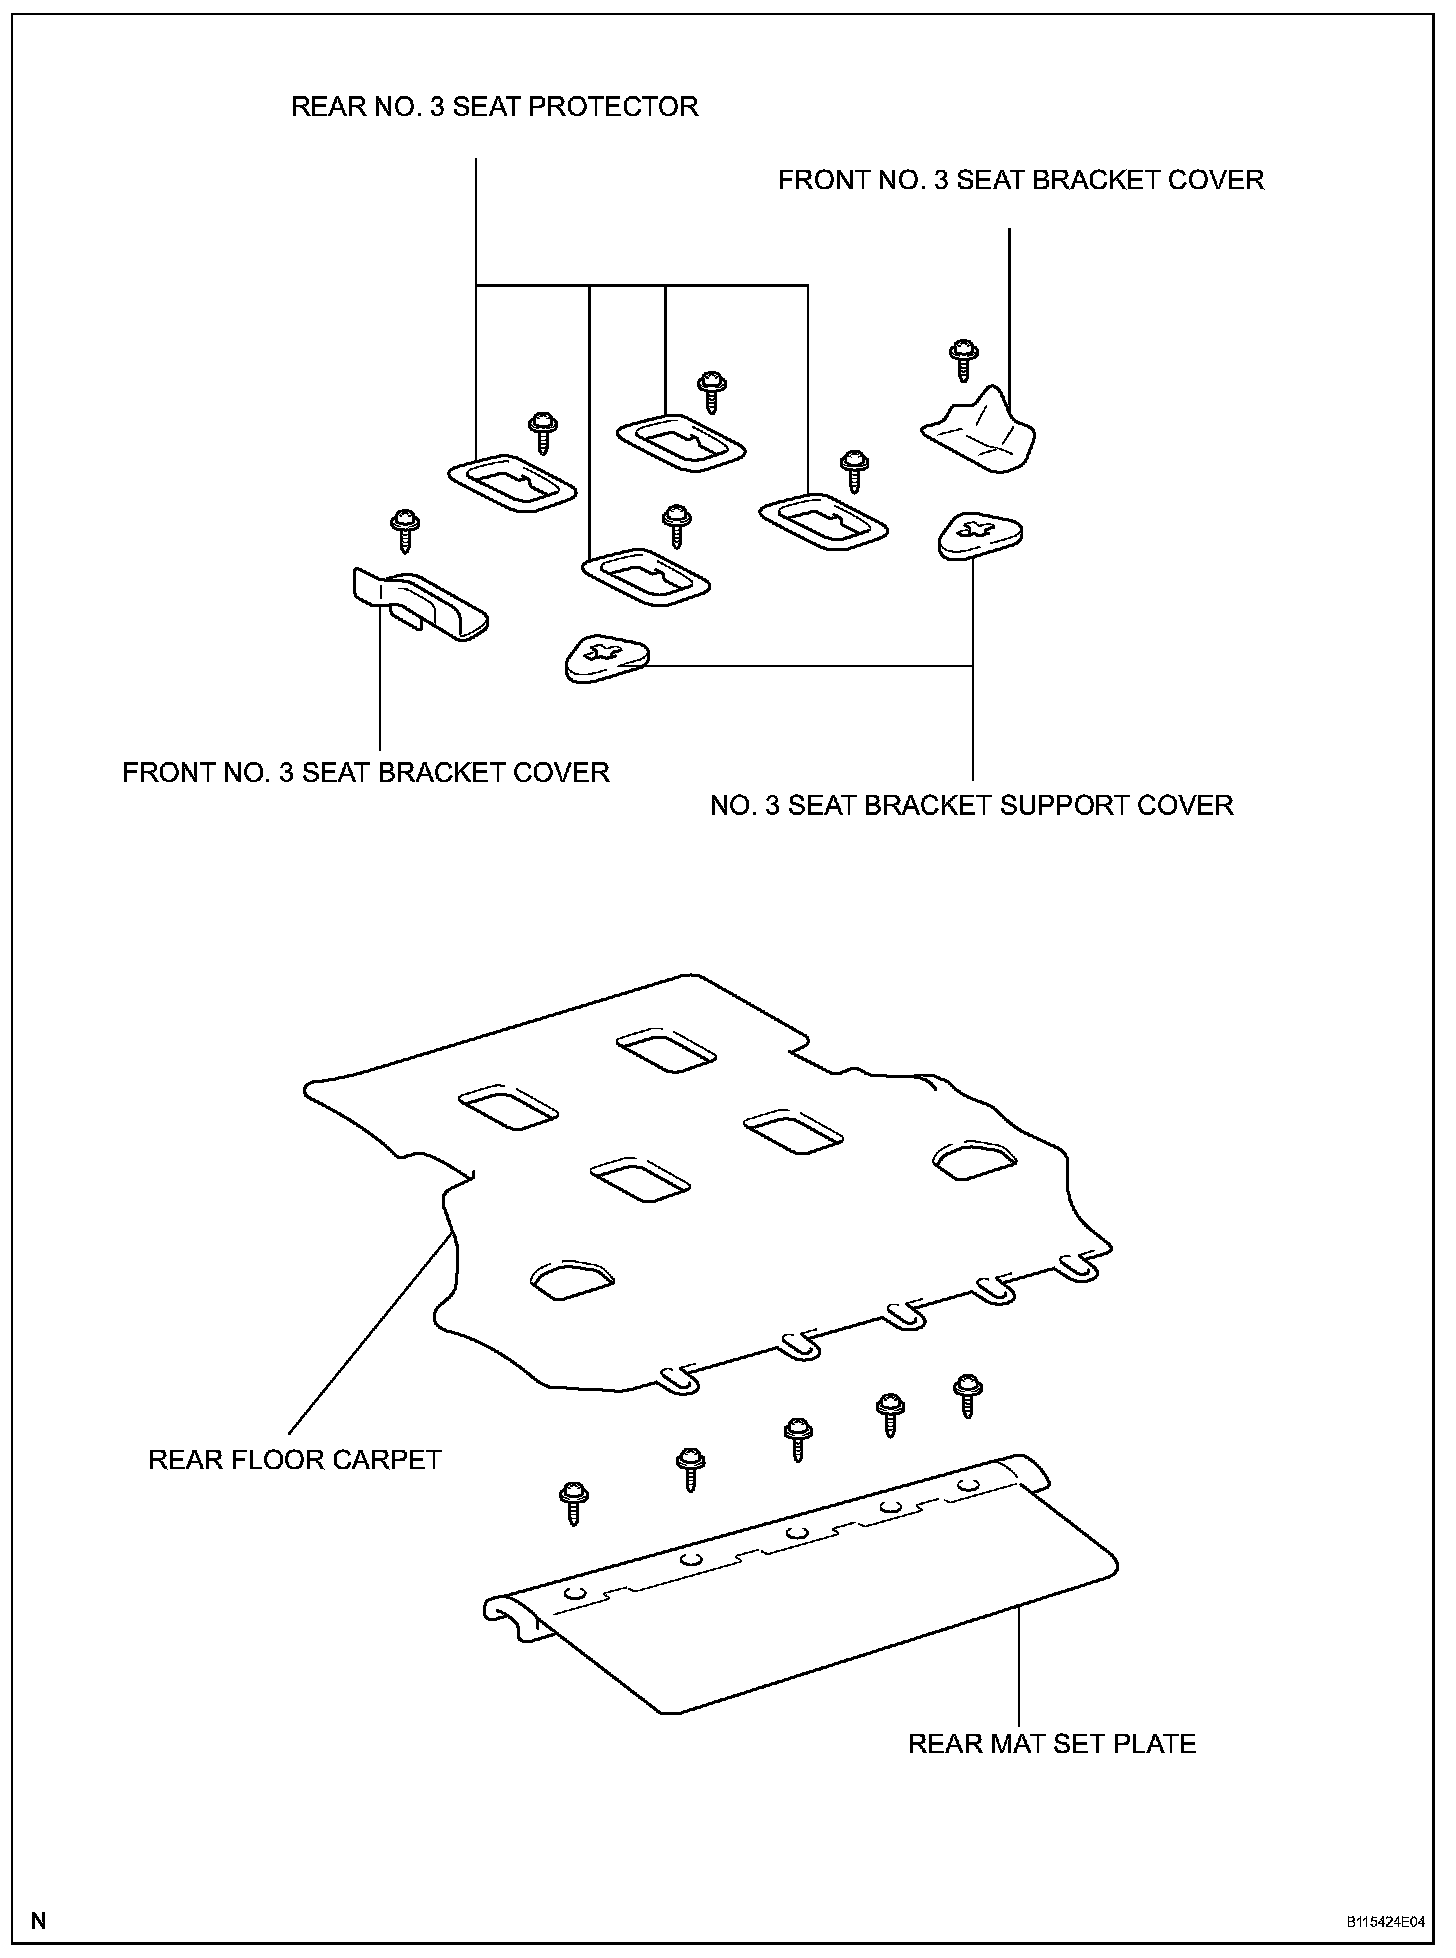
REMOVAL
HINT: Use the same procedures for the RH side and LH side.
1. DISCONNECT CABLE FROM NEGATIVE BATTERY TERMINAL
CAUTION: Wait at least 90 seconds after disconnecting the cable from the negative (-) battery terminal to prevent airbag and seat belt pretensioner activation.
2. REMOVE ROOF HEADLINING REAR TRIM
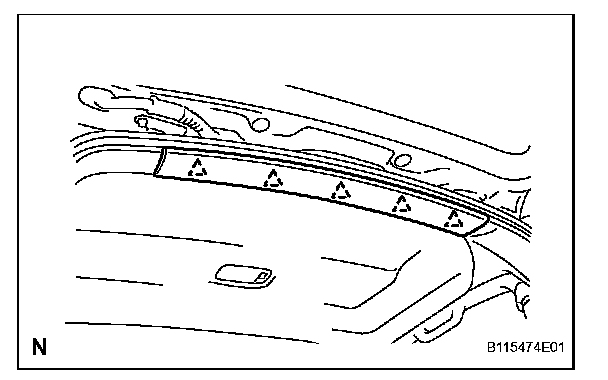
a. Using a screwdriver, remove the trim.
HINT: Tape the screwdriver tip before use.
3. REMOVE REAR NO. 2 SEAT
a. Remove the rear No. 2 seat.
4. REMOVE REAR MAT SET PLATE
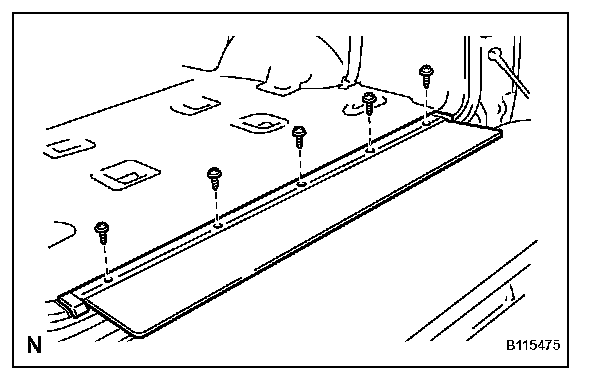
a. Remove the 5 screws.
b. Using a screwdriver, remove the set plate.
HINT: Tape the screwdriver tip before use.
5. REMOVE REAR NO. 3 SEAT PROTECTOR
6. REMOVE FRONT NO. 3 SEAT BRACKET COVER
a. Remove the 2 screws and 2 bracket covers.
7. REMOVE NO. 3 SEAT BRACKET SUPPORT COVER
a. Remove the 2 covers.
8. REMOVE REAR FLOOR CARPET
9. REMOVE REAR NO. 2 SEAT OUTER BELT FLOOR ANCHOR
10. REMOVE REAR NO. 1 SEAT OUTER BELT FLOOR ANCHOR
11. REMOVE REAR DOOR SCUFF PLATE
12. REMOVE REAR DOOR OPENING TRIM
13. REMOVE QUARTER TRIM PANEL
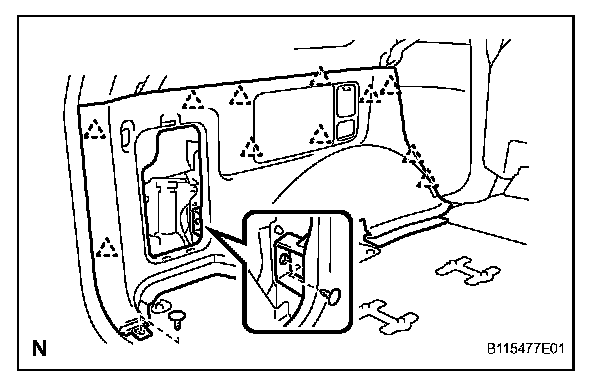
a. Remove the quarter trim jack cover.
b. Using a clip remover, remove the 2 clips.
c. Remove the trim panel, and then disconnect the connector.
14. REMOVE REAR NO. 2 SEAT OUTER BELT SHOULDER ANCHOR
15. REMOVE REAR NO. 1 SEAT OUTER BELT SHOULDER ANCHOR
16. REMOVE UPPER ROOF SIDE INNER GARNISH
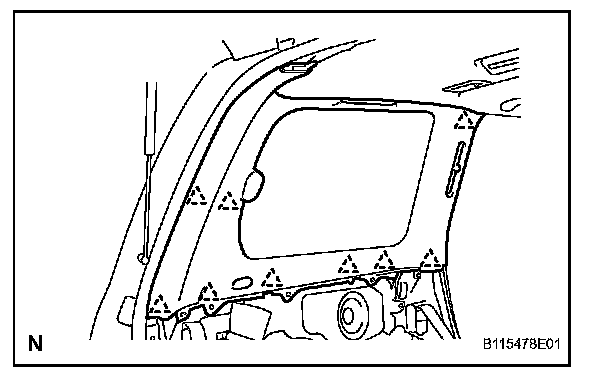
a. Using a screwdriver, remove the 2 assist grip plugs, and then remove the 2 screws and assist grip.
HINT: Tape the screwdriver tip before use.
b. Using a clip remover, remove the clip.
c. Using a screwdriver, remove the garnish.
HINT: Tape the screwdriver tip before use.
17. REMOVE QUARTER WINDOW GLASS
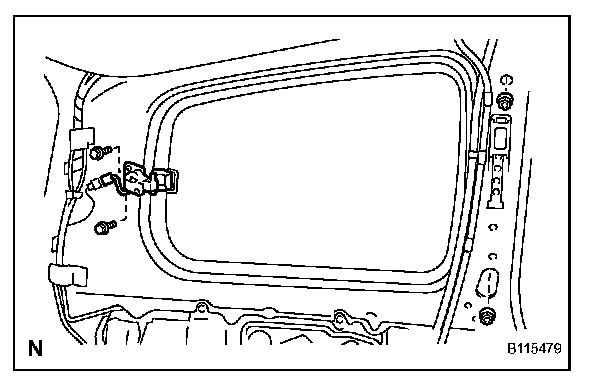
a. Disconnect the connector.
b. Remove the 2 bolts.
c. Remove the 2 nuts and window glass.
18. REMOVE QUARTER WINDOW WEATHERSTRIP
19. REMOVE QUARTER BELT MOULDING
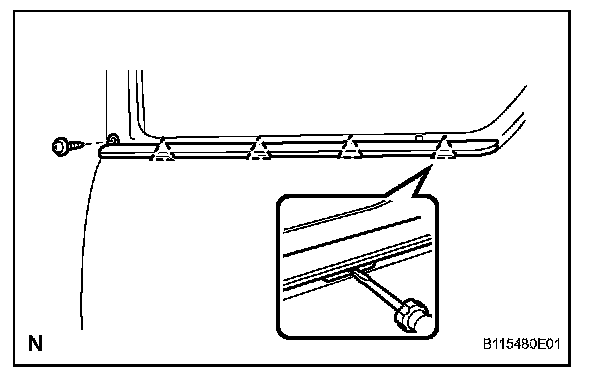
a. Remove the screw.
b. Using a screwdriver, remove the moulding.
HINT: Tape the screwdriver tip before use.
20. REMOVE REAR QUARTER WINDOW MOTOR
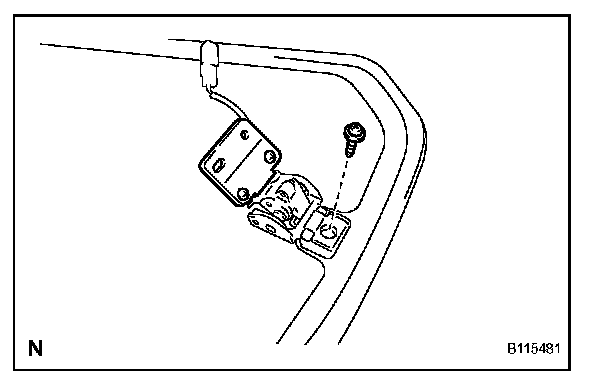
a. Remove the screw and window motor.
21. REMOVE QUARTER WINDOW LOCK
a. Remove the screw and window lock.
INSTALLATION
HINT:
- Use the same procedures for the RH side and LH side.
- A bolt without a torque specification is shown in the standard bolt chart.
1. INSTALL QUARTER WINDOW LOCK
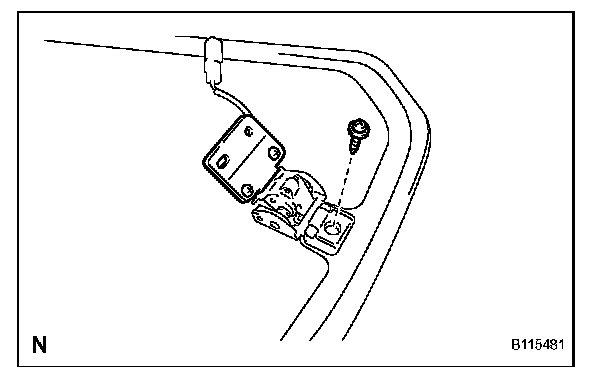
a. Install the window lock with the screw.
2. INSTALL REAR QUARTER WINDOW MOTOR
a. Install the motor with the screw.
3. INSTALL QUARTER BELT MOULDING
a. Install the belt moulding.
b. Install the screw.
4. INSTALL QUARTER WINDOW WEATHERSTRIP
5. INSTALL QUARTER WINDOW GLASS
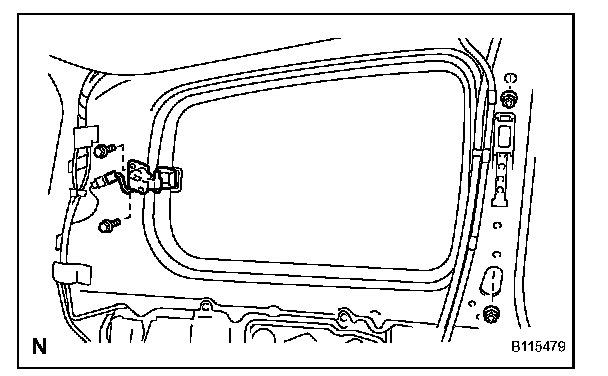
a. Install the window glass with the 2 bolts and 2 nuts.
b. Connect the connector.
6. INSTALL UPPER ROOF SIDE INNER GARNISH
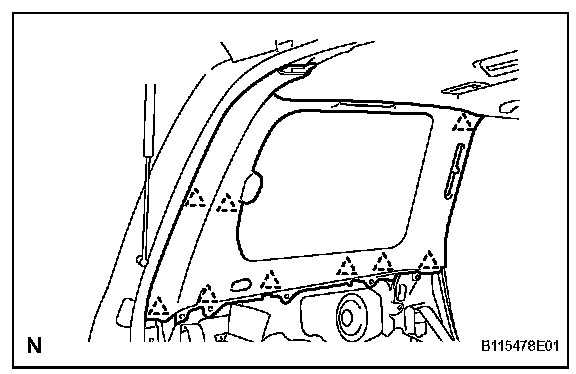
a. Install the garnish.
b. Install the assist grip with the 2 screws.
c. Install the 2 assist grip plugs.
7. INSTALL REAR NO. 1 SEAT OUTER BELT SHOULDER ANCHOR
8. INSTALL REAR NO. 2 SEAT OUTER BELT SHOULDER ANCHOR
9. INSTALL QUARTER TRIM PANEL
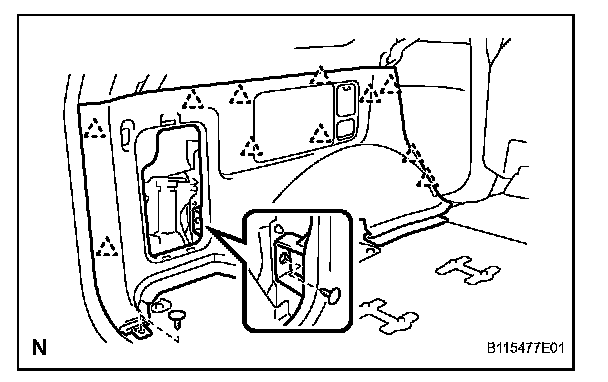
a. Connect the connector.
b. Install the trim panel.
c. Install the 2 clips.
d. Install the trim jack cover.
10. INSTALL REAR DOOR OPENING TRIM
11. INSTALL REAR DOOR SCUFF PLATE
12. INSTALL REAR NO. 1 SEAT OUTER BELT FLOOR ANCHOR
a. Install the floor anchor with the bolt.
Torque: 42 N.m (430 kgf.cm, 31 ft.lbf)
13. INSTALL REAR NO. 2 SEAT OUTER BELT FLOOR ANCHOR
a. Install the floor anchor with the bolt.
Torque: 42 N.m (430 kgf.cm, 31 ft.lbf)
14. INSTALL REAR FLOOR CARPET
15. INSTALL NO. 3 SEAT BRACKET SUPPORT COVER
16. INSTALL FRONT NO. 3 SEAT BRACKET COVER
17. INSTALL REAR NO. 3 SEAT PROTECTOR
18. INSTALL REAR MAT SET PLATE
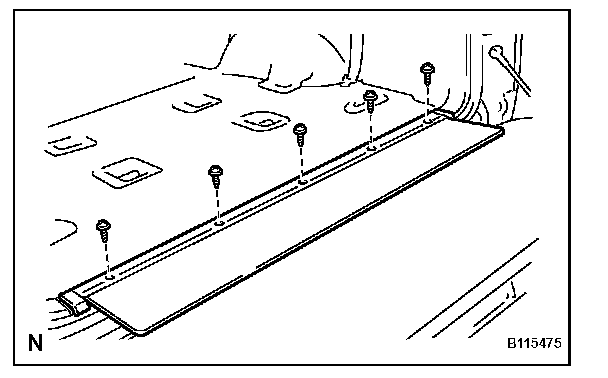
a. Install the set plate with the 5 screws.
19. INSTALL REAR NO. 2 SEAT
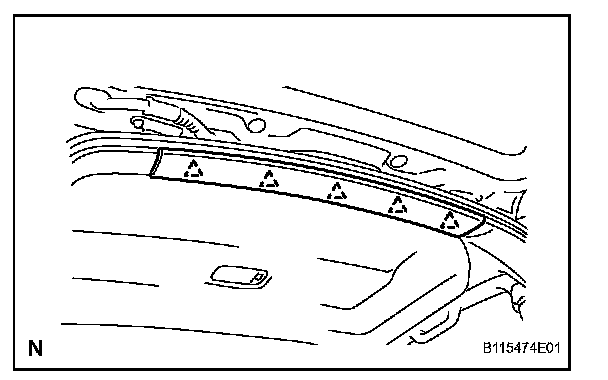
20. INSTALL ROOF HEADLINING REAR TRIM
21. CONNECT CABLE TO NEGATIVE BATTERY TERMINAL
22. PERFORM INITIALIZATION
a. Perform initialization.
NOTICE: Certain systems need to be initialized after disconnecting and reconnecting the cable from the negative (-) battery terminal.