Reassembly
BRAKE (FRONT): FRONT BRAKE: REASSEMBLY
HINT:
- Use the same procedures for the LH side and RH side.
- The procedures listed below are for the LH side.
1. TEMPORARILY INSTALL FRONT DISC BRAKE BLEEDER PLUG
(a) Temporarily install the bleeder plug to the disc brake caliper.
HINT:
The bleeder plug will be tightened to a torque specification in the "Bleed Brake Line" procedure.
2. INSTALL FRONT DISC BRAKE BLEEDER PLUG CAP
3. INSTALL PISTON SEAL
(a) Apply lithium soap base glycol grease to 4 new piston seals.
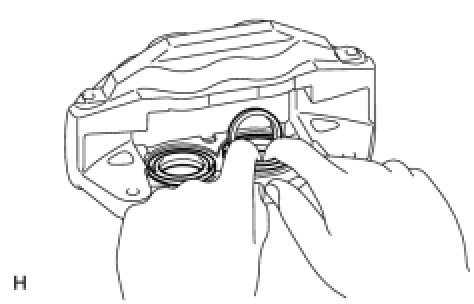
(b) Install the 4 piston seals to the disc brake caliper.
4. INSTALL FRONT DISC BRAKE PISTON
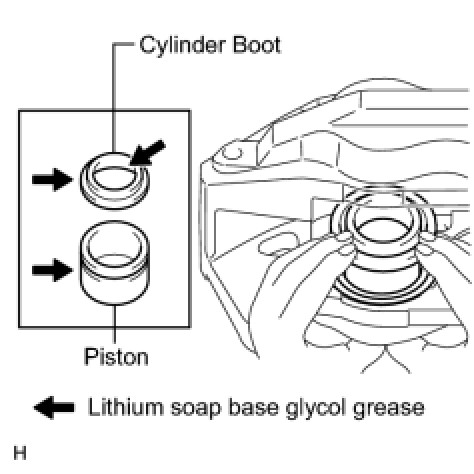
(a) Apply lithium soap base glycol grease to the 4 front disc brake pistons and 4 new cylinder boots.
(b) Install the 4 cylinder boots to the 4 front disc brake pistons.
(c) Install the 4 pistons into the front disc brake caliper.
NOTICE:
Do not forcibly install the piston into the disc brake caliper.
5. INSTALL CYLINDER BOOT
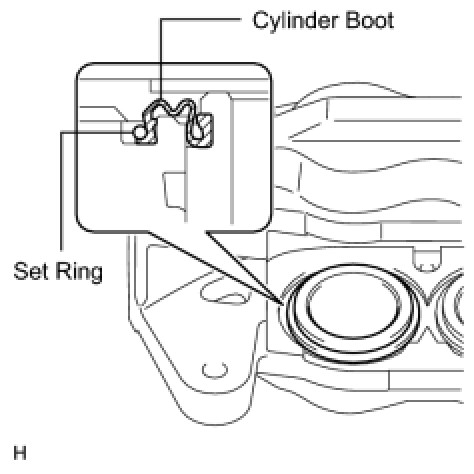
(a) Install one side of each of the 4 cylinder boots to the front disc brake caliper.
NOTICE:
- Install the cylinder boot securely to the grooves of the cylinder and piston.
- Do not damage the cylinder boot.
6. INSTALL FRONT DISC BRAKE PISTON SET RING
(a) Install the 4 set rings.