Installation
WINDOW / GLASS: QUARTER WINDOW GLASS: INSTALLATION
HINT
* Use the same procedure for the LH and RH sides.
* The procedure listed below is for the LH side.
* A bolt without a torque specification is shown in the standard bolt chart Standard Bolt - Specified Torque For Standard Bolts.
1. INSTALL QUARTER WINDOW ASSEMBLY LH

(a) Using a brush or sponge, apply primer M to the exposed part of the vehicle body.
NOTICE:
* Allow the primer coating to dry for 3 minutes or more.
* Throw away any leftover primer.
* Do not apply too much primer.
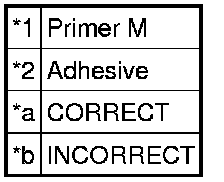
Text in Illustration
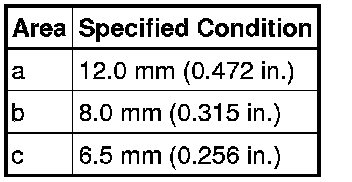
(b) Using a brush or sponge, apply Primer G to the contact surface of the glass.

Text in Illustration

Standard:
HINT
If primer is applied to an area that is not specified, wipe off the primer with non-residue solvent before it dries.
NOTICE:
* Allow the primer to dry for 3 minutes or more.
* Throw away any leftover primer.
* Do not apply too much primer.
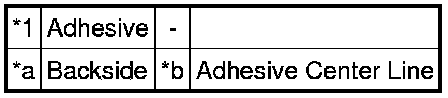
(c) Apply adhesive to the quarter window glass.
Adhesive:
Toyota Genuine Windshield Glass Adhesive or equivalent
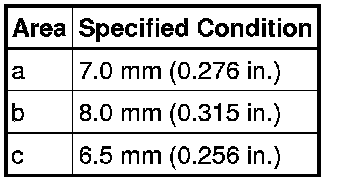
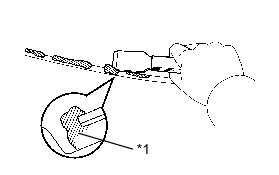
(1) Cut off the tip of a cartridge nozzle as shown in the illustration.
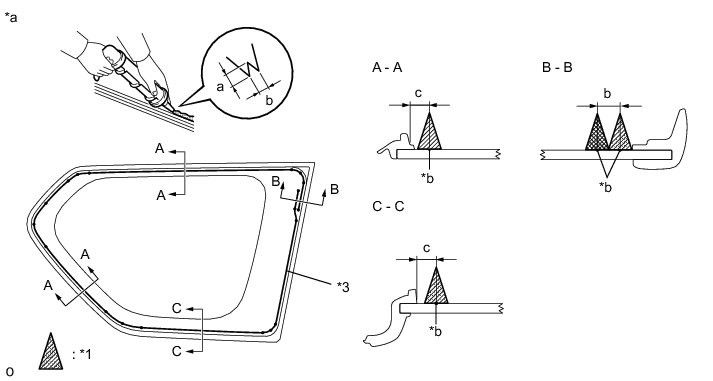
Text in Illustration
Standard:
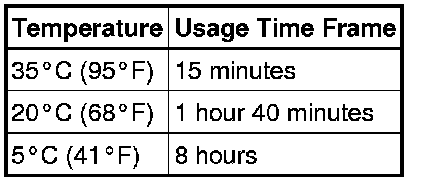
HINT
After cutting off the tip, use all adhesive within the time written in the table below.
Usage Time Frame:
(2) Load a sealer gun with the cartridge.
(3) Apply adhesive to the quarter window glass as shown in the illustration.
(d) Install the quarter window glass to the vehicle body.
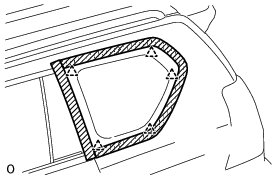
Attach the 4 clips to install the quarter window assembly LH.
NOTICE:
Allow the primer to dry for 3 minutes or more.
(1) Hold the quarter window glass in place securely with protective tape or equivalent until the adhesive hardens.
NOTICE:
* Allow the primer coating to dry for 3 minutes or more.
* Check the clearance between the body and glass.
(2) Lightly press the front surface of the glass to ensure a close fit.
Using a scraper, remove any excess or protruding adhesive.
HINT
Apply adhesive to any areas where the amount of adhesive is inadequate.
NOTICE:
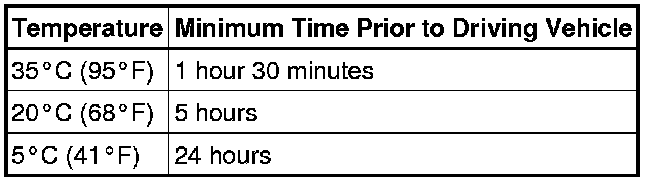
Do not drive the vehicle within the time written in the table below.
Minimum Time:
Text in Illustration

2. CHECK FOR LEAK AND REPAIR
(a) Conduct a leak test after the adhesive has completely hardened.
(b) Seal any leaks with auto glass sealer.
3. INSTALL NO. 1 ROOF SIDE RAIL GARNISH LH
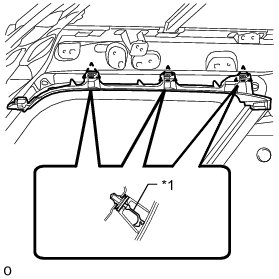
(a) Install a new clip A to the roof side rail garnish.
Text in Illustration

(b) Attach the 3 clips to install the roof side rail garnish.
4. INSTALL ROOF HEADLINING ASSEMBLY
(a) Install the roof headlining assembly Installation.