Part 3
Transmission Con't
58. Remove the forward planetary assembly.

59. Remove the input shell and sun gear assembly.

60. Rotate the intermediate one-way clutch sprag and race to disassemble.

61. Install the special tool.

62. Install the special tool.

63. Using the special tools, remove the intermediate clutch retaining ring.
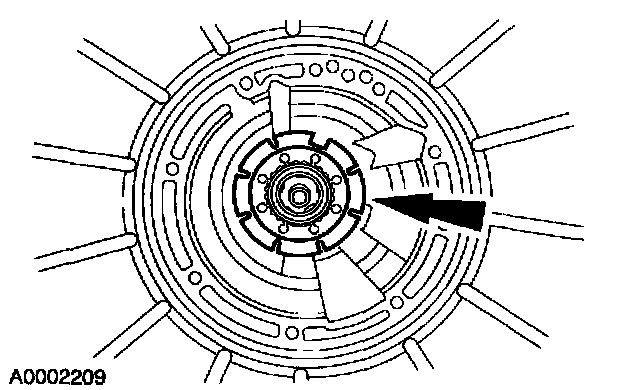
64. Remove the intermediate clutch housing and piston assembly.

65. Remove the intermediate clutch piston spring, clutch plates, and cylinder as an assembly.

66. Remove the low and reverse gear spacer.

67. NOTE: Tag and identify the No. 8 low/reverse planetary carrier thrust bearing.
Remove the thrust bearing.

68. Remove the retaining ring.

69. Remove low/reverse planetary assembly.

70. NOTE: Tag and identify the No. 9 low/reverse planetary carrier thrust bearing.
Remove the thrust bearing.

71. NOTE: Use slots located around the outside of the sleeve.
Using a small pick, remove the output shaft sleeve.

72. WARNING: The output shaft may fall out after removing the snap ring. Failure to follow these instructions may result in personal injury.
CAUTION: Discard the output shaft retaining ring. A new retaining ring must be used for assembly.
While holding the output shaft remove and discard the output shaft retaining ring.

73. Remove the output shaft ring gear and hub.

74. Remove the No. 10 low intermediate sun gear bearing.

75. Remove the reverse band actuating lever shaft.

76. Remove the reverse band actuating lever assembly.

77. NOTE: The inner race of the rear one-way clutch is not removable. It is repaired in the case.
Remove the low/reverse brake drum and one-way clutch assembly by rotating it clockwise.

78. Remove the reverse band.

79. Remove the output shaft and park gear.

80. NOTE: Tag and identify the No. 11 output shaft thrust washer.
Remove the output shaft thrust washer.

81. CAUTION: To avoid damage, make sure the wrench does not strike the manual valve inner lever pin.
Remove the nut.
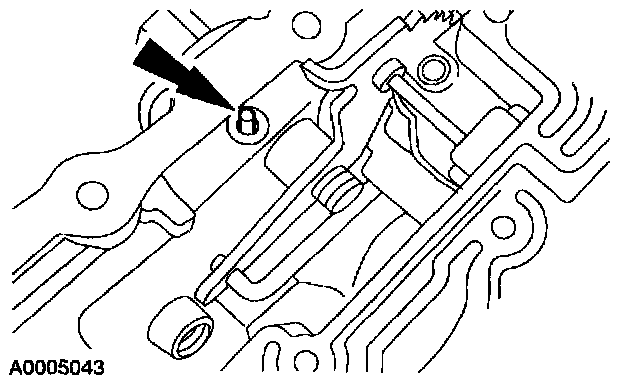
82. Remove the manual lever shaft retaining pin.

83. Remove the manual control lever shaft.

84. Disconnect the manual valve inner lever from the parking lever actuating rod.

85. Remove the manual valve inner lever.

86. Remove the parking lever actuating rod.
87. CAUTION: Do not damage the bore.
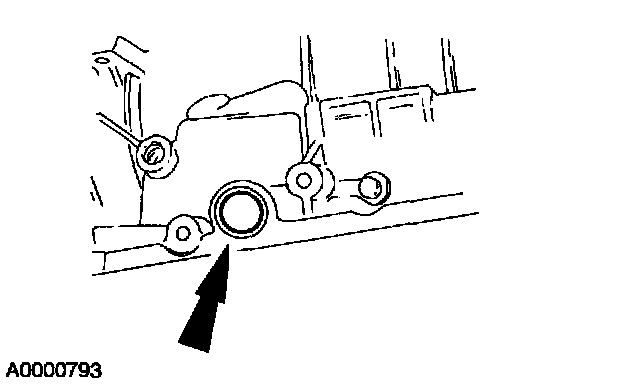
Remove the manual control lever seal.