Installation
Transmission-4x4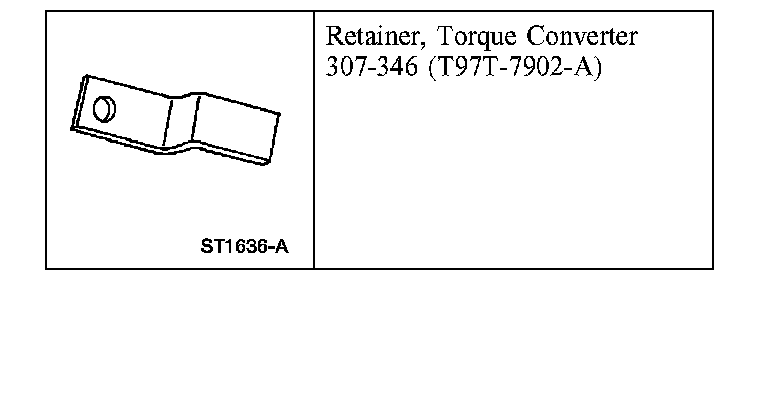
Special Tool(s)
1. WARNING: Secure the transmission to the transmission jack with a safety chain. Failure to follow these instructions can result in personal injury.
Secure the transmission to the transmission jack with a safety chain.
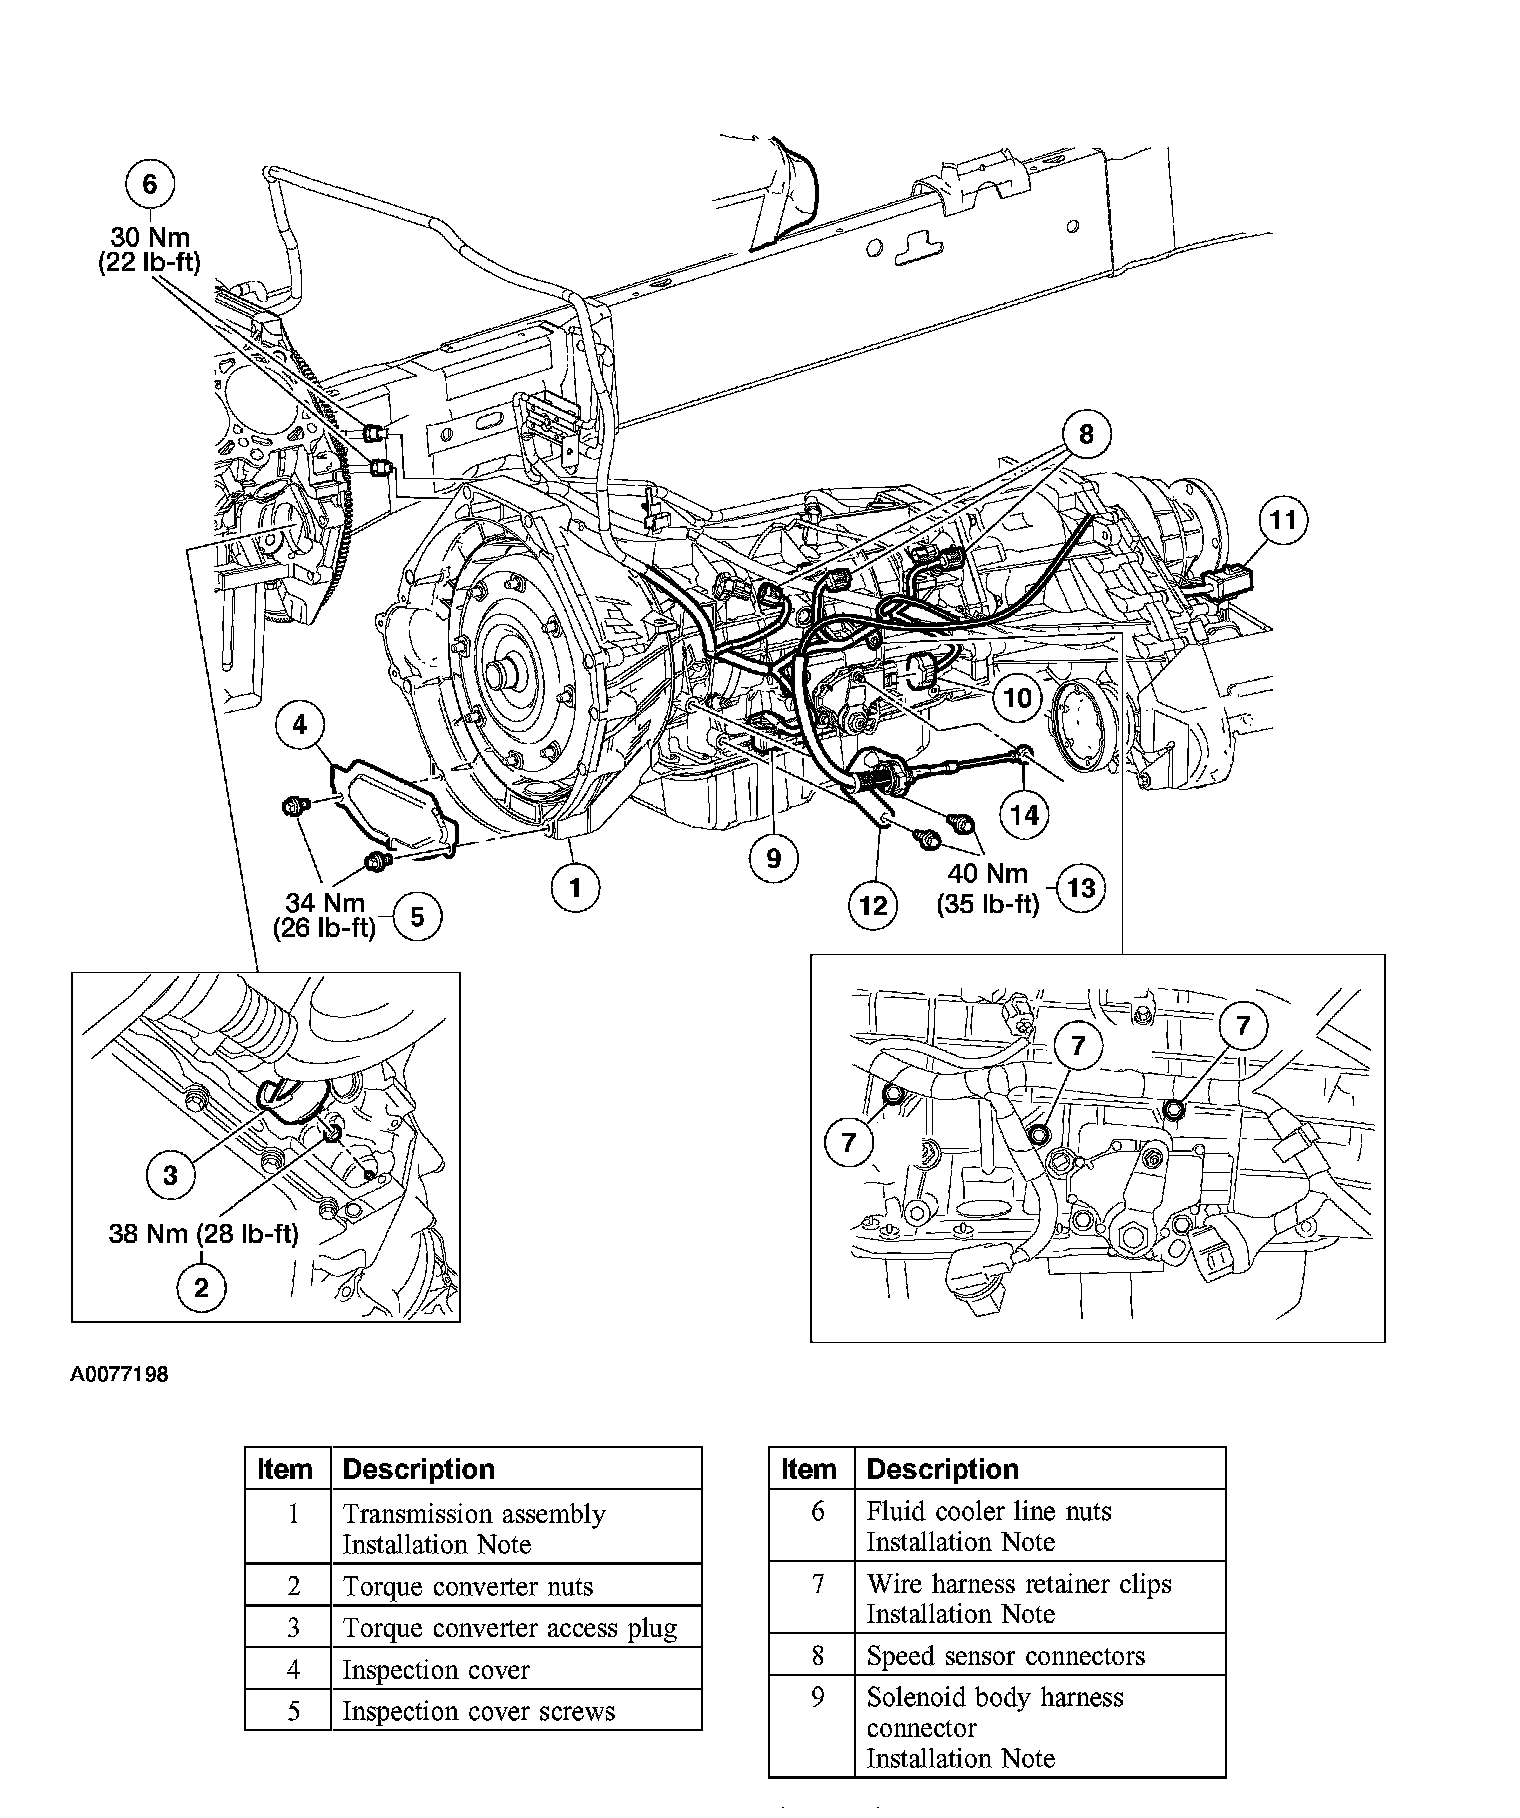
Part 1 Of 6:
Part 2 Of 6:
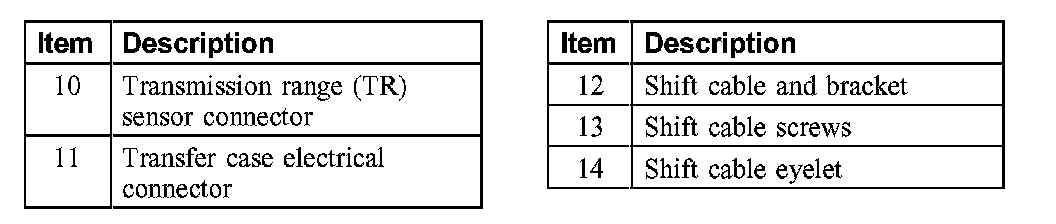
Part 3 Of 6:
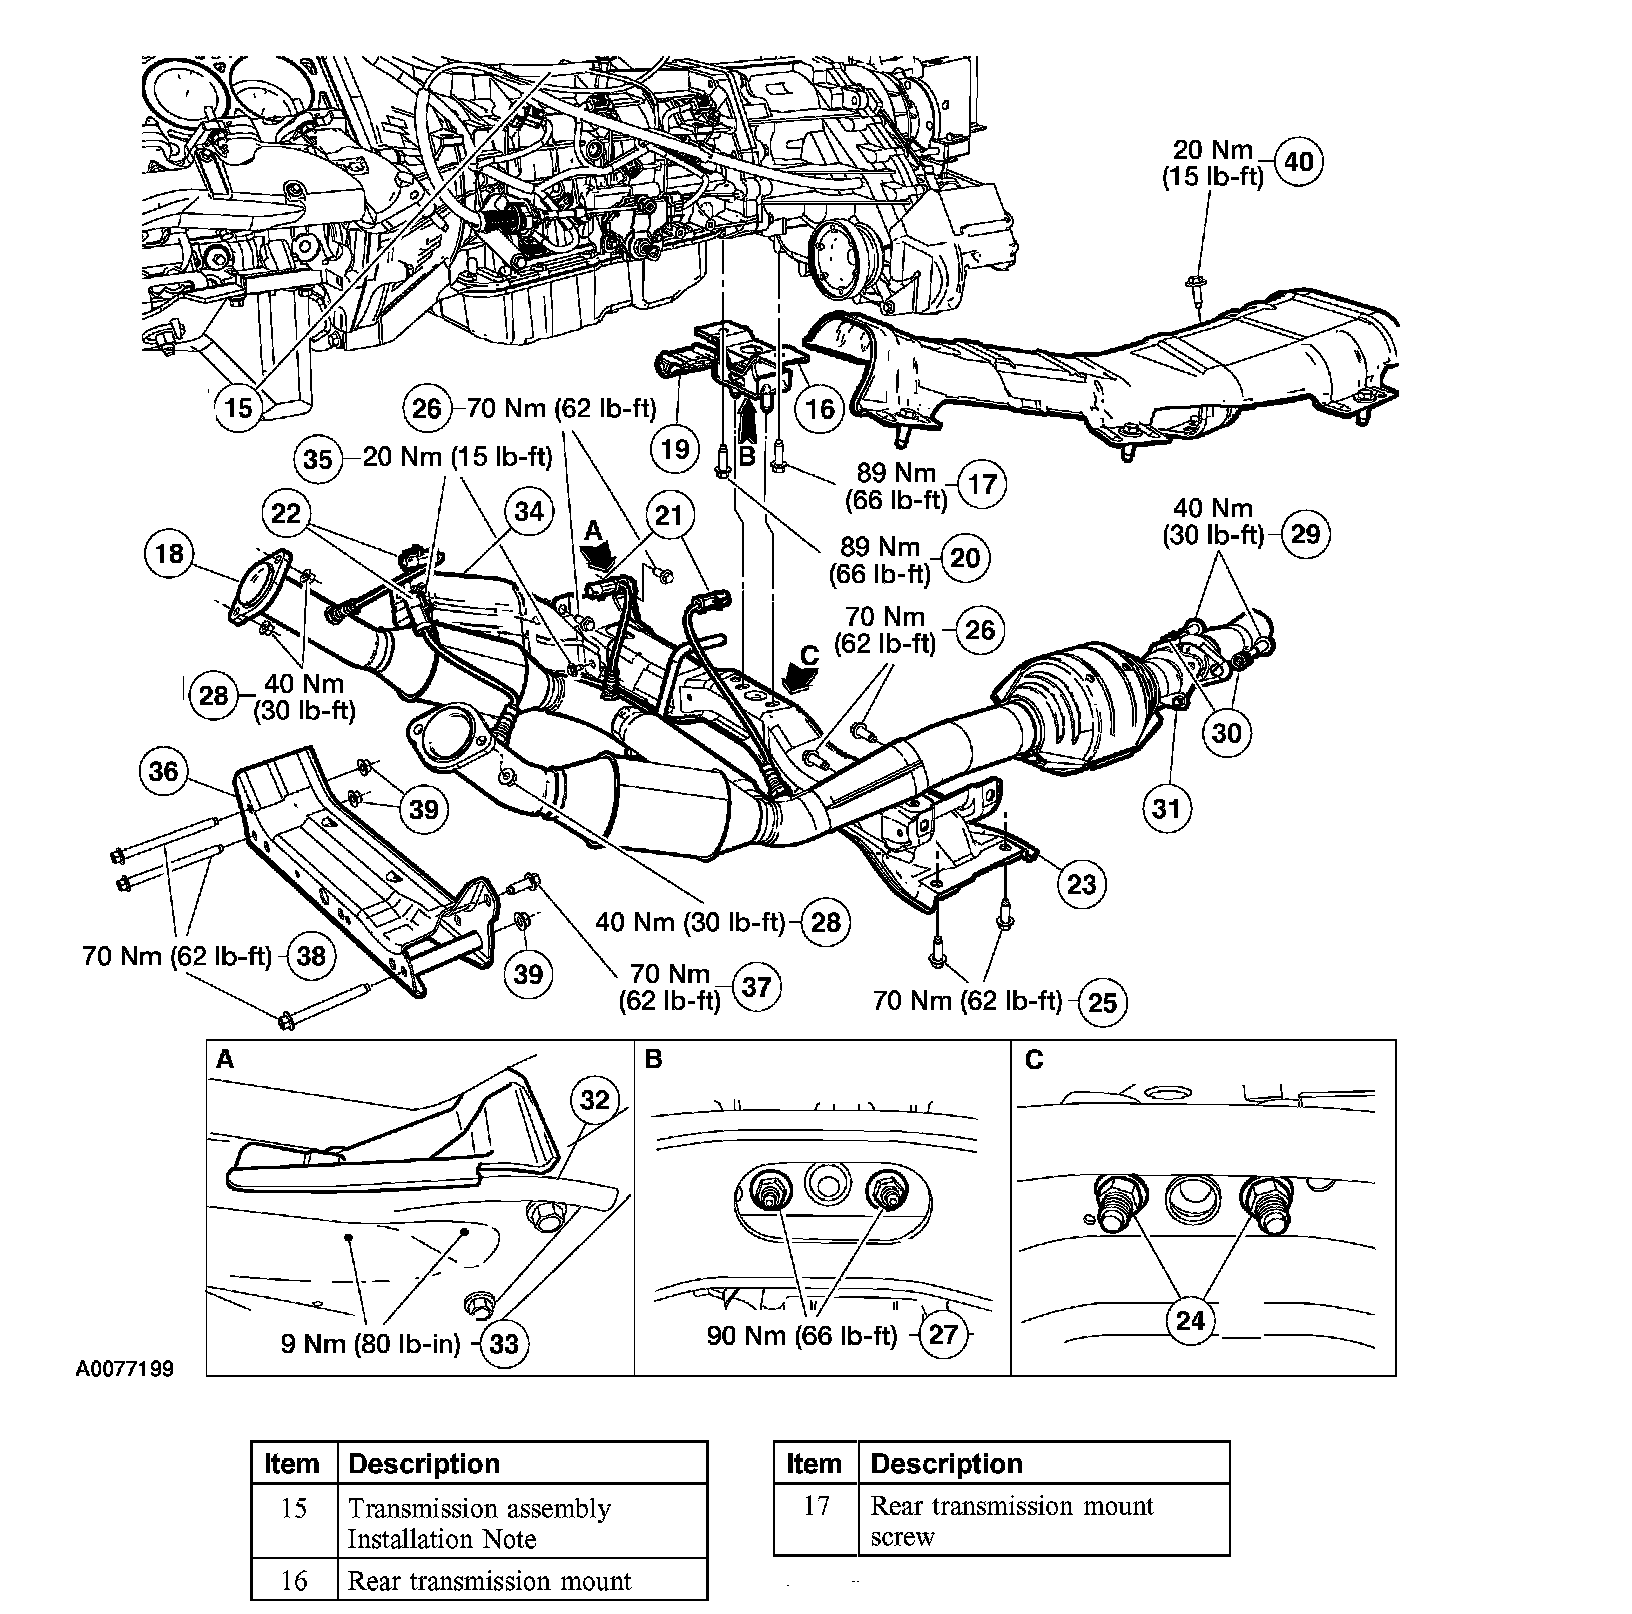
Part 4 Of 6:
Part 5 Of 6:
Part 6 Of 6:
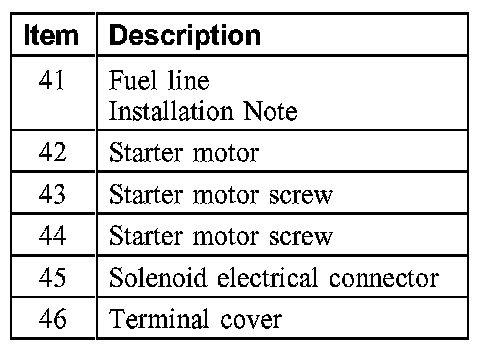
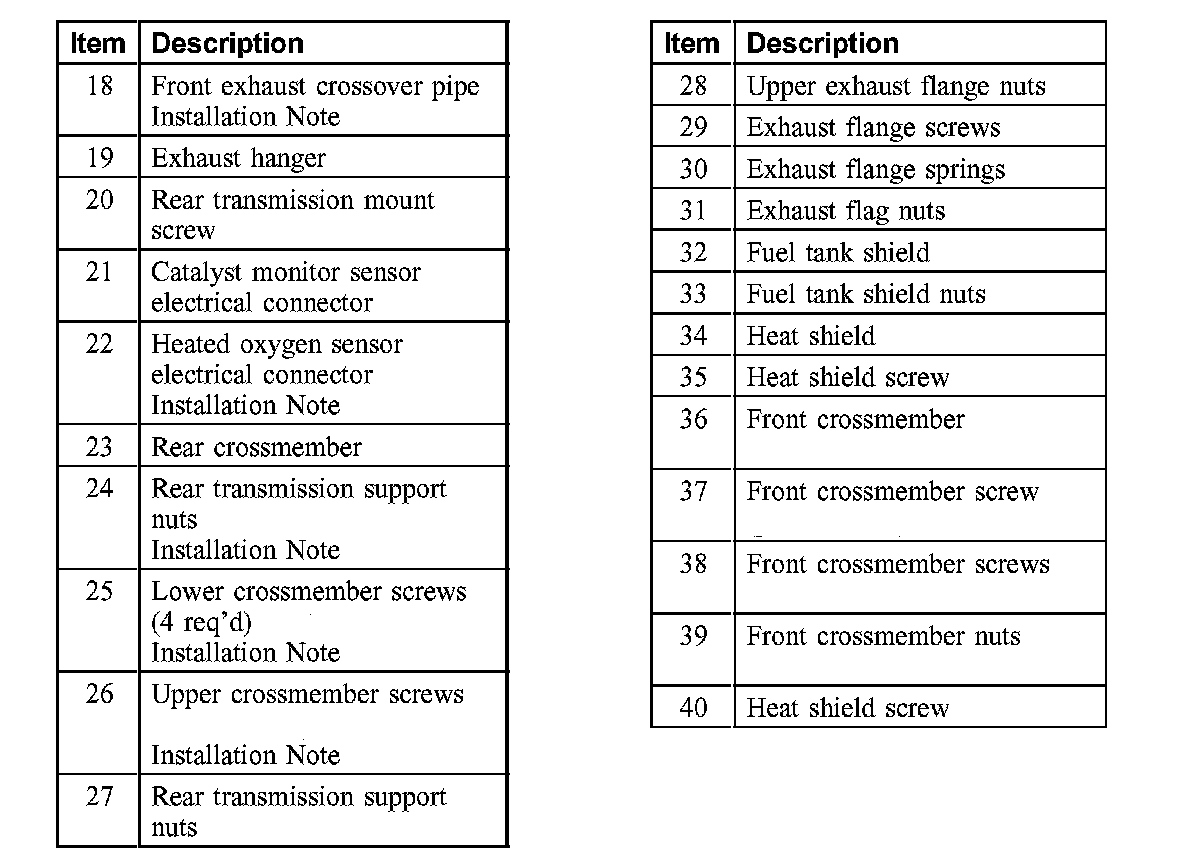
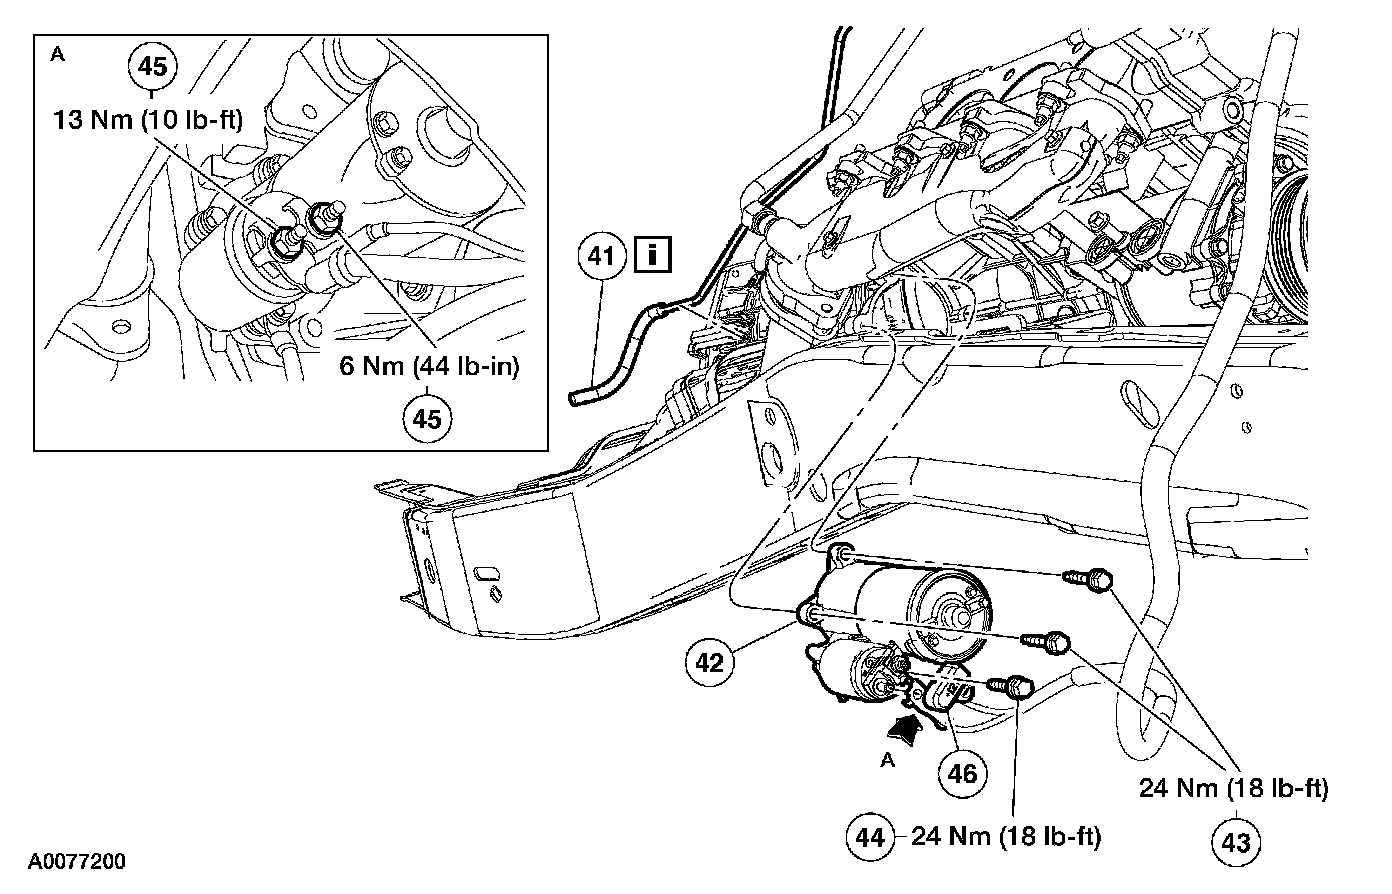
2. Install the components in the order indicated in the above illustration and table.
3. Install the driveshaft.
4. NOTE: When the battery has been disconnected and reconnected, some abnormal drive symptoms can occur while the vehicle relearns its adaptive strategy. The customer needs to be notified that they can experience slightly different upshifts (either soft or firm) and that this is a temporary condition and will eventually return to normal operating condition.
Connect the battery ground cable.
5. Carry out the fluid level check.
6. Verify that the shift cable is correctly adjusted.
7. Check the operation of the transmission and inspect for leaks.
Item 1: Transmission Assembly Installation Note
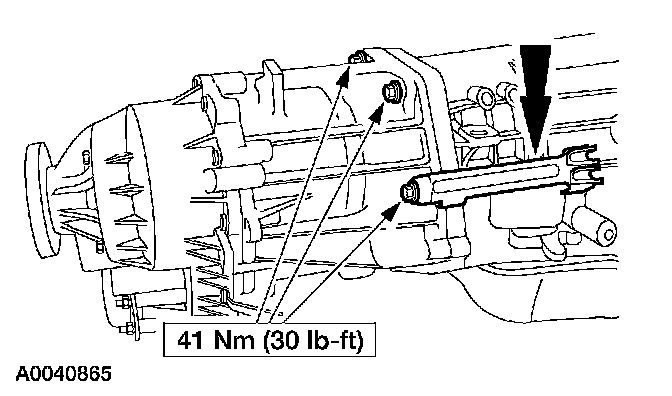
1. WARNING: Secure the transmission to the transmission jack with a safety chain. Failure to follow these instructions can result in personal injury.
If removed, install the transfer case to the back of the transmission, install the bracket and connect the vent hose.
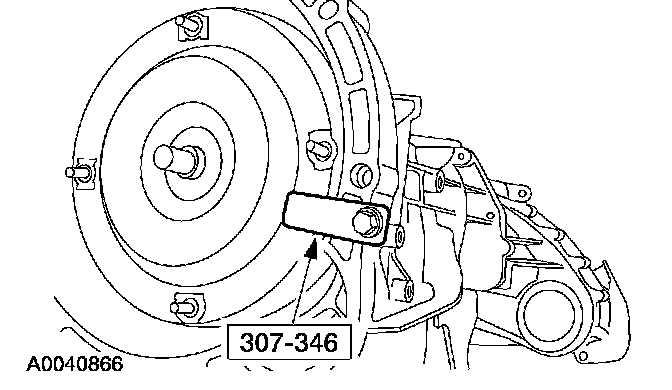
2. Install the special tool.
3. WARNING: Make sure that the transmission and transfer case assembly are secured to the transmission jack with a safety chain. Failure to follow these instructions can result in personal injury.
NOTE: Align the flexplate-to-converter marks made during the removal procedure.
Raise and position the transmission and transfer case to the back of the engine. Remove the special tool prior to attaching the transmission to the engine.
4. Position the fuel line bracket into place prior to installing the transmission retaining screws.
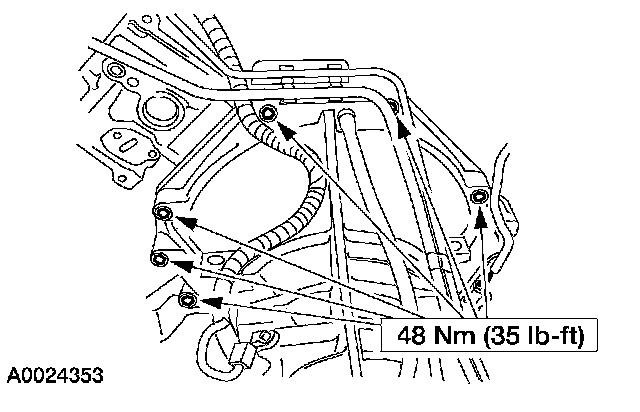
5. Install the seven engine-to-transmission retaining bolts.
Item 6: Fluid Cooler Nuts Installation Note
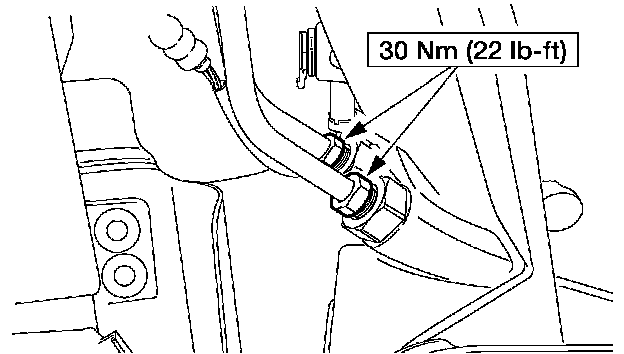
1. CAUTION: Use care not to bend or force the cooler tubes otherwise damage to the cooler tubes and the transmission can result.
Install the transmission fluid cooler tubes.
2. Use the following guidelines for the in-line transmission fluid filter:
^ If the transmission was overhauled and the vehicle was equipped with an in-line fluid filter, install a new in-line fluid filter.
^ If the transmission was overhauled and the vehicle was not equipped with an in-line fluid filter, install a new in-line fluid filter kit.
^ If the transmission is being installed for a non-internal repair, do not install an in-line filter or filter kit.
^ If installing a new or a Ford-authorized remanufactured transmission, install the in-line transmission fluid filter that is supplied.
^ Prior to lowering the vehicle, install a new in-line transmission filter or a filter kit.
Item 7: Wire Harness Retainer Clips Installation Note
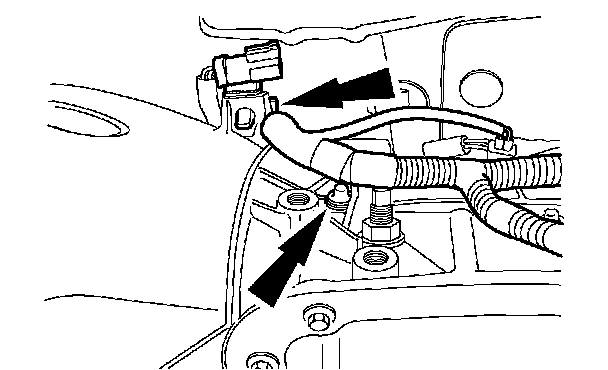
1. Connect the LH Heated Oxygen Sensor (H02S) to the transmission and install the wire harness.
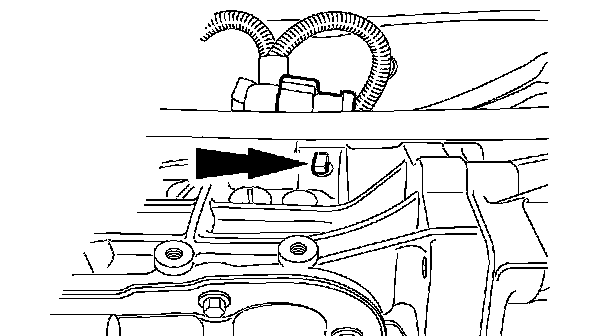
2. Connect the LH catalyst monitor connector to the transmission.
Item 9: Solenoid Body Harness Connector Installation Note
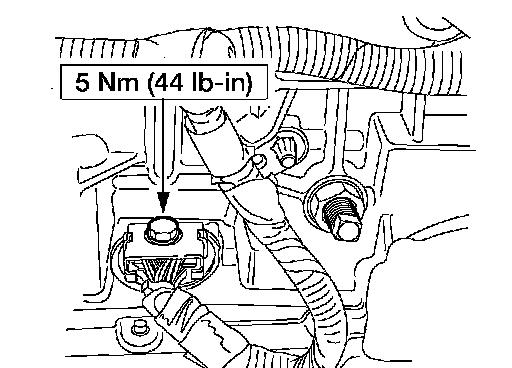
1. CAUTION: Damage will occur to the solenoid body assembly if the screw is tightened above the specification.
NOTE: Always install new O-ring seals on the vehicle harness connector.
NOTE: Clean the area around the connector to prevent contamination of the solenoid body connector.
NOTE: Use petroleum jelly to lubricate the O-ring seals to aid in the installation process.
Install and lubricate new O-ring seals on the transmission connector and connect the connector.
Item 15: Transmission Assembly Installation Note
1. Remove the transmission jack.
2. Install a jackstand under the transfer case.
Item 18: Front Exhaust Crossover Pipe Installation Note
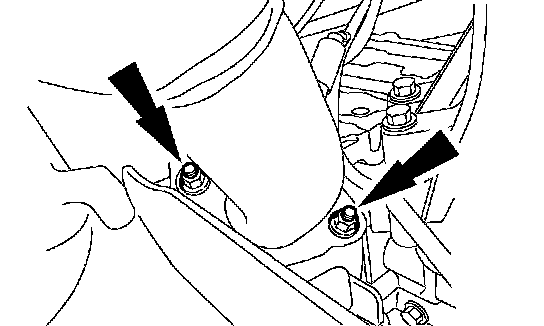
1. NOTE: This step may require an assistant.
Position the catalytic converter assembly with the heat shield and loosely install the four converter-to-manifold nuts.
Item 22: Heated Oxygen Sensor Electrical Connector Installation Note
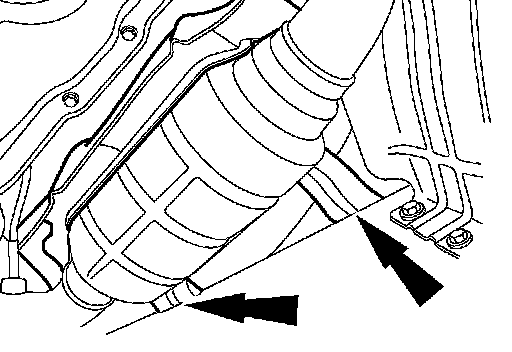
1. Install the two RH head shield bolts.
Item 24: Rear Transmission Support Nuts Installation Note
1. Loosely install the rear transmission support nuts.
Items 25 and 26: Crossmember Installation Note
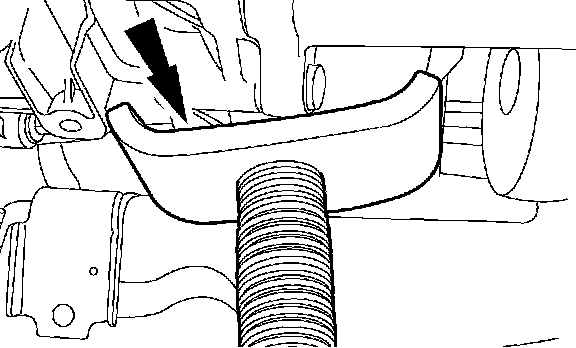
1. Remove the jackstand from under the transfer case.
Item 41: Fuel Line Installation Note
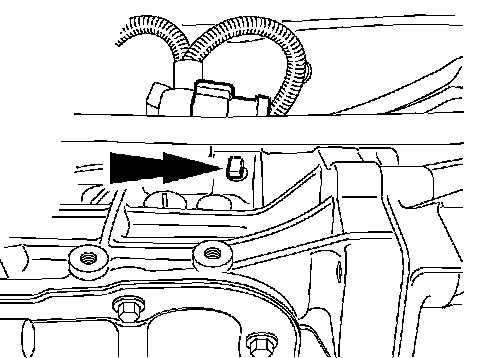
1. Connect the fuel lines and the RH catalyst monitor connector to the bracket.