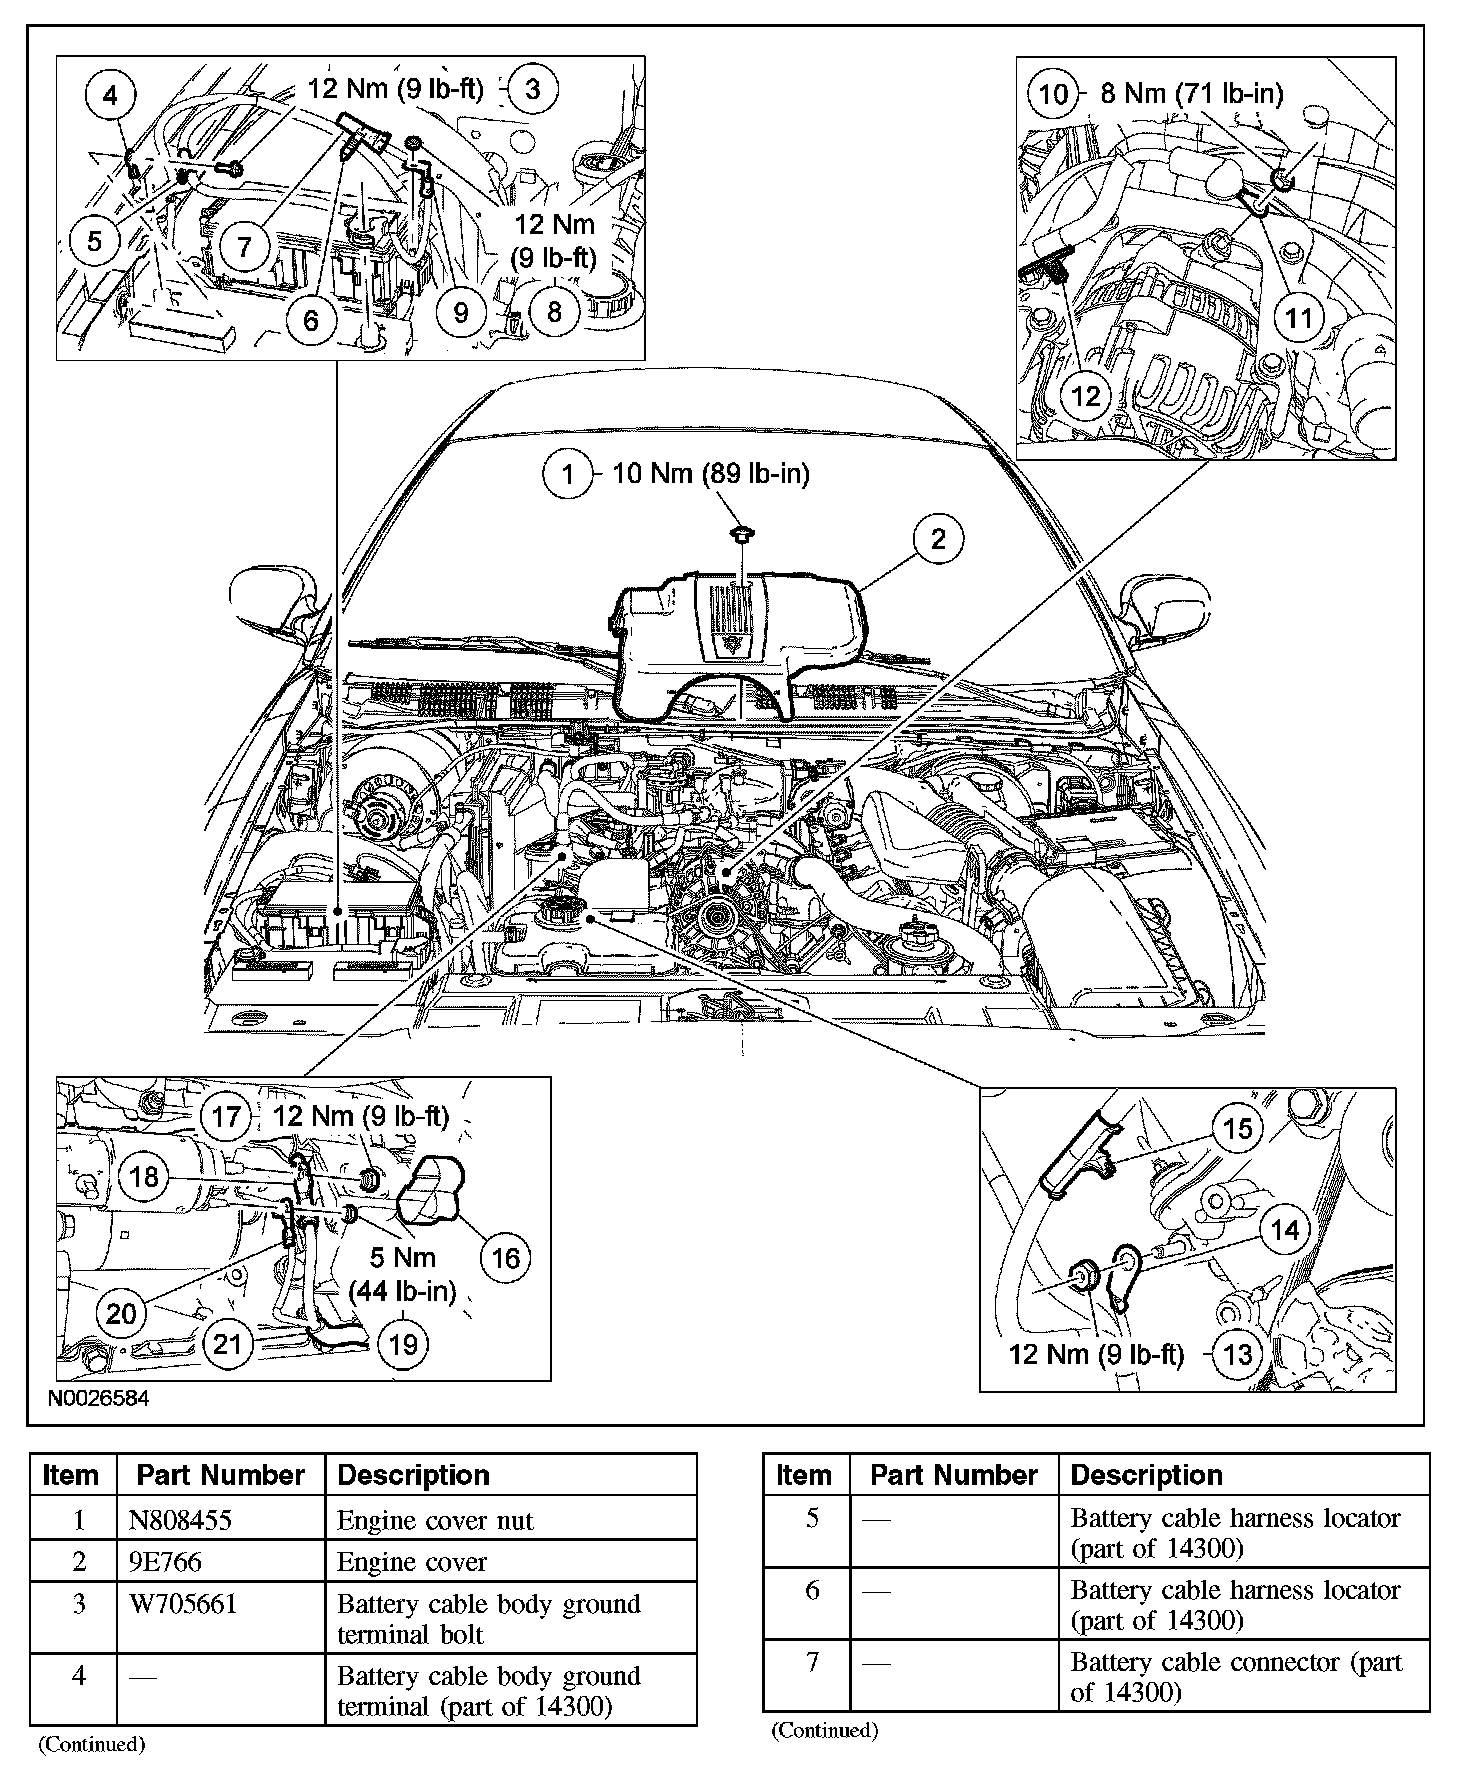
Battery Cable: Service and Repair
BATTERY CABLESPart 1:
Part 2:
Removal and Installation
1. With the vehicle in NEUTRAL, position it on a hoist.
2. Disconnect the battery.
3. Remove the nut and the engine cover.
- To install, tighten to 10 Nm (89 lb-in).
4. Remove the bolt and position the battery cable body ground terminal aside.
- To install, tighten to 12 Nm (9 lb-ft).
5. Release the 2 battery cable harness locators from the fenderwell.
6. Remove the nut and position the BJB cable terminal aside.
- To install, tighten to 12 Nm (9 lb-ft).
7. Remove the nut and position the generator B+ terminal aside.
- To install, tighten to 8 Nm (71 lb-in).
8. Release the battery cable harness locator from the generator bracket.
9. Remove the nut and position the battery cable engine ground terminal aside.
- To install, tighten to 12 Nm (9 lb-ft).
10. Release the battery cable harness locator from the valve cover stud bolt.
11. Remove the starter terminal cover.
12. Remove the nut and position the starter solenoid positive terminal aside.
- To install, tighten to 12 Nm (9 lb-ft).
13. Remove the nut and position the starter solenoid wire terminal aside.
- To install, tighten to 5 Nm (44 lb-in).
14. Remove the battery cable harness.
- Release the 3 remaining battery cable harness locators.
15. To install, reverse the removal procedure.