A/T Position Indicator - Adjusting Pointer After Repair
89mazda04Category Applicable Model/s
7 1989 MPV
Subject Bulletin No. 055/89
ADJUSTMENT OF A/T Issued 5/25/89
POSITION INDICATOR Revised
DESCRIPTION
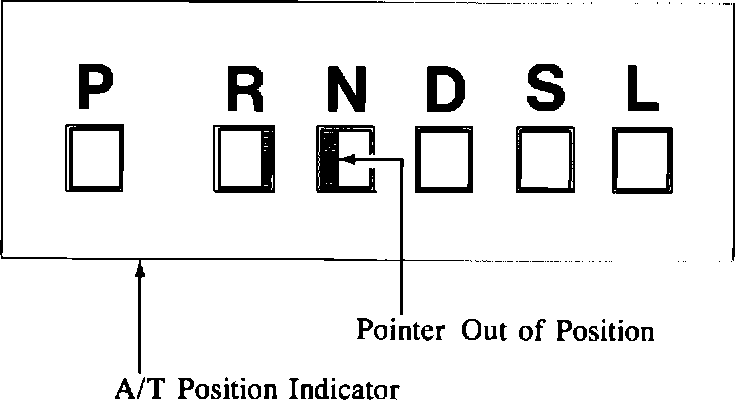
There is a possibility that the pointer of the A/T position indicator can come out of position when the instrument cluster is removed and reinstalled or the shift lever linkage and/or related parts are replaced.
Methods of adjusting this pointer are not clearly mentioned in the latest Workshop Manual and it does not mention that it is necessary to use an adjusting pin to set the pointer in its correct position.
Adjust the A/T position indicator using the adjusting pin provided and referring to the procedures listed in this Service Bulletin.
ADJUSTMENT PROCEDURES
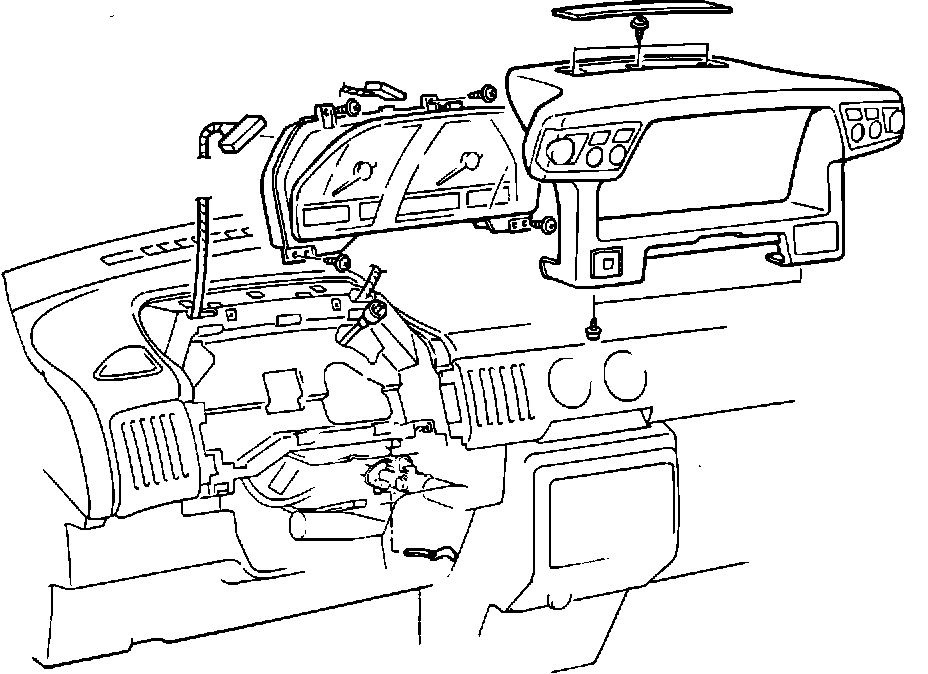
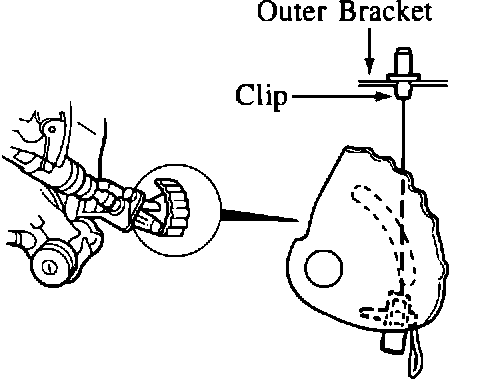
1. Remove the instrument cluster as shown in the figure.
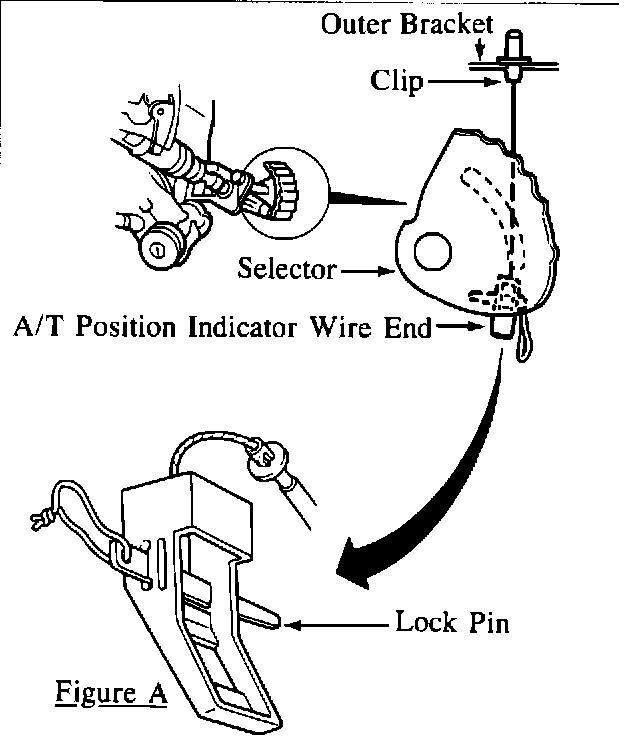
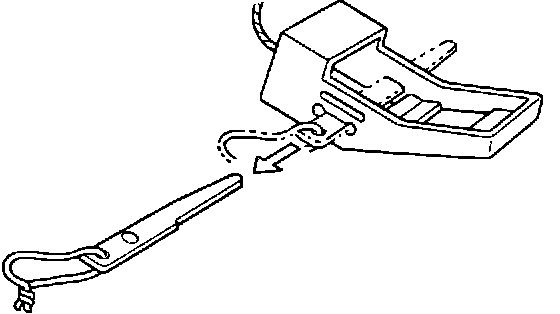
2. Disconnect the A/T position indicator wire end from the selector by slightly pulling it in the direction indicated.
NOTE:
Do not apply excessive force to the indicator wire. Some early production vehicles have a lock pin in the wire end as shown in Figure A. For these vehicles, remove the lock pin first, then disconnect the wire end.
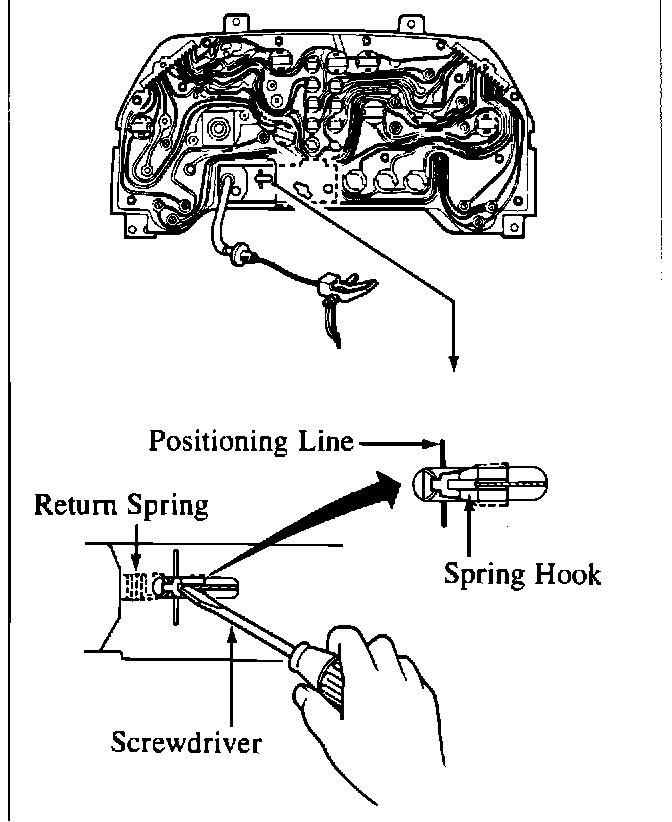
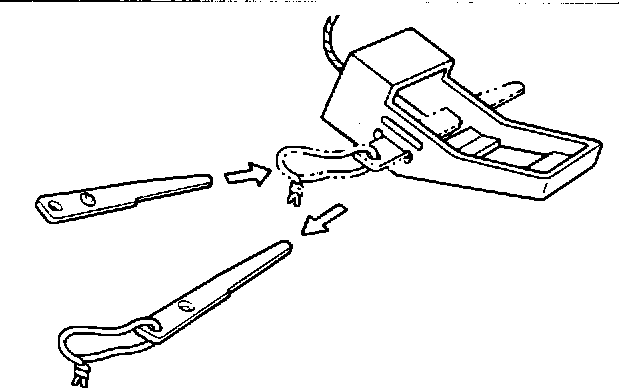
3. Using a small screwdriver, align the spring hook with the positioning line as shown in the figure.
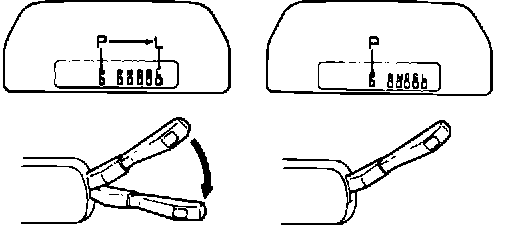
4. Pull the indicator wire until it just stops; then release it and verify that the position indicator is centered in P position.
NOTE:
Be careful not to move the position indicator after aligning it.
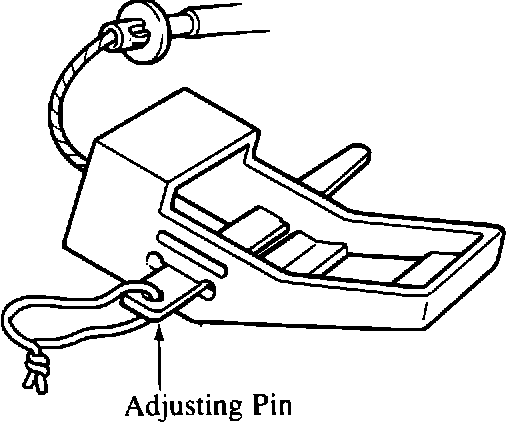
5. Install the adjusting pin into the position indicator wire end as shown in the figure.
NOTE:
Be sure to install the adjusting pin in the correct position.
6. Install the instrument cluster.
7. Verify that the selector lever is in P range.
8. Mount the A/T position indicator wire housing onto the outer bracket using the clip.
9. Hook the position indicator wire onto the selector.
10. Turn the ignition switch to ACC.
11. Move the selector lever from P to L and then to P again. Verify that the position indicator indicates the correct positions.
For the vehicles which have a lock pin:
12. Remove the adjusting pin and install the lock pin.
For the vehicles which do not have a lock pin:
12. Remove the adjusting pin.
WARRANTY INFORMATION
Operation No: K0409X-R-X (Select Indicator and/or Bulb, R&R)
Labor Hour: 0.4 Hr.