D. Modification of Vehicle Relay Box
1. Open the relay box and remove the blower motor relay.2. Check the blower motor relay terminal for discoloration due to excess heat.
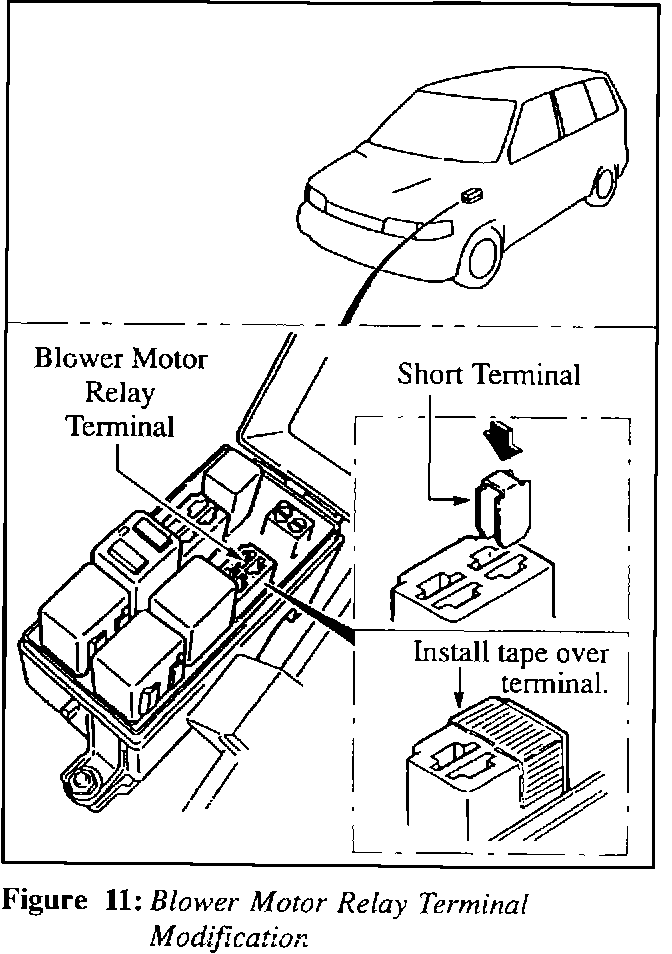
a) If it is not discolored, insert the short terminal as shown. Figure 11.
b) Cover short terminal with electrical tape and proceed to step 9.
c) If it is discolored, proceed as outlined in steps 3 through 8.
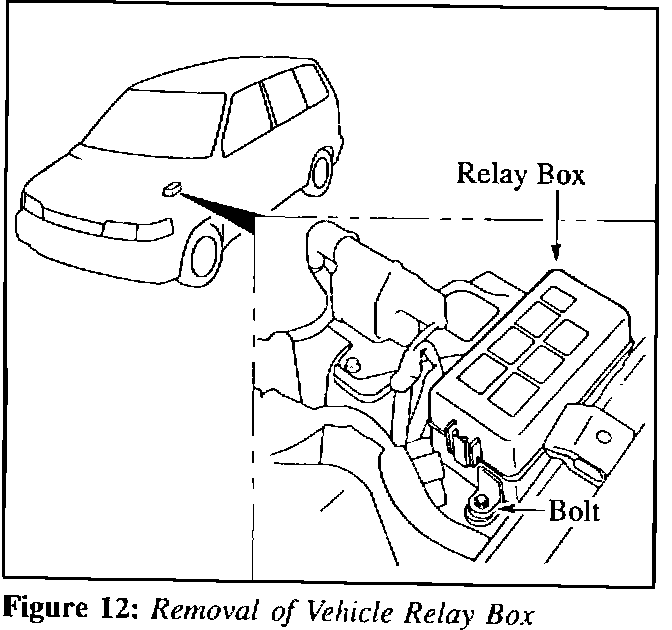
3. Remove the vehicle relay box. Figure 12.
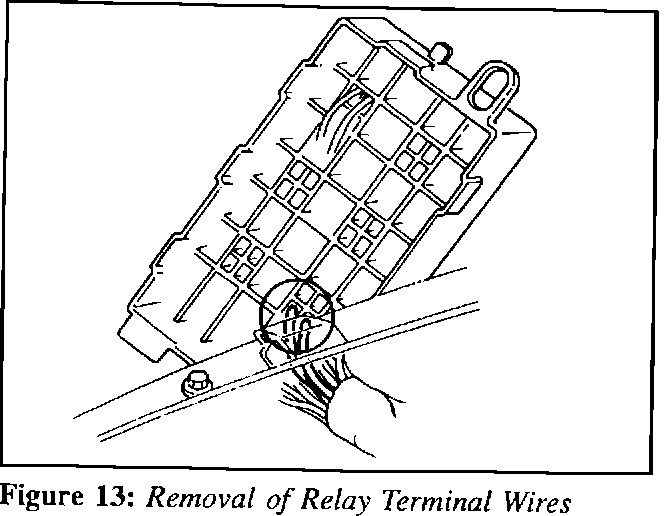
4. From the bottom of the box, remove the blue and blue/orange wires from the blower motor relay terminal. Figure 13.
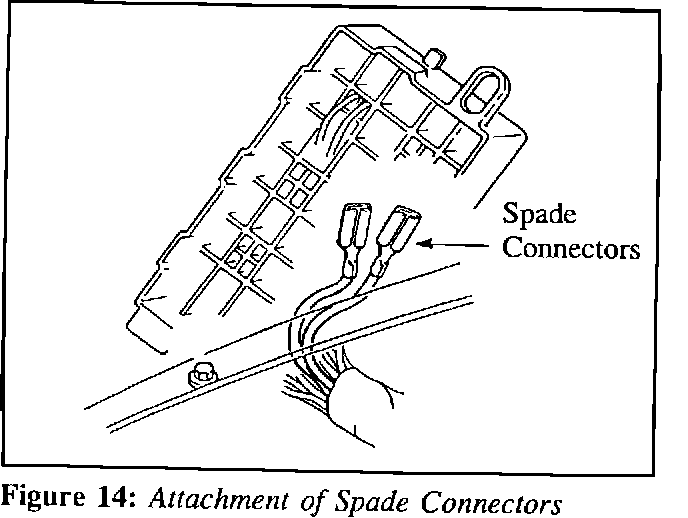
5. Attach the two (2) spade connectors from the repair kit to the blue and blue/orange wires (removed in step 4). Figure 14.
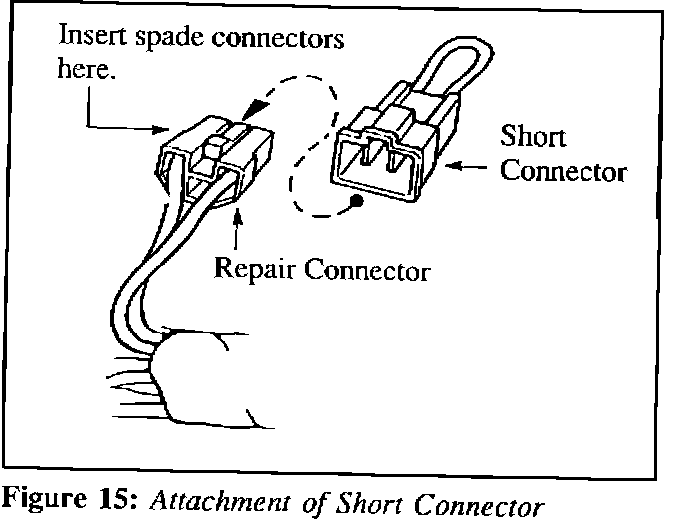
6. Insert the two (2) spade corLnectors into the repair connector contained in the repair kit. Figure 15.
7. Connect the repair corinector with the short connector contained in the repair kit.
8. Reinstall the relay box.
9. Attach the negative battery terminal.