Clutch: Service and Repair
Fig. 7 Clutch Replacement.:
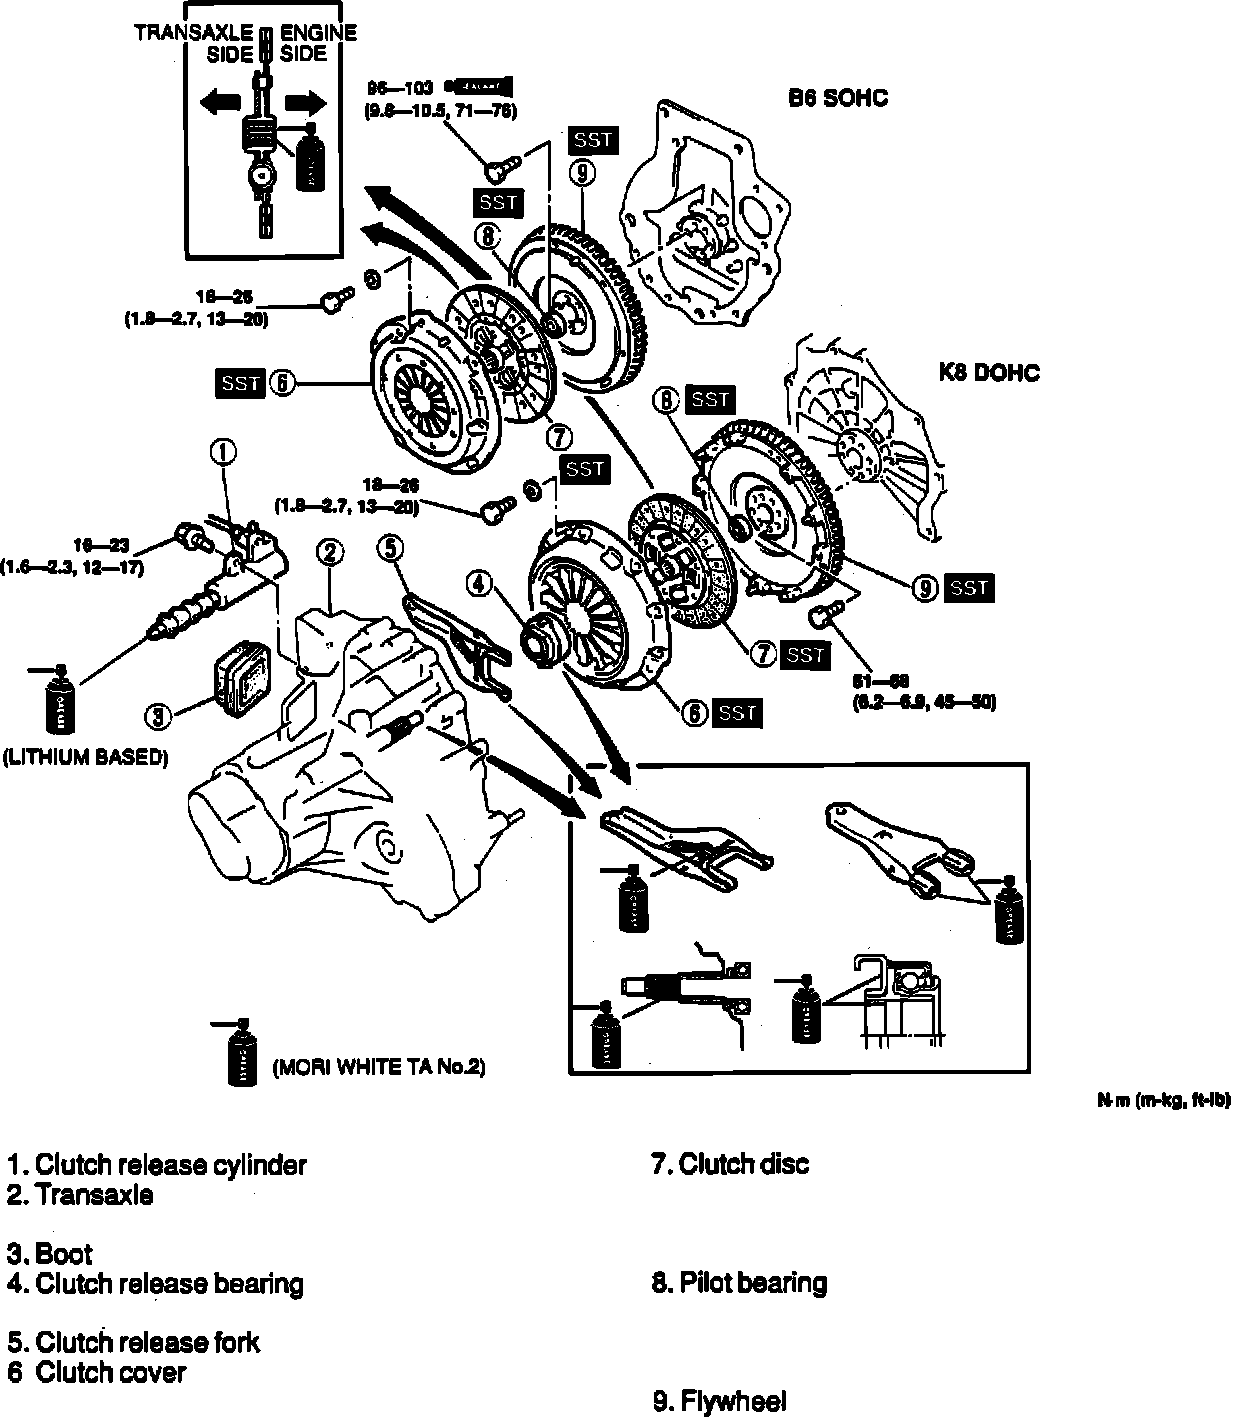
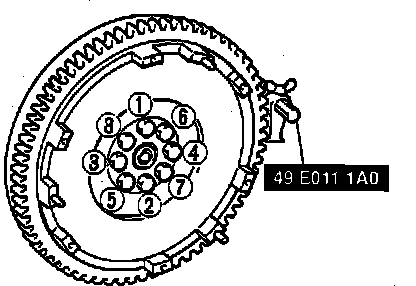
Fig. 8 Flywheel Bolt Tightening Sequence.:
Remove clutch in numbered sequence shown in Fig. 7, noting the following:
1. Remove clutch cover as follows:
a. Install flywheel holding fixture No. 49-E011-1AO and Clutch Pilot tool No. 49-SE01-310A or equivalents.
b. Loosen each bolt one turn at a time in a crisscross pattern until spring tension is released.
c. Remove clutch cover and disc.
2. Remove pilot bearing with puller No. 49-1285-071 and bearing removal tool No. 49-1285-073 or equivalents. Do not remove pilot bearing unless necessary.
3. Install flywheel mounting bolts in numbered sequence, Fig. 8. When reusing the bolts, clean and apply sealant to the threads, no sealant is necessary when new bolts are used.
4. Install clutch cover by torquing bolts evenly and gradually in sequence shown in Fig. 9, to of 13-20 ft. lbs.
5. Install pilot bearing into flywheel with suitable piece of pipe. Depth of press should be 0-0.16 inch.
6. Measure thickness of lining on clutch disc. Thickness should be a minimum of .012 inch.
7. Using dial indicator, measure clutch disc runout. Runout should be .027 inch maximum.
8. Using dial indicator, measure flywheel runout. Runout should be .008 inch maximum.
9. Inspect the flatness of the pressure plate contact surface with a straightedge and feeler gauge. Maximum warpage should not exceed 0.020 inch.
10. Reverse procedure to install.