Oil Pump
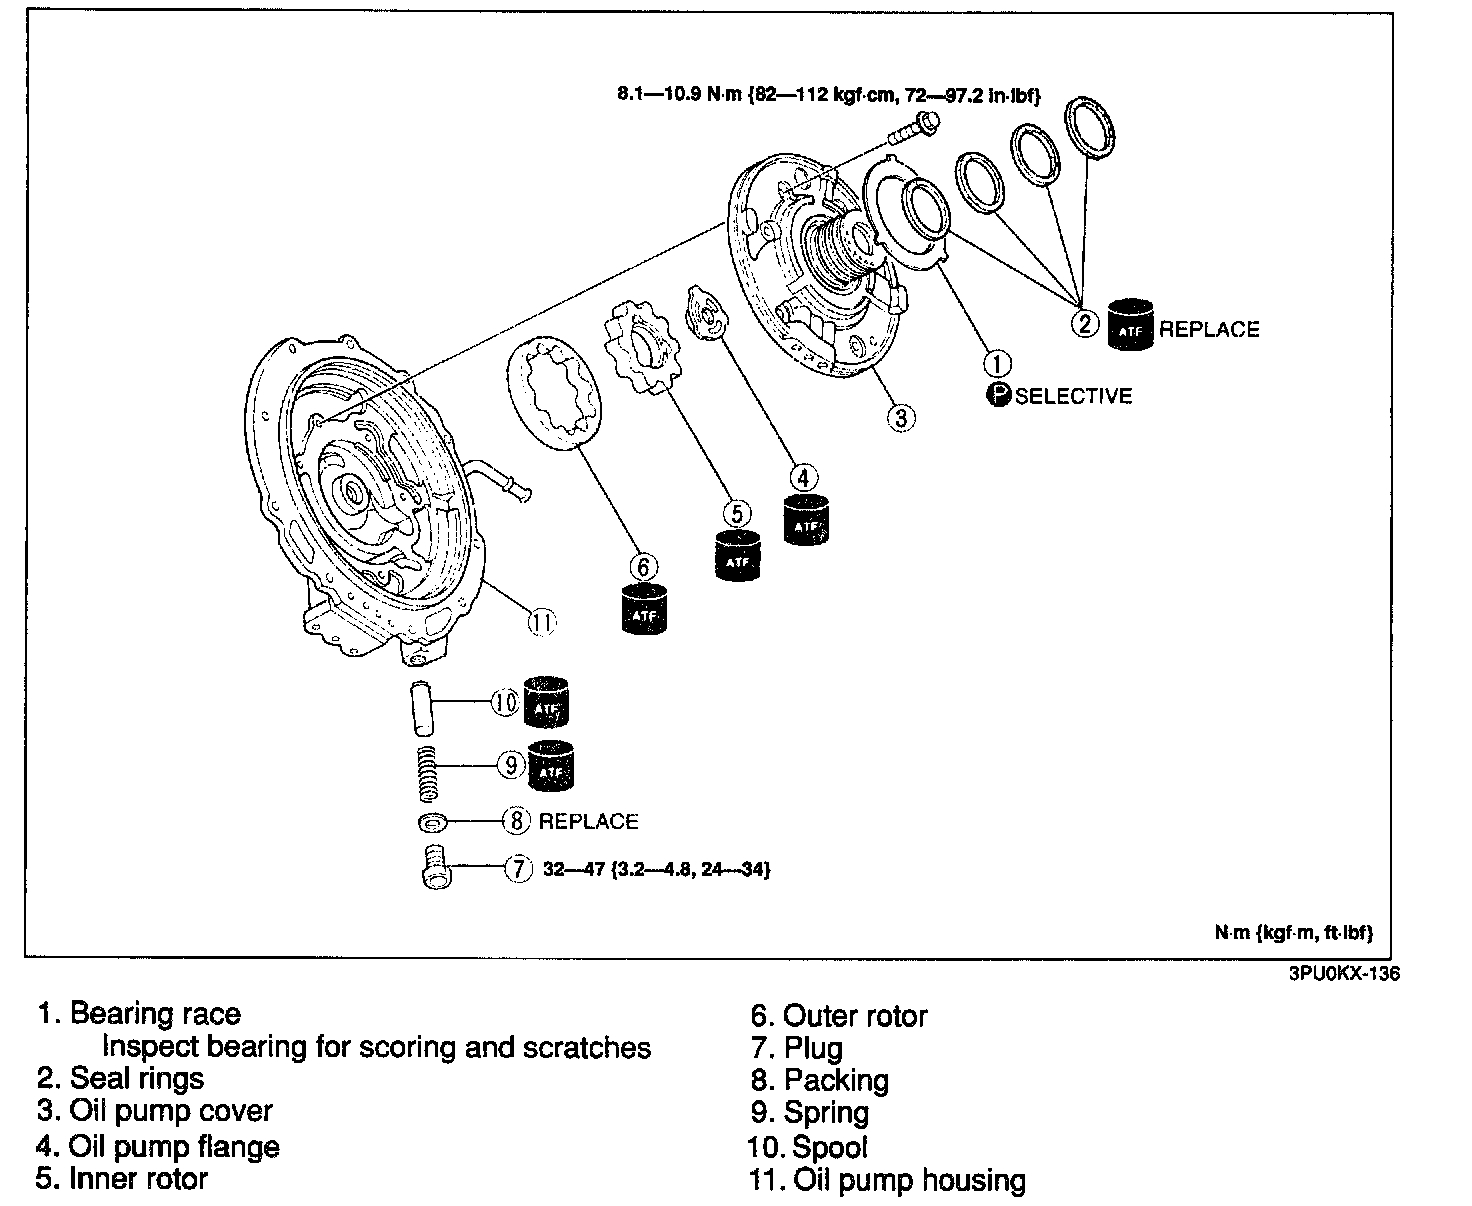
Disassembly/Inspection/Assembly
1. Disassemble in the order shown in the figure, referring to Disassembly Note.
2. Inspect all parts and repair or replace as necessary.
3. Assemble in the reverse order of disassembly, referring to Assembly Procedure.
Disassembly note
Oil pump cover
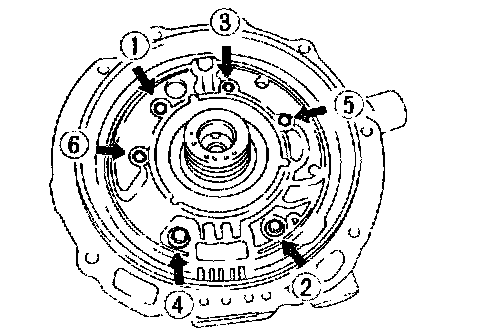
Loosen the mounting bolts evenly in the pattern shown and remove the oil pump cover from the oil pump housing.
Inner rotor, outer rotor
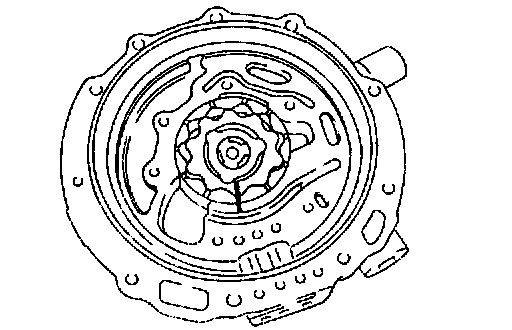
CAUTION: Do not use a punch to mark the outer and inner rotors.
Mark the outer and inner rotors.
Inspection
Oil pump housing, outer rotor, inner rotor
NOTE: Make several measurements and calculate the average value.
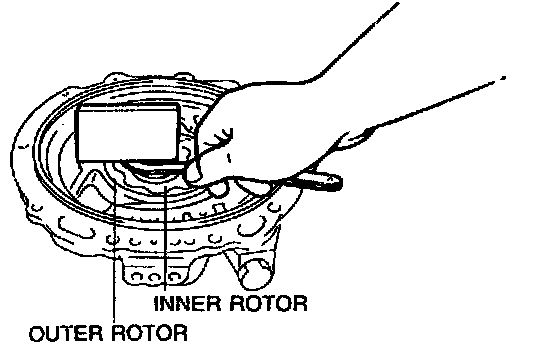
1. Measure the clearance between the end of the oil pump housing and the outer rotor and inner rotor.
Clearance
Standard: 0.02 - 0.04 mm (0.00079 - 0.00157 in)
Maximum: 0.05 mm (0.00197 in)
2. If not as specified, replace the oil pump assembly.
NOTE: Make several measurements and calculate the average value.
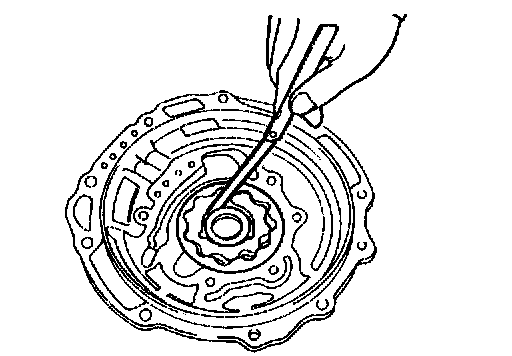
3. Measure the clearance between the oil pump boss and the inner rotor.
Oil clearance
Standard: 0.040 - 0.115 mm (0.00157 - 0.00453 in)
Maximum: 0.125 mm (0.00492 in)
4. If not within specification, replace the oil pump assembly.
Spring
NOTE: Do not compress the spring when measuring it with vernier calipers.
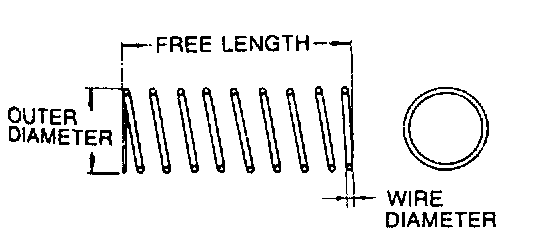
Specification:
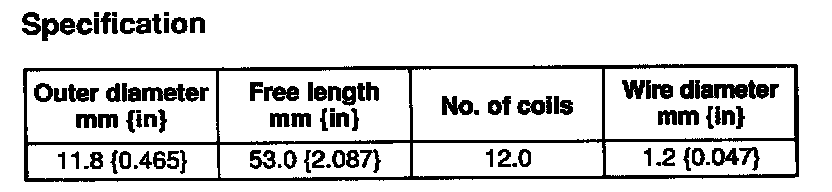
1. Measure the spring free length.
2. If not as specified, replace the spring.
Spool
NOTE: Make several measurements and calculate the average value.
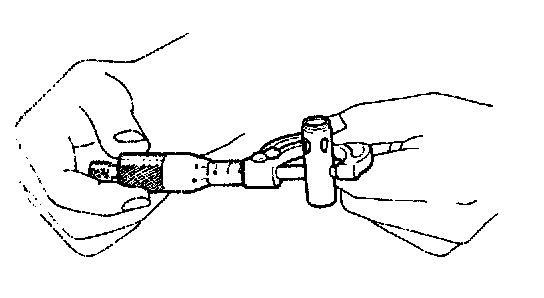
1. Measure the spool and check for wear. Outer diameter
Standard: 14.00 mm (0.551 in)
Minimum: 13.98 mm (0.550 in)
2. If not as specified, replace the oil pump assembly.
Assembly procedure
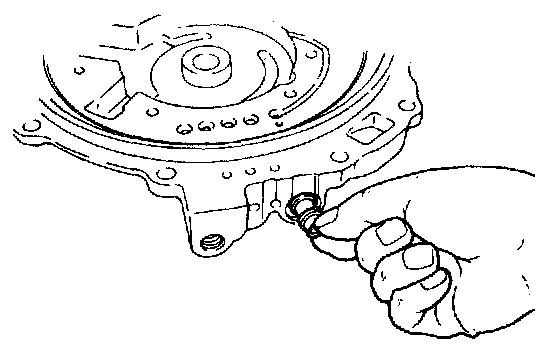
1. Install the spool and spring into the oil pump housing and verify that the spool moves smoothly.
2. Install a new packing and the plug.
Tightening torque: 32 - 47 N.m (3.2 - 4.8 kg.m, 24 - 34 ft.lb)
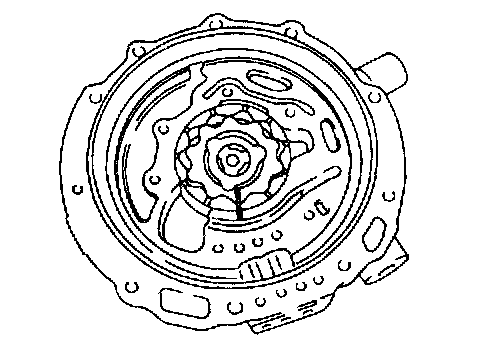
3. Align the marks and install the outer and inner rotors.
4. Install the oil pump flange.
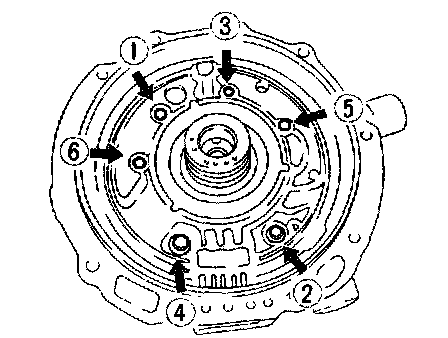
5. Mount the oil pump cover onto the oil pump housing.
6. Tighten the bolts evenly and gradually in the order shown.
Tightening torque: 8.1 - 10.9 N.m (82 - 112 kg.cm, 72 - 97.2 in.lb)
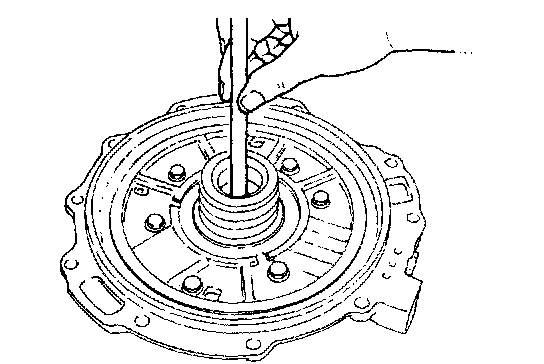
7. Install the oil pump shaft and verify smooth oil pump operation.
CAUTION: Do not damage the seal rings when installing them.
NOTE: Seal ring inner diameter: 39.45 mm (1.553 in)
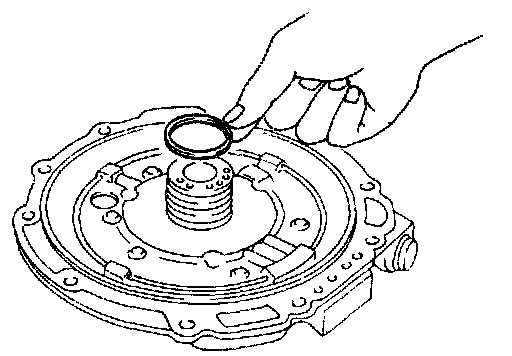
8. Apply ATF to new seal rings and install them onto the oil pump cover.
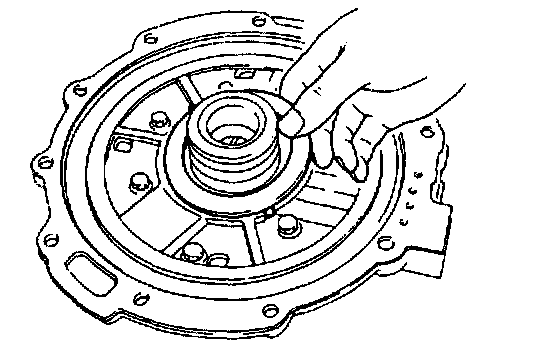
9. Apply petroleum jelly to the bearing race and secure it on the oil pump cover.
Bearing race outer diameter: 88.0 mm (3.46 in)