Removal/Installation
REMOVAL1. Disconnect battery cables and relieve fuel system pressure as outlined under Technician Safety Information.
2. Raise and support vehicle.
3. Drain cooling system.
4. Disconnect intake air temperature sensor and mass airflow sensor connectors.
5. Remove air cleaner assembly.
6. Remove upper intake manifold/throttle body assembly.
7. Remove heater hose retaining screws from cylinder head cover.
8. Remove engine and alternator wiring harnesses.
9. Remove spark plugs and wires, ensuring to mark for installation in original positions.
10. Disconnect vacuum hoses.
11. Remove dipstick tube and bracket.
12. Remove EGR valve to exhaust manifold tube.
13. Remove cylinder head cover.
14. Remove drive belt.
15. Recover refrigerant from A/C system, then disconnect A/C compressor and position aside with hoses attached.
16. Remove power steering pump bracket and position aside with hoses attached.
17. Disconnect alternator connector.
18. Remove lower radiator hose and heater hoses from water inlet tube and thermostat housing.
19. Remove bolts securing water pump inlet tube to alternator bracket.
20. Remove alternator bracket with alternator and ignition coils attached.
21. Remove upper radiator hose and fan clutch.
22. Remove water pump pulley.
23. Remove timing belt and tensioner as outlined under Timing Belt.
24. Remove front engine lifting eye.
25. Remove lower intake manifold.
26. Remove rear engine lifting eye.
27. Remove exhaust manifold.
28. Remove cylinder head and gasket.
INSTALLATION
Fig. 2 Cylinder Head Tightening Sequence:
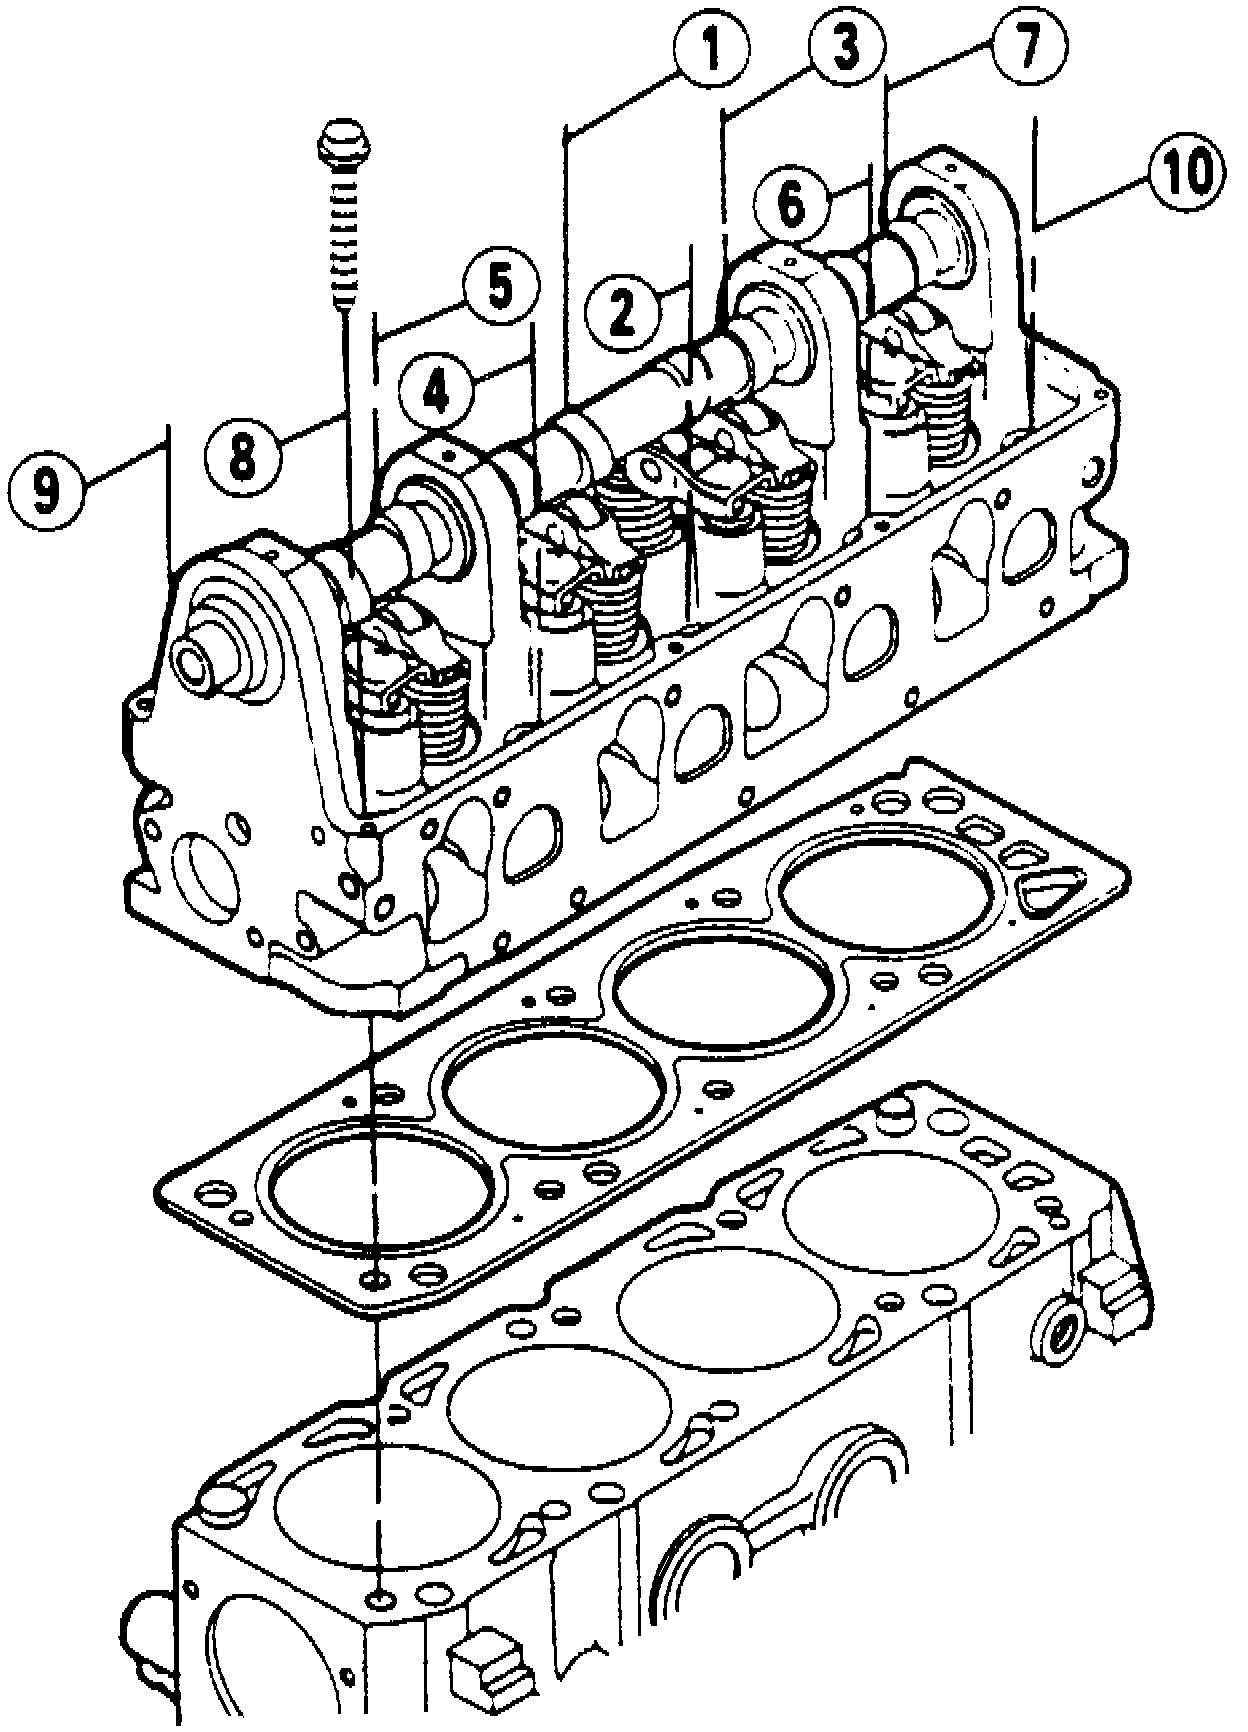
1. Install cylinder head and bolts. Using sequence shown in Fig. 2, tighten cylinder head bolts as follows:
a. First step, torque to 52 ft. lbs.
b. Loosen cylinder head bolts completely, then torque to 52 ft. lbs.
c. Tighten an additional 90°.
2. Install exhaust manifold as follows:
a. Clean exhaust manifold bolts and studs.
Fig. 3 Exhaust Manifold Tightening Sequence:
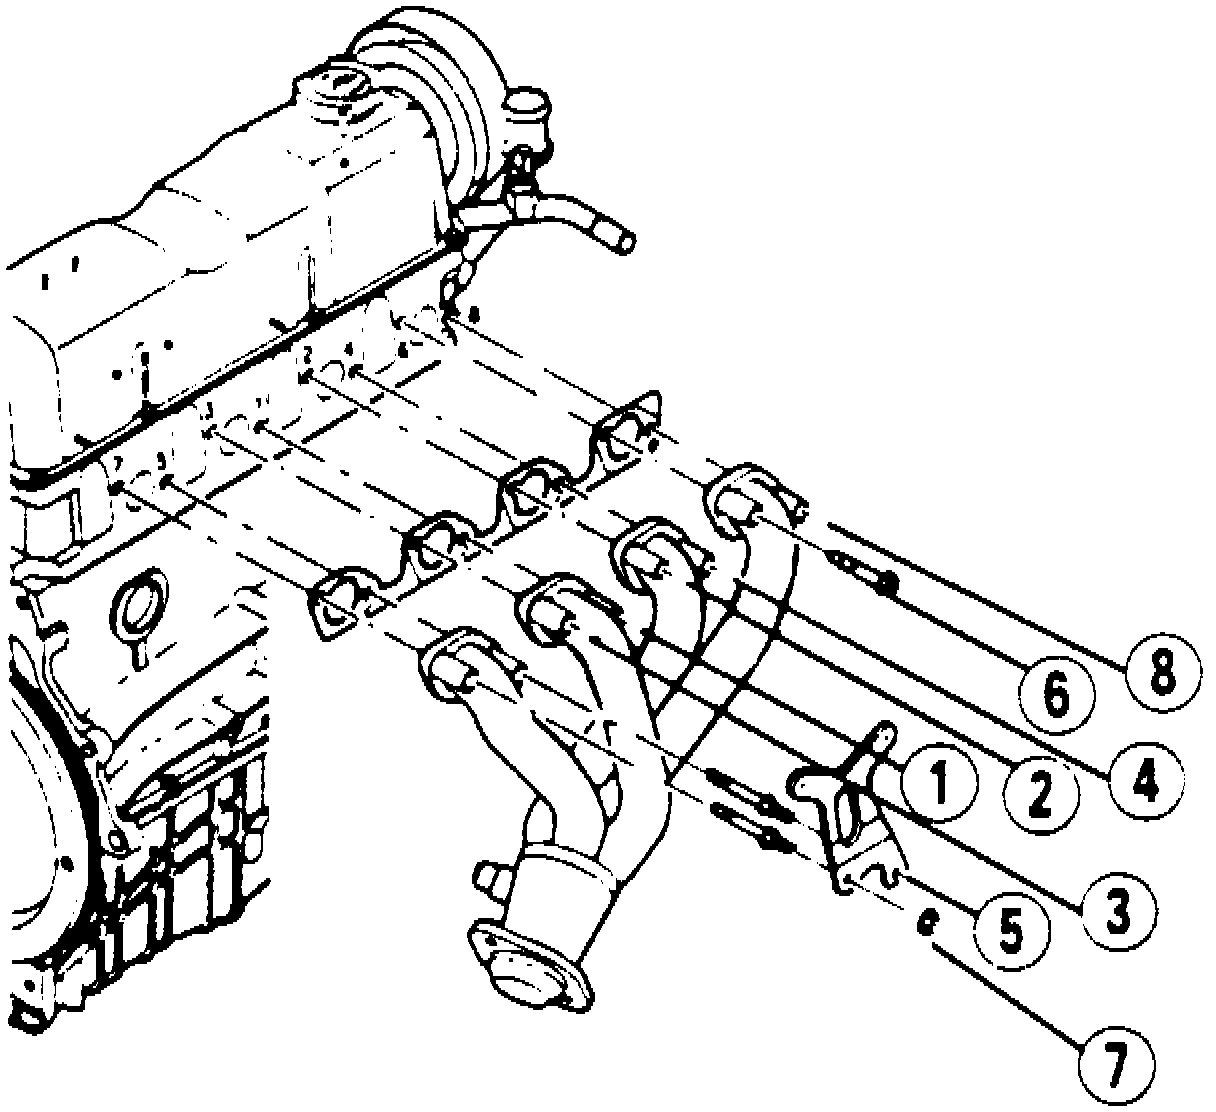
b. Using sequence shown in Fig. 3, torque bolts and nuts in two steps; first to 15-22 ft. lbs., then to 45-59 ft. lbs.
3. Install rear engine lifting eye.
4. Install lower intake manifold as follows:
a. Clean lower intake manifold gasket surface.
b. Install manifold and hand tighten four upper bolts.
c. Install and hand tighten four lower bolts.
Fig. 4 Lower Intake Manifold Tightening Sequence:
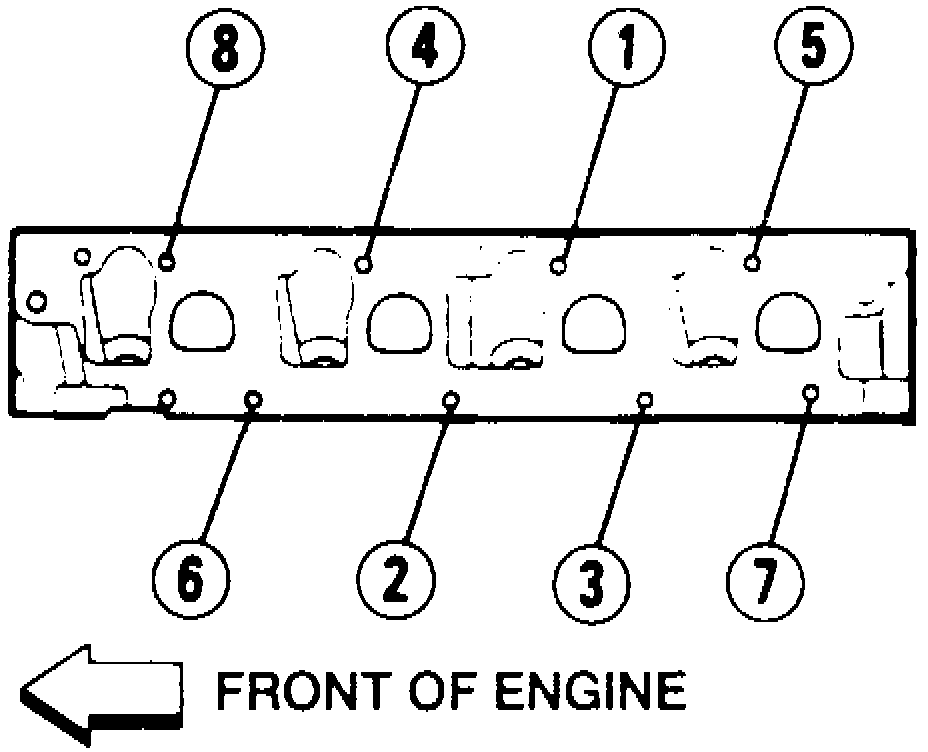
d. Tighten to specifications in sequence, Fig. 4.
5. Install engine lifting eye.
6. Install timing belt and tensioner as outlined under Timing Belt.
7. Install water pump pulley.
8. Install fan clutch.
9. Install upper radiator hose.
10. Install alternator bracket with alternator and ignition coils.
11. Secure water pump inlet tube to alternator bracket.
12. Install lower radiator hose and heater hoses to water inlet tube and thermostat housing. Replace O-ring on water inlet tube.
13. Connect alternator connector.
14. Install power steering pump bracket.
15. Install A/C compressor and recharge system as outlined in Heating and Air Conditioning.
16. Install drive belt.
17. Install cylinder head cover.
18. Install EGR valve to exhaust manifold tube.
19. Install dipstick tube and bracket.
20. Connect vacuum hoses.
21. Install spark plugs and wires, ensuring to install in original positions.
22. Install engine and alternator wiring harnesses.
23. Install heater hose on cylinder head cover with retaining screws.
24. Install upper intake manifold/throttle body assembly.
25. Connect intake air temperature sensor and mass airflow sensor connectors.
26. Install air cleaner assembly.
27. Refill cooling system.
28. Connect battery cables.