Disassembly
Fig. 5 Exploded View Of Engine:
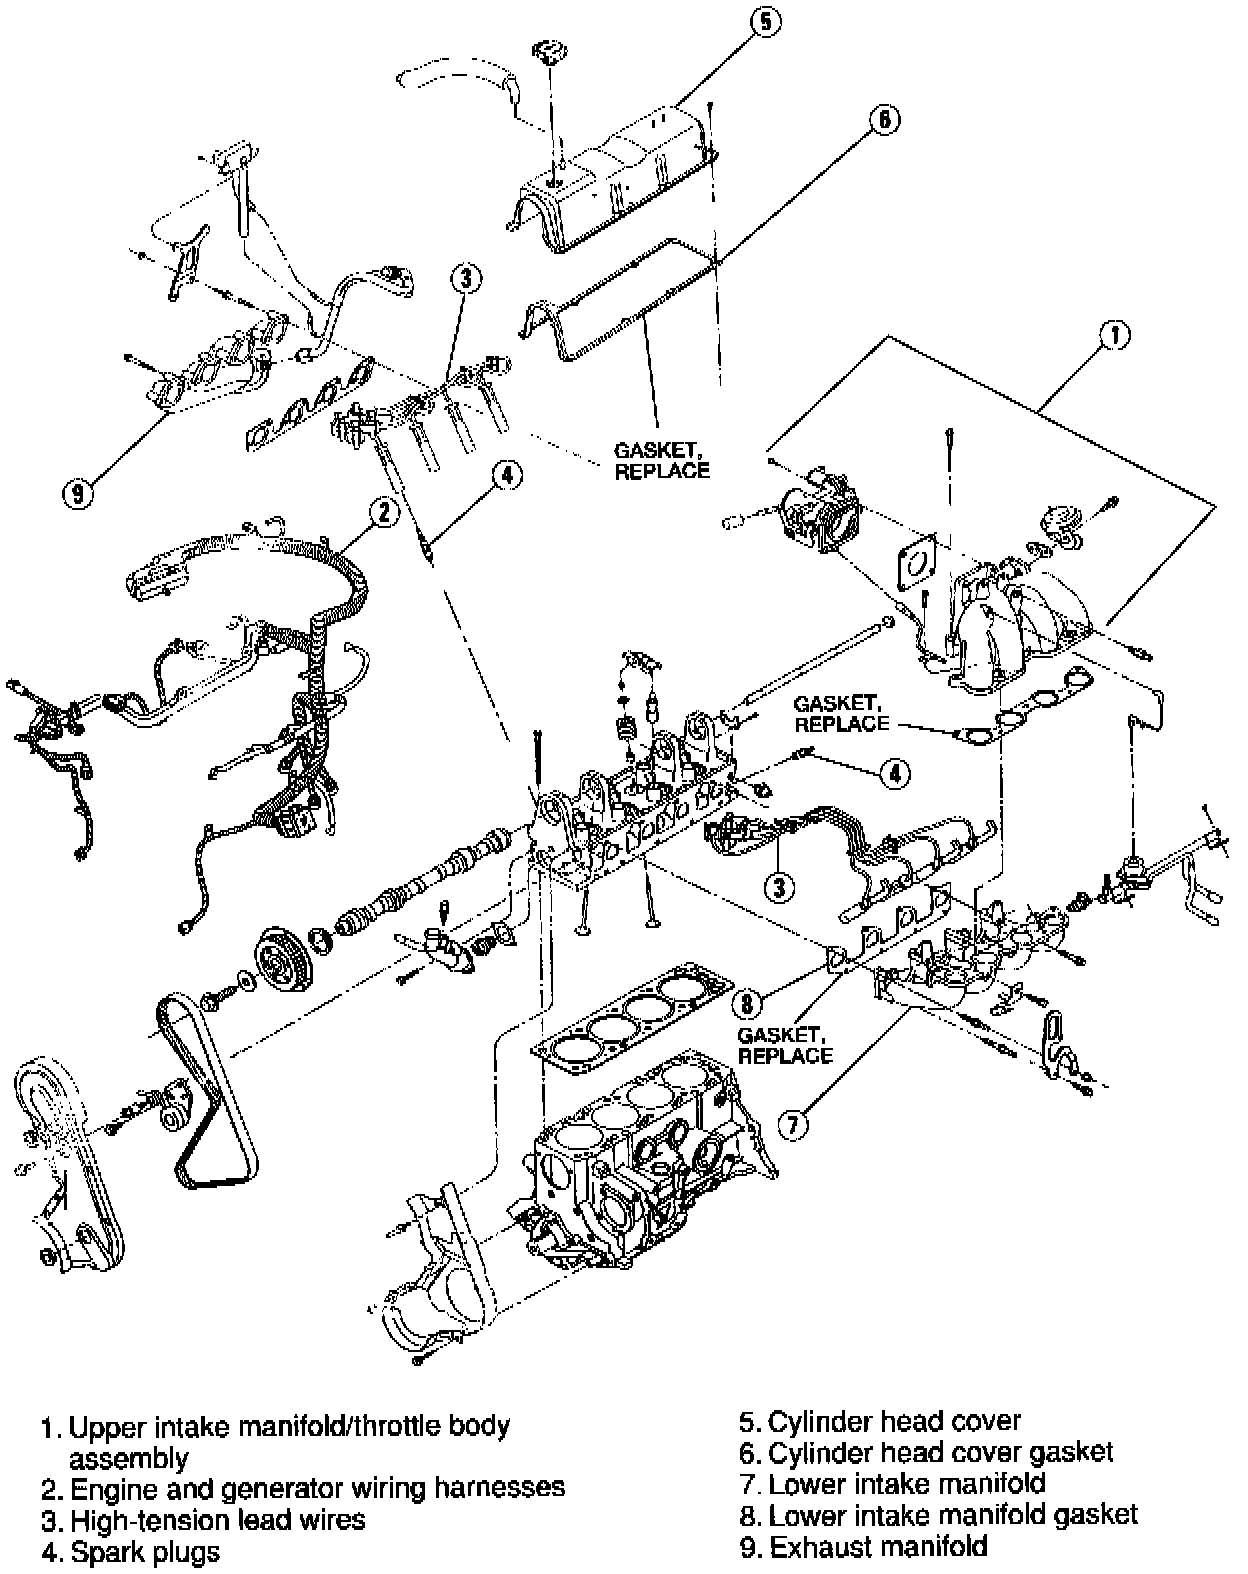
1. Disconnect and tag vacuum hoses, dipstick tube and bracket, belt tensioner, alternator and mounting bracket, Fig. 5.
Fig. 6 Timing Assembly:
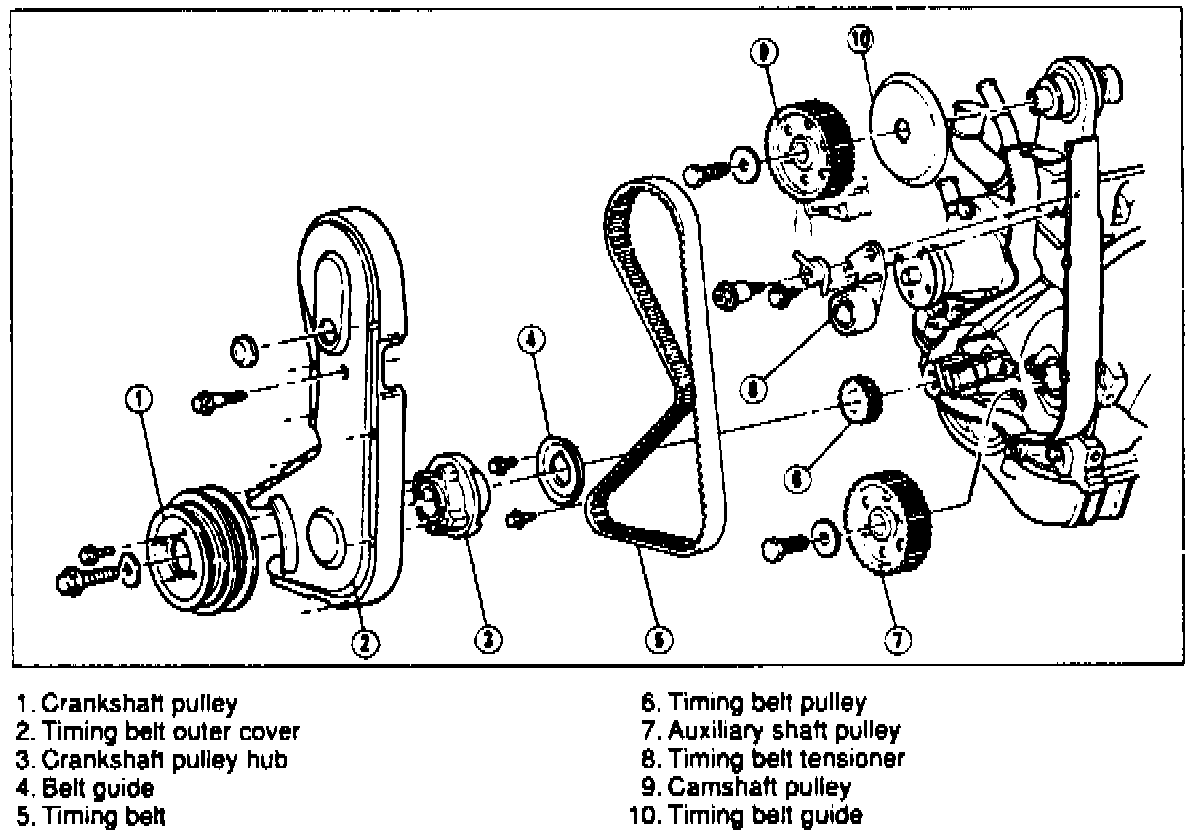
2. Remove crankshaft pulley, timing belt outer cover, crankshaft pulley hub and belt guide, Fig. 6.
Fig. 7 Timing Belt Removal:
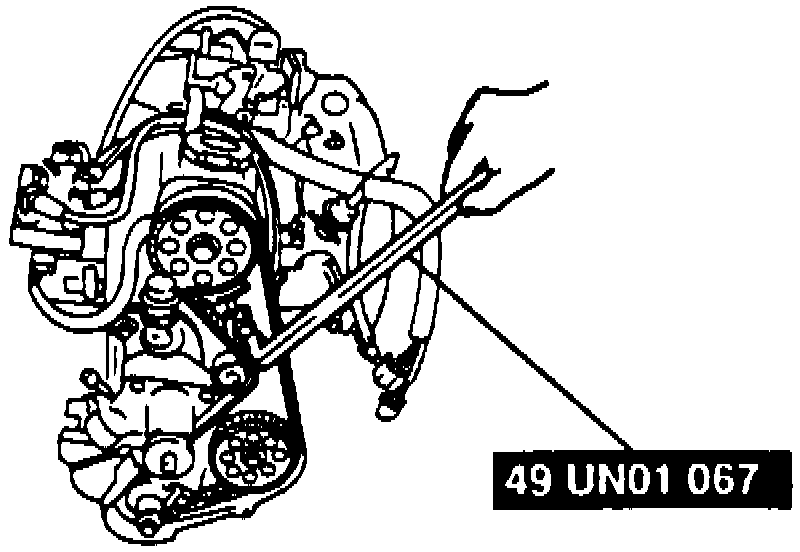
3. Remove timing belt using camshaft belt tensioner tool No. 49 UN01 067, or equivalent, Fig. 7.
4. Remove nuts retaining heat stove to exhaust manifold.
5. Remove thermostat housing and thermostat.
6. Remove cylinder head bolts, cylinder head and gasket.
7. Remove camshaft oil seal using seal removal tool No. 49 UN01 080, or equivalent, then the camshaft thrust plate.
Fig. 8 Rocker Arm Removal:
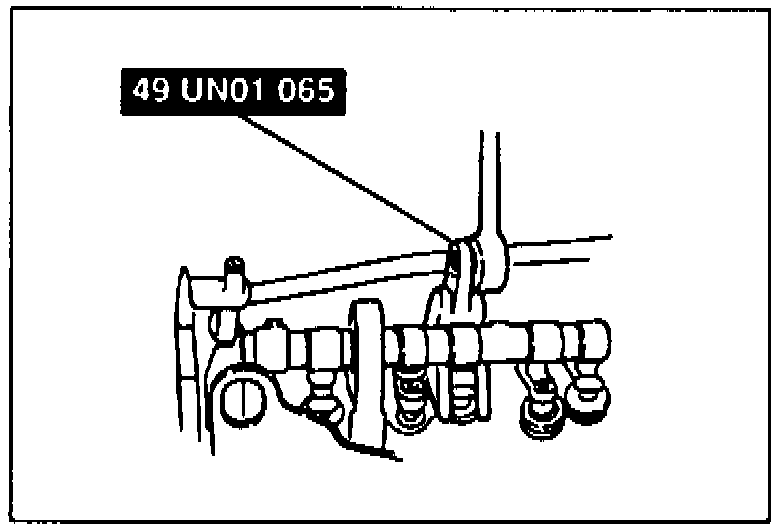
8. Using valve spring compressor tool No. 49 UN01 065, or equivalent, to depress valve springs, remove rocker arms, Fig. 8. Remove rocker arms from hydraulic lash adjuster side.
9. Depress valve springs to remove valve keepers.
10. Carefully remove camshaft to avoid damage to journals and lobes.
11. Remove camshaft bearings using special cam bearing replacer tool No. T71P-6250-A, or equivalent.
12. Remove front oil seal cover, gasket and auxiliary shaft.
13. Remove auxiliary shaft bearing using impact slide hammer tool No. T59L-100-B and puller attachment tool No. T58L-101-B, or equivalents.
14. On models with manual transmission, remove clutch cover, clutch disc and flywheel.
15. On models with automatic transmission, remove driveplate.
16. Remove rear cover plate, water pump, oil pump drive housing and shaft and engine coolant temperature sensor.
17. Remove oil filter, oil pan, oil level sensor, crankshaft position sensor and crankcase vent baffle.
18. Remove oil pump, then the oil strainer and inlet tube.
19. Invert engine, measure crankshaft endplay before removing main bearing caps.
20. Measure connecting rod side clearance and record, then remove connecting rod caps.
21. Remove crankshaft rear oil seal and discard, then the crankshaft.
22. Mark pistons for position and direction before removal. Keep same piston heads, pins and connecting rod assemblies together. All pistons, connecting rods, bearings and connecting rod bearing caps must be installed in the original location from which they were removed.
23. Using suitable arbor press and piston pin replacement tool No. T68P-6135-A, or equivalent, press pin from piston head and connecting rod.
24. Remove piston rings using a suitable piston ring expander.