Transfer Case: Service and Repair
1. Disconnect battery cable, then raise and support vehicle.2. Drain transfer case fluid, then remove skid plate and damper if equipped.
3. On models with electronic shift, disconnect motor electrical connection, then remove motor from mounting bracket.
4. On models with manual shift, disconnect 4x4 indicator.
5. Remove front and rear propeller shafts.
6. Disconnect vehicle speed sensor electrical connection, then the vent hose.
7. On models with manual shift, remove shift lever as follows:
a. Place transfer case in 4L.
b. Remove plastic insert from shift ball, then the heat shift ball with heat gun to 60 - 80°C and knock shift ball off shift lever with suitable tool.
c. Remove screw from rubber boot, then the rubber boot.
d. Remove bolts from floor pan, then the floor pan cover.
e. Remove nut from shift shaft lever, then the shift lever bolts.
f. Remove shift lever and bushing.
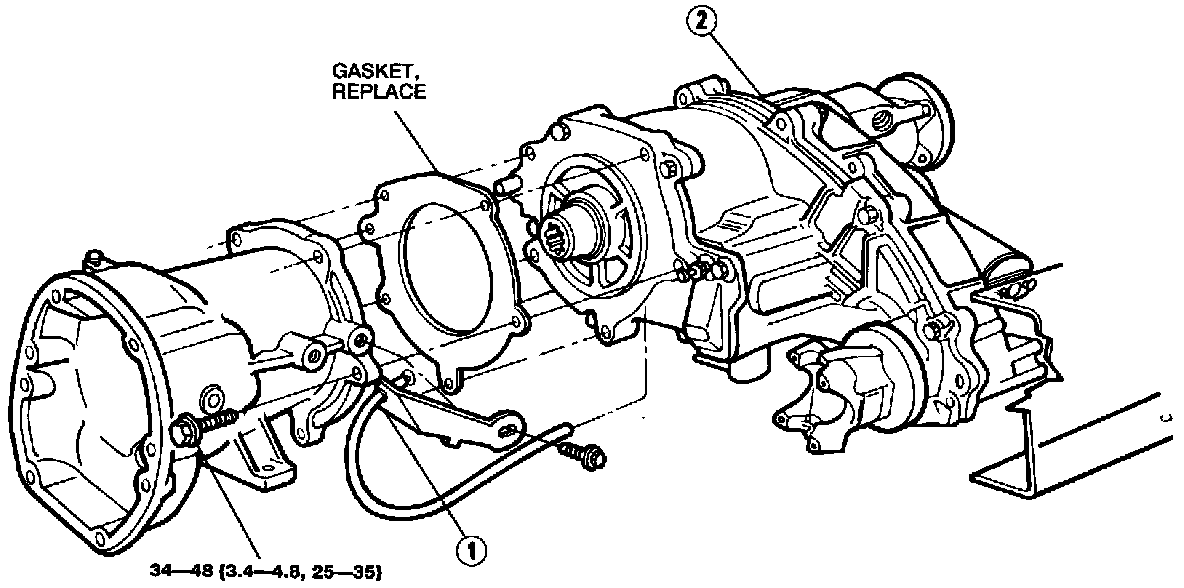
8. Support transfer case with suitable jack stand, then remove transfer case to extension bolts.
9. Remove transfer case and gasket from extension housing, Fig. 3.
Fig. 3 Transfer Case Assembly Removal:
10. On models with manual shift, remove shift shaft.
11. Reverse procedure to install, noting the following:
Fig. 4 Transfer Case Tightening Sequence:
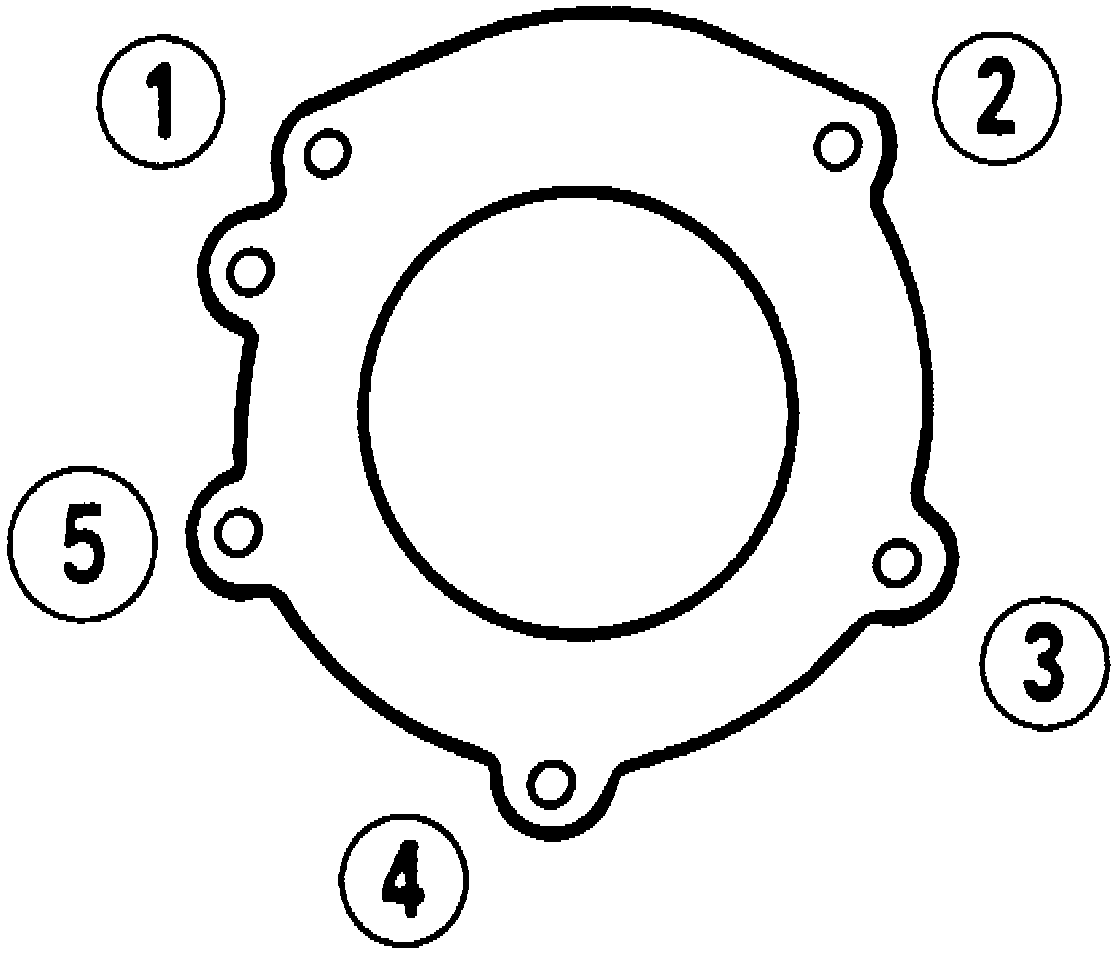
a. Tighten transfer case bolts to specification in the sequence shown in Fig. 4.
b. Install vent hose with white mark in the notch in bracket. Upper end of vent hose should be 3/4 above top of shift lever assembly and just below floor pan.