Condenser HVAC: Service and Repair
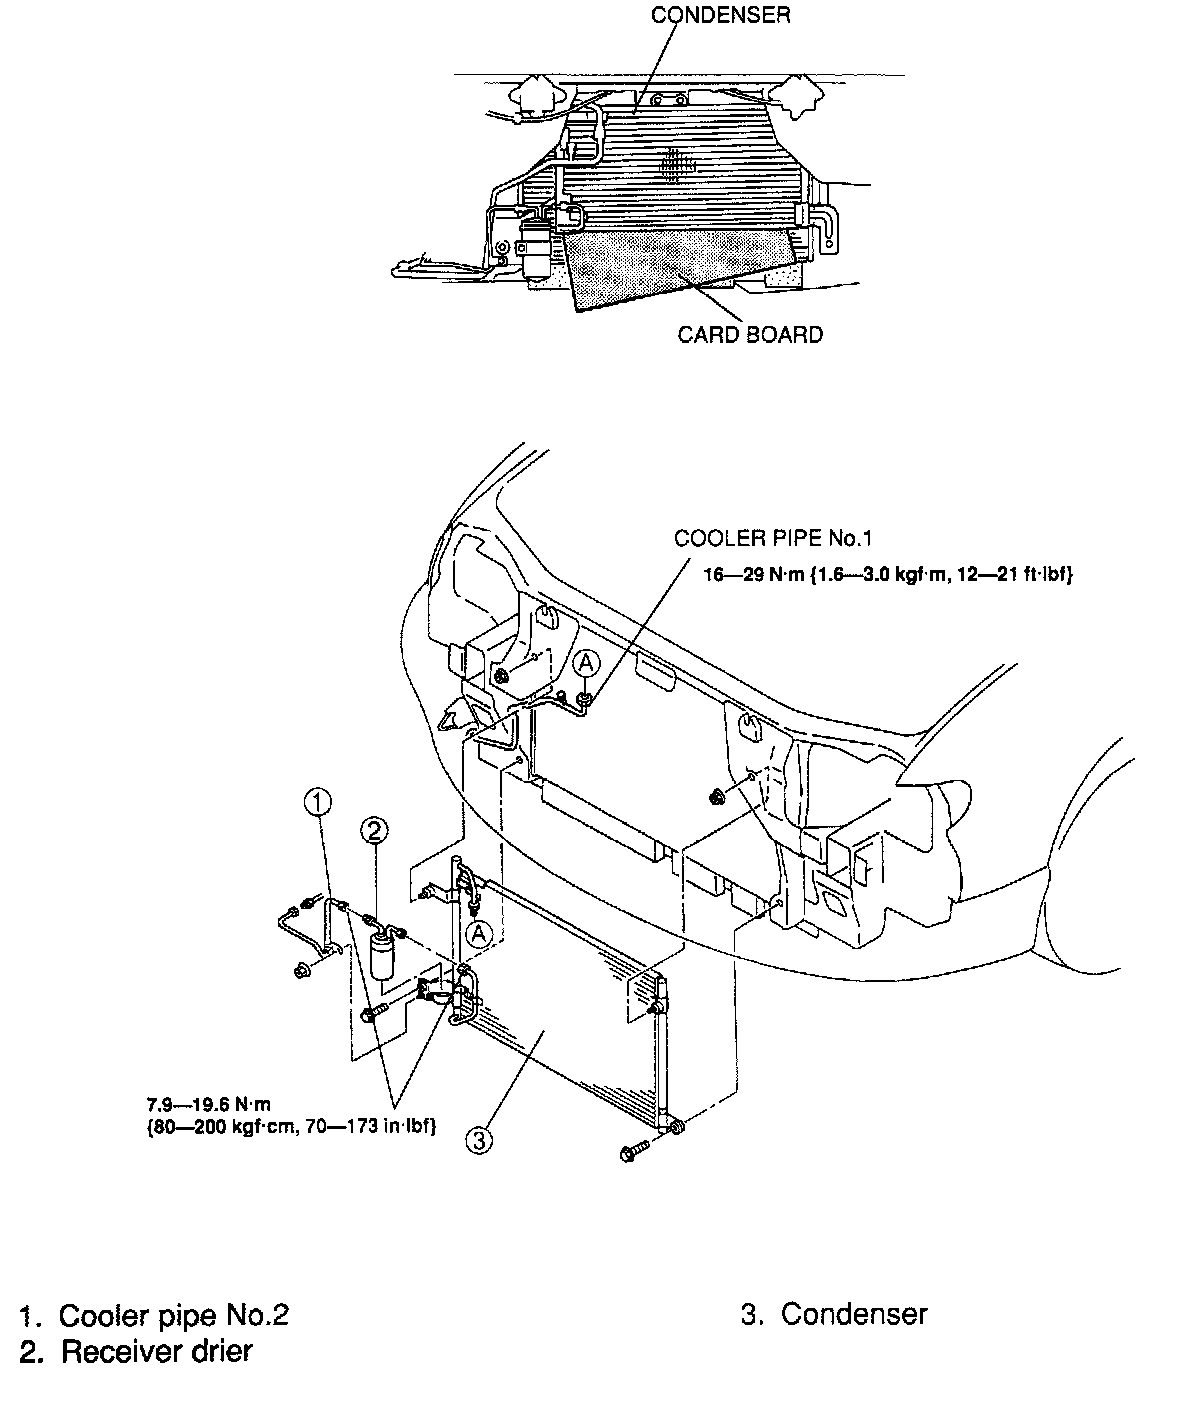
Removal / Installation
1. Discharge the refrigerant from the system.
2. Raise the front of the vehicle.
3. Remove the ambient temperature sensor.
4. Remove the radiator grille, mud guard (RH), splash shield (F), and hood stay.
5. Remove the radiator brackets and coolant reservoir.
6. Insert a protector (such as card board) between the condenser and the radiator and lean the radiator toward the engine.
7. Disconnect the cooler pipe No. 1.
8. Remove the assembled cooler pipe No.2, receiver drier and condenser, then disassemble them in the order shown in the figure. Do not allow compressor oil to spill. Immediately plug all open fittings to keep moisture out of the system.
9. Install in the reverse order of removal.
10. Charge the system and test its performance.
Installation note
Condenser, Receiver drier
When installing new parts, add compressor oil through the high-pressure side of the A/C compressor. 41
Condenser: 20 ml {20 cc, 0.6 fl oz}
Receiver drier: 10 ml {10 cc, 0.3 fl oz}
Condenser, Cooler pipe, Receiver drier
Refer to the installation note for system piping when tightening the piping joints.