Heater Core Case: Service and Repair
Disassembly / Assembly- Disassemble in the order shown in the figure.
- Assemble in the reverse order of disassembly. Do not apply extra grease to the links.
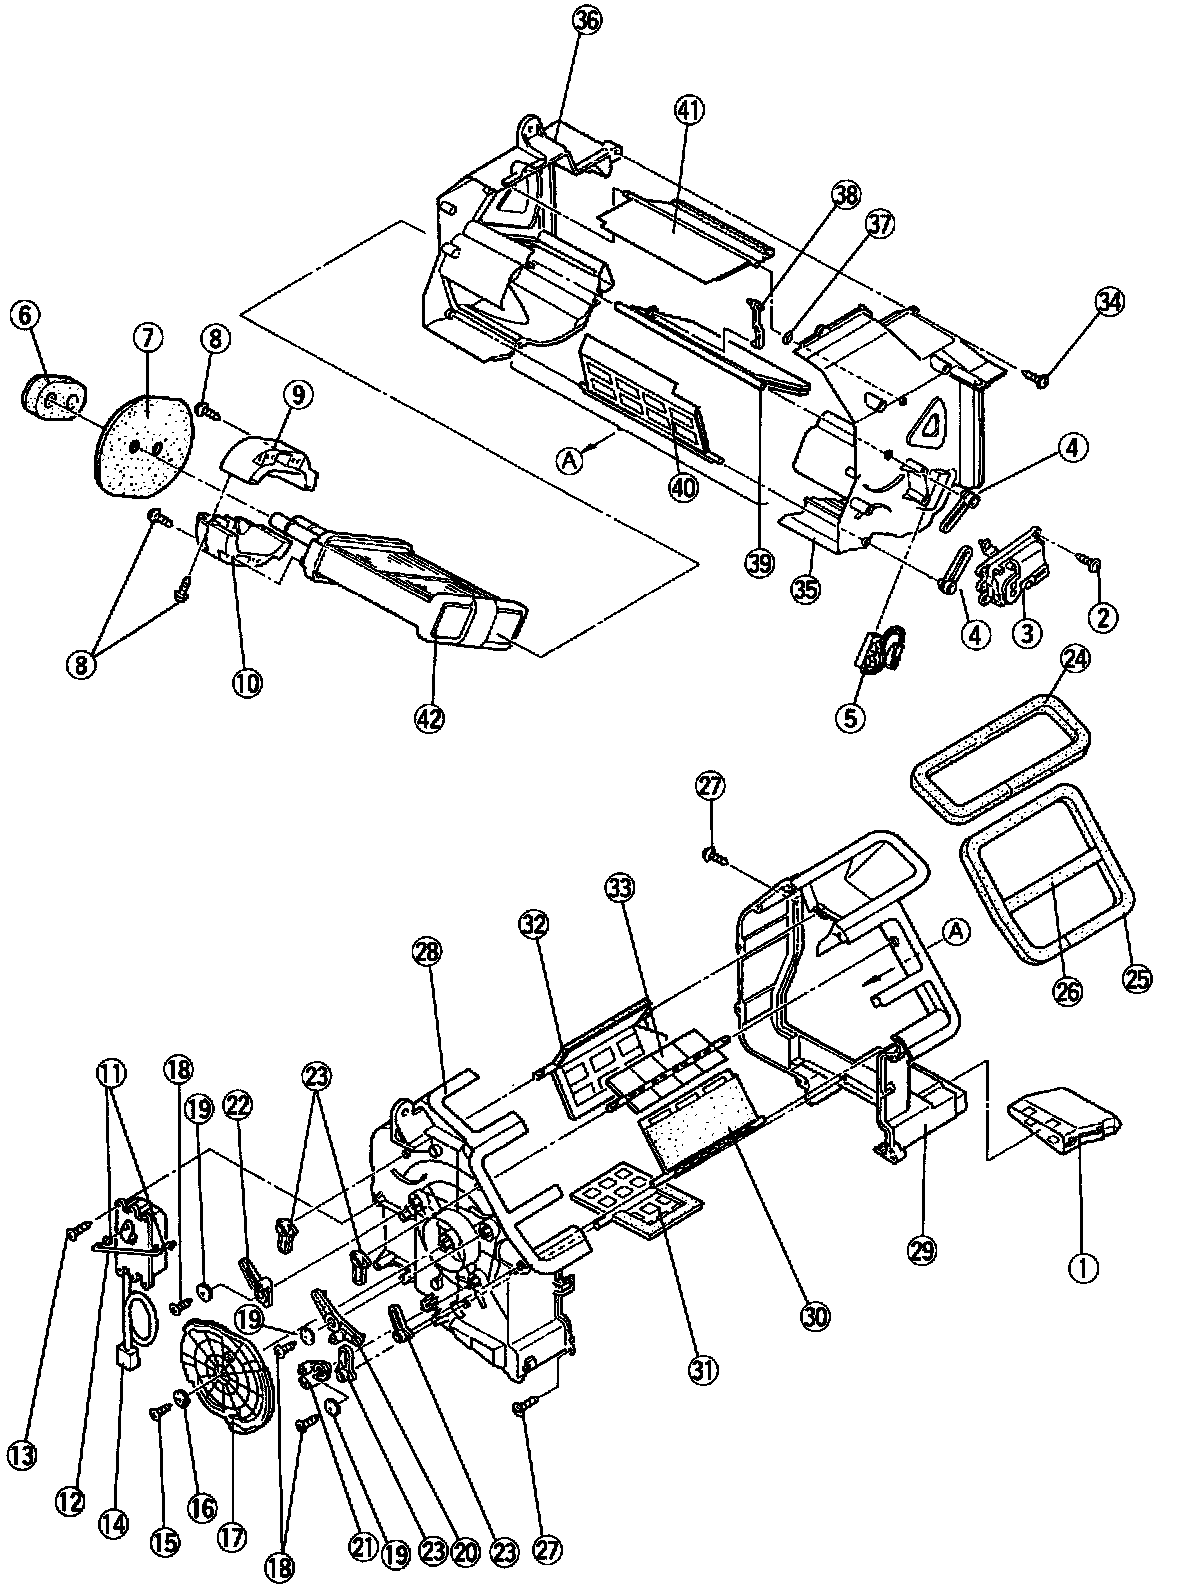
1. Heat duct 22. Airflow mode sub link (DEFROSTER)
2. Tapping screw 23. Airflow mode crank
3. Air mix actuator 24. Polyurethane protector (DEFROSTER)
4. Air mix crank 25. Polyurethane protector (VENT)
5. Water temperature sensor 26. Polyurethane protector (SIDE VENT)
6. Polyurethane foam (thick) 27. Tapping screw
7. Polyurethane foam (thin) 28. Heater case (4)
8. Tapping screw 29. Heater case (3)
9. Heater core bracket (1) 30. Vent door
10. Heater core bracket (2) 31. Heat door
11. Rodstopper 32. Defroster door
12. Airflow mode rod 33. Side vent door
13. Tapping screw 34. Tapping screw
14. Airflow mode actuator 35. Heater case (1)
15. Tapping screw 36. Heater case (2)
16. Link collar 37. Collar
17. Airflow mode main link 38. Air mix rod
18. Tapping screw 39. Air mix main door
19. Link collar 40. Air mix sub door
20. Airflow mode sublink (VENT) 41. Air mix guide door
21. Airflow mode sublink (HEAT) 42. Heater core