Replacement
NOTE: The clutch release cylinder can be removed from the transaxle with the clutch pipe connected.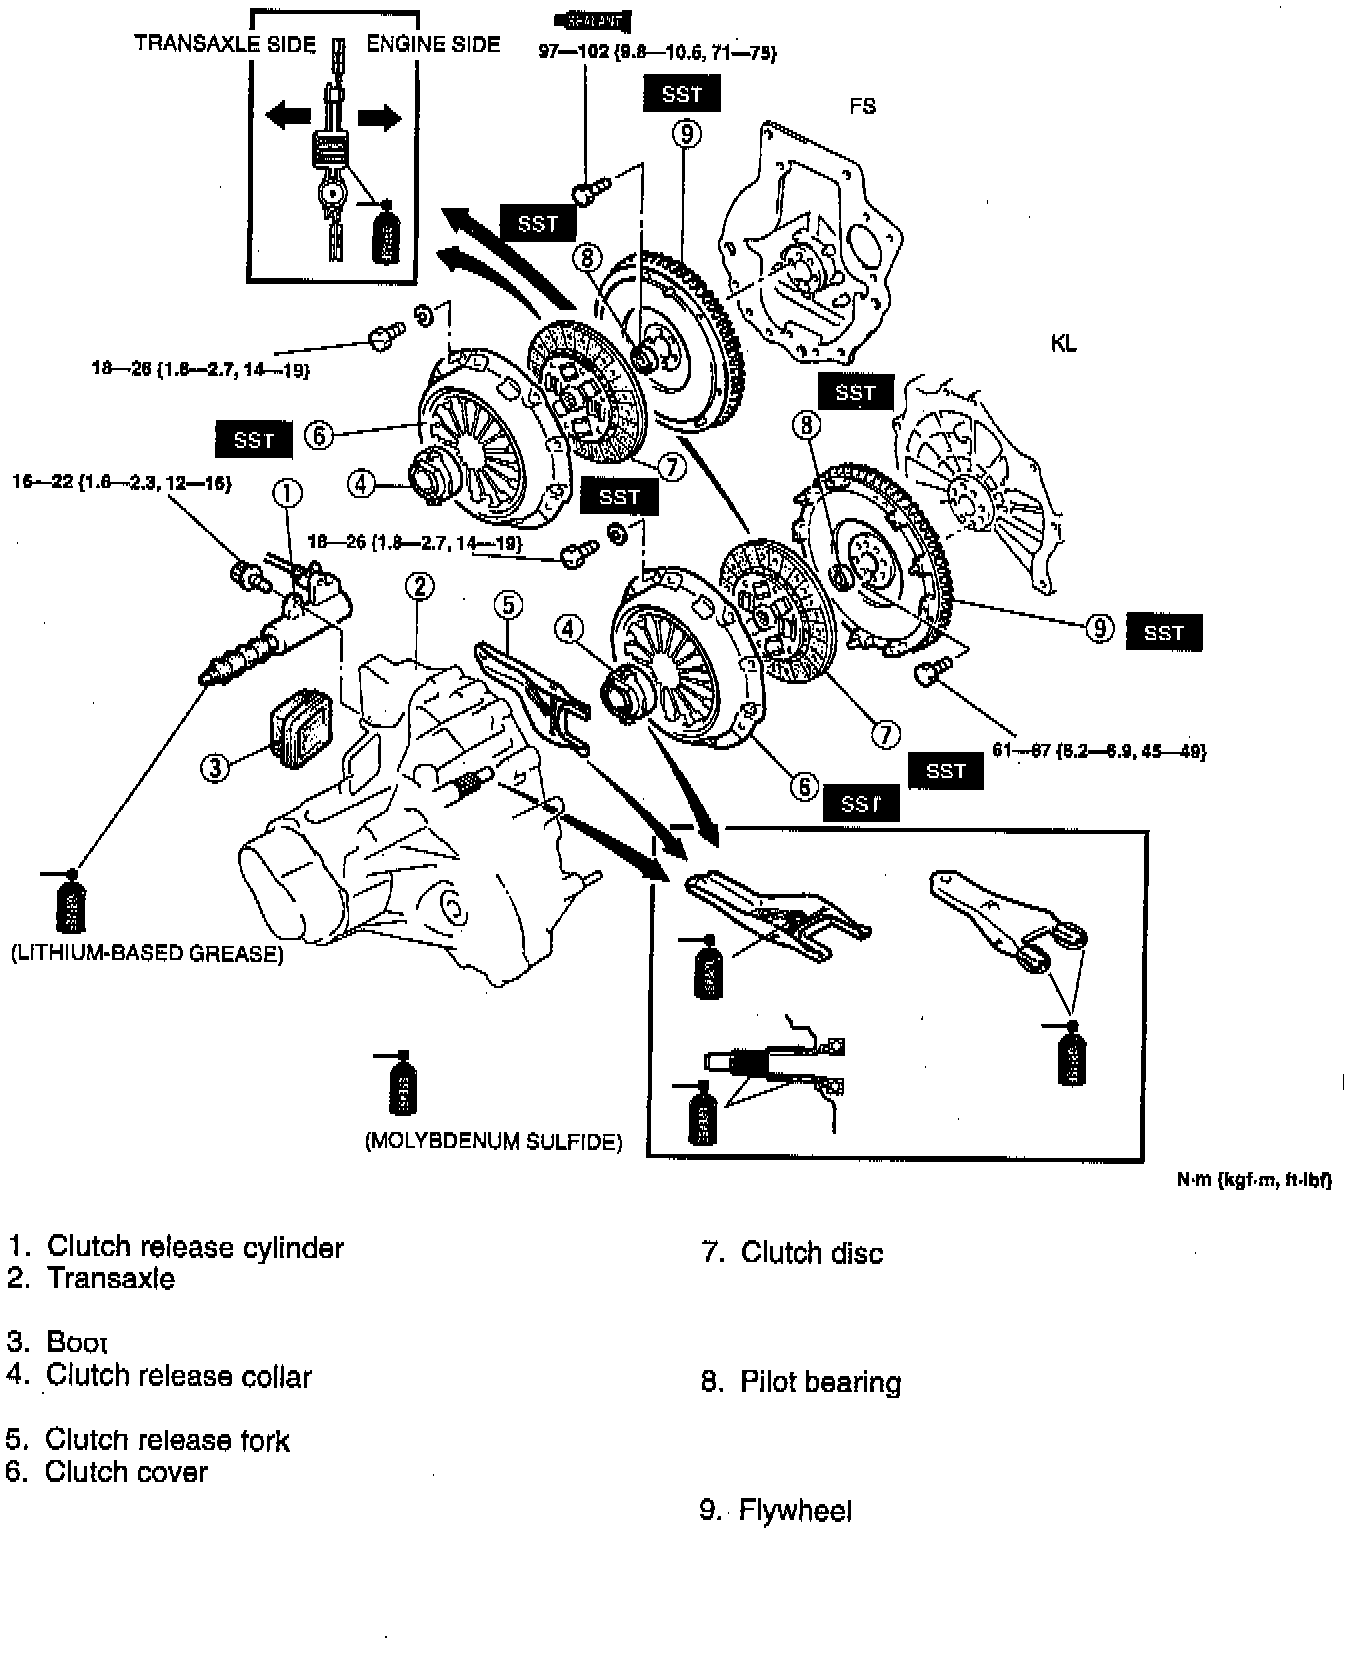
REMOVAL
Remove in the order shown in the illustration, referring to the following notes:
Clutch Cover And Clutch Disc
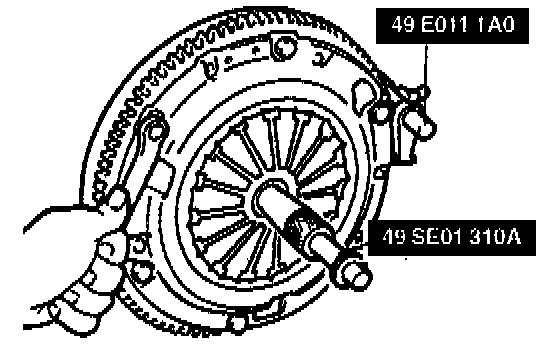
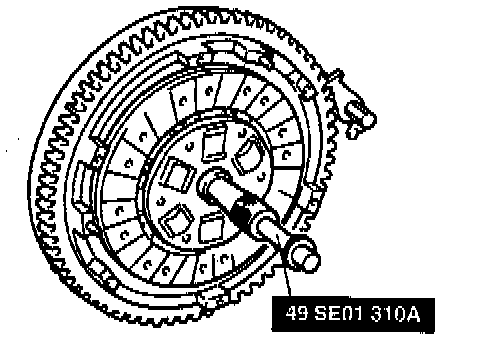
1. Install the Special Service Tool (SST).
2. Loosen each bolt one turn at a time in a crisscross pattern until the spring tension is released.
3. Remove the clutch cover and disc.
Pilot Bearing
NOTE: The pilot bearing does not need to be removed unless you are replacing it.
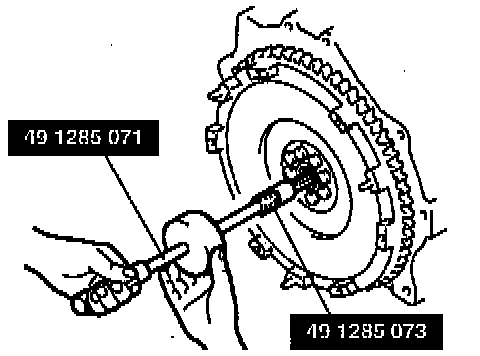
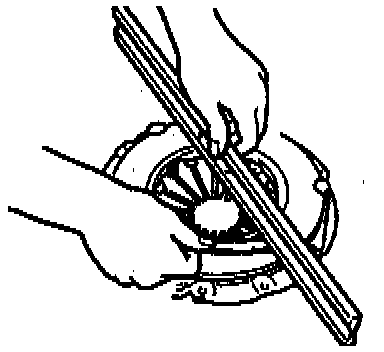
^ Use the SST to remove the pilot bearing.
Flywheel
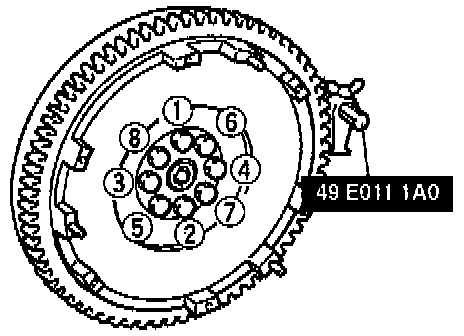
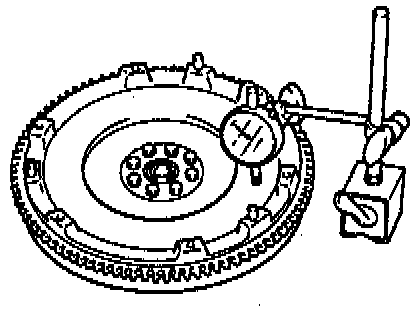
1. Hold the flywheel by using the SST or equivalent tool.
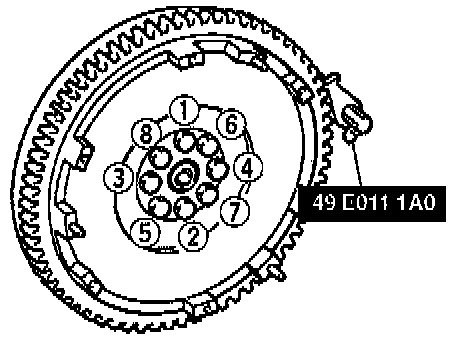
2. Remove the bolts evenly and gradually in the pattern shown.
3. Remove the flywheel.
4. Inspect for oil leakage from the crankshaft rear oil seal. If there is any such leakage or if the oil seal is damaged, refer to Engine, and replace the crankshaft oil seal.
INSPECTION
Clutch Cover
1. Measure the wear of the diaphragm spring fingers. Depth should be 0.5 mm (0.020 inch) maximum.
2. Measure the flatness of the pressure plate surface by using a straightedge and a feeler gauge as shown in the illustration. Maximum clearance is 0.50 mm (0.020 inch).
3. Rotate the flywheel and check for misaligned diaphragm spring fingers. Misalignment is 0.600 mm (0.0236 inch) maximum.
4. Replace the clutch cover if not as specified.

Clutch Disc
1. Inspect the contact surface of the clutch disc for scoring, cracks, burning, and oil contamination.
2. Remove minor scoring or burning by using emery paper. Repair if scoring or burning is major. Replace if cracked or oil-soaked.
3. Inspect for loose facing rivets and dampers. Replace the clutch disc if either is loose.
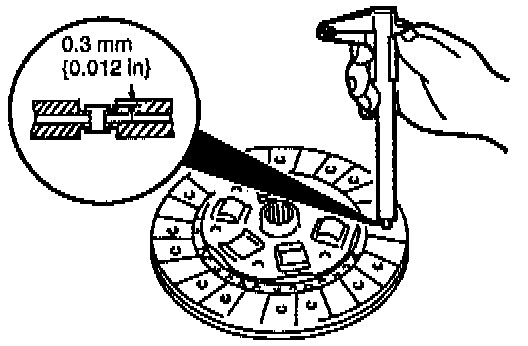
4. Using vernier calipers, measure the thickness of the lining at a rivet head on both sides. Replace the clutch disc if its thickness is less than 0.3 mm (0.012 inch) minimum.
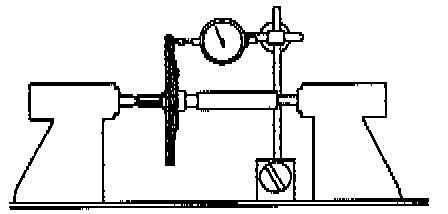
5. Measure the clutch disc runout by using a dial indicator. Replace the clutch disc if runout is excessive. Runout should be 0.700 mm (0.0276 inch) maximum.
Clutch Release Collar
CAUTION: Cleaning the clutch release collar with cleaning fluids or a steam cleaner can wash the grease out of the sealed bearing.
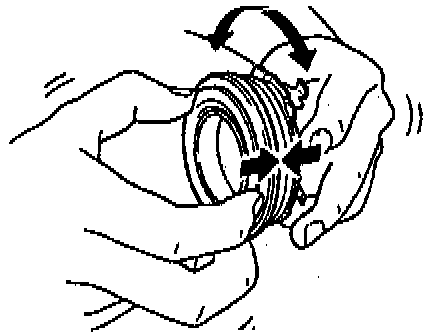
1. Turn the collar while applying force in the axial direction.
2. If the collar sticks or has excessive resistance, replace it.
Pilot Bearing
NOTE: The pilot bearing can be inspected while it is in the fly wheel.
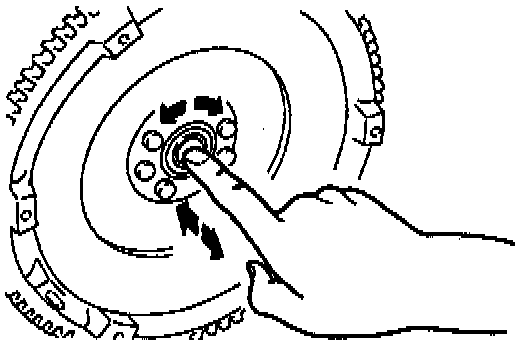
1. Turn the bearing while applying force in the axial direction.
2. If the bearing sticks or has excessive resistance, replace it.
Flywheel
1. Inspect the contact surface for scoring, cracks, and burning.
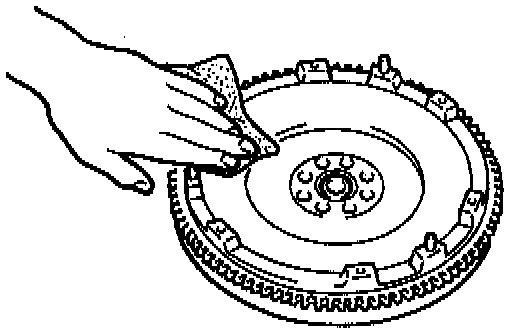
2. Remove minor scoring or burning by using emery paper. Repair if scoring or burning is major. Replace if cracked.
3. Inspect the ring gear teeth for wear and damage. If necessary, replace the ring gear.
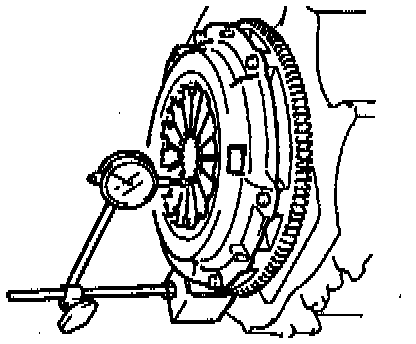
4. Measure the flywheel runout by using a dial indicator. Replace the flywheel if runout is excessive. Runout should be 0.200 mm (0.0079 inch) maximum.
INSTALLATION
Install in the reverse order of removal, referring to following notes:
Flywheel
NOTE: Flywheel bolts require sealant. New bolts have sealant already applied at the factory. However, when reusing bolts, remove all old sealant and then apply new sealant. Remove the old sealant from the bolt holes in the crankshaft, whether using new or reused bolts. These steps help to ensure that engine oil does not leak from the crankshaft bolt holes.
1. Install the flywheel to the crankshaft.
2. Hand-tighten the flywheel installation bolts.
3. Install the SST or equivalent tool to the flywheel.
4. Tighten the flywheel installation bolts evenly and gradually in the pattern shown in the illustration to 97 - 102 Nm (71 - 75 ft. lbs.).

Pilot Bearing
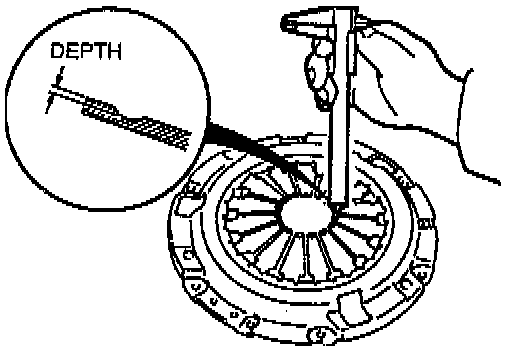
Install a new pilot bearing by using a suitable pipe. Pipe outer diameter of 35.0 mm (1.378 inch). Bearing installation depth is 0 - 0.4 mm (0 - 0.016 inch).
Clutch Disc
1. Clean the clutch disc splines and main drive gear splines.
2. Apply organic molybdenum sulfide grease to the splines.
3. Hold the clutch disc in position by using the SST.
Clutch Cover
1. Align the dowel holes with the flywheel dowels and install the clutch cover.
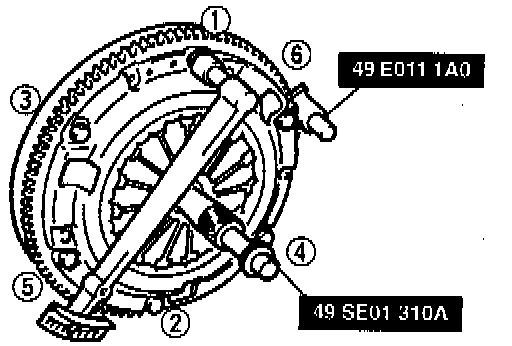
2. Install the SST or equivalent tool.
3. Tighten the bolts evenly and gradually in the pattern shown to 18 - 26 Nm (14 - 19 ft. lbs.).