Air Conditioning System Flushing
CAUTION- Follow all refrigerant system safety and service precautions.
1. Before removing any refrigerant system components, discharge the refrigerant system.
2. Remove the receiver/drier and drain the oil into a calibrated container.
3. Install a new receiver/drier and add new refrigerant oil to replace the old oil.
NOTE
- Add the same amount of oil drained plus 60 ml (2 oz.) of new refrigerant oil to the new receiver! drier.
4. Install a new orifice tube.
NOTE
- If the orifice tube in the vehicle on which you are working is located in the liquid line between the condenser and the evaporator, replace the liquid line assembly.
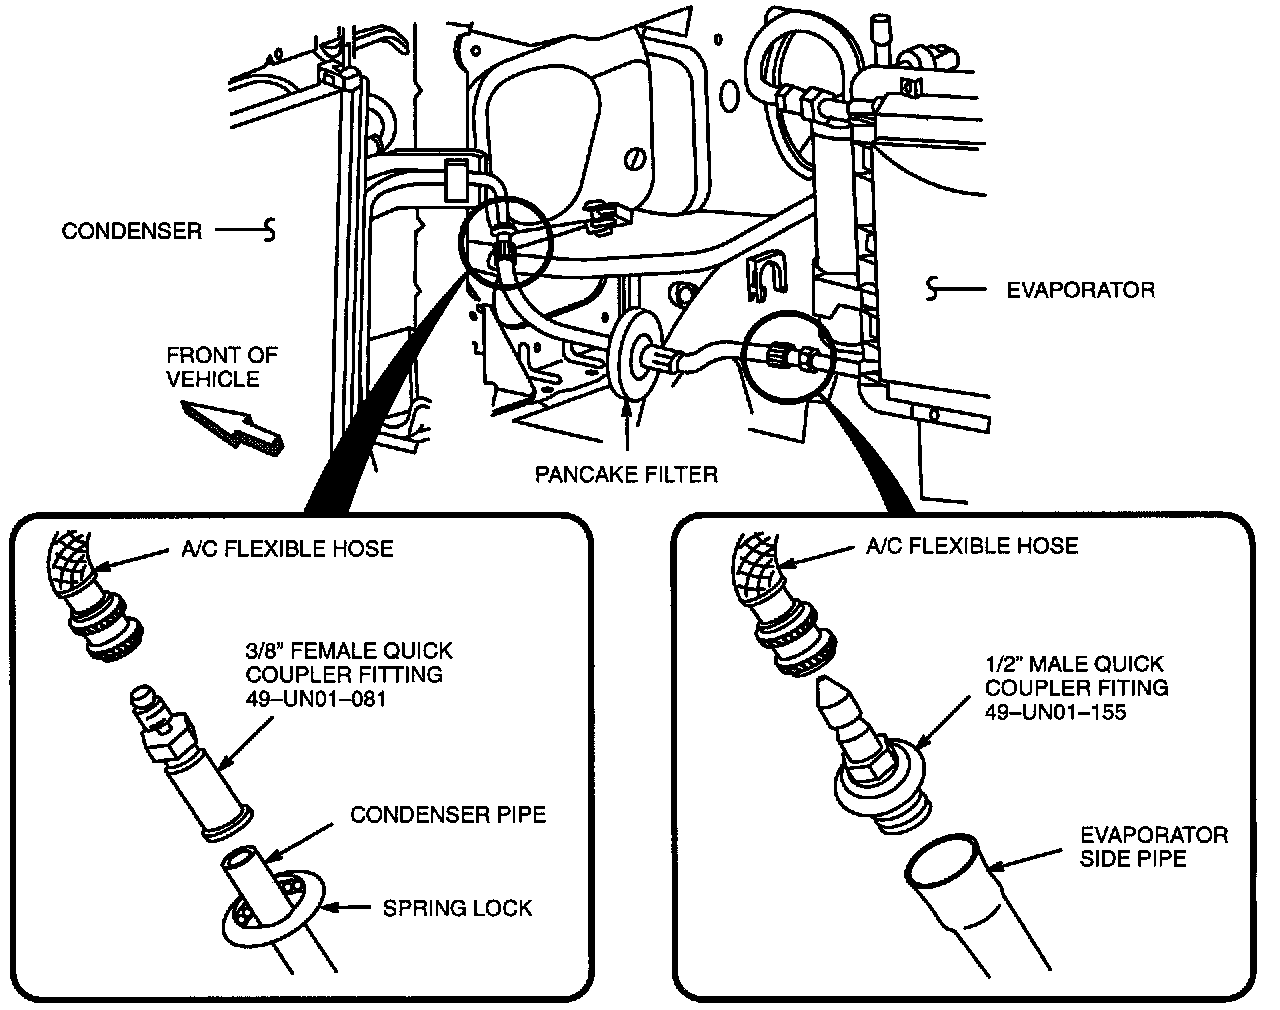
5. Install pancake filter from A/C filter kit
In the liquid line between the condenser and the orifice tube. Be sure the filter inlet side of the pancake filter is toward the condenser. Using the flexible hose from the kit, insert A/C adapter fitting 49-UN01-081 to the condenser side and A/C adapter fitting 49-UN01-155 to the evaporator side.
6. Remove the old compressor and drain oil into a calibrated container.
7. Drain oil from new service compressor into a clean calibrated container.
8. Transfer the magnetic clutch from the old compressor to the new service compressor.
NOTE
- A new service compressor contains 207 ml (7 oz) of refrigerant oil.
9. Pour clean refrigerant oil into the new service compressor.
- If the amount of oil drained from the removed compressor is between 90 and 148 ml (3-5 oz), pour the same amount of clean refrigerant oil into the new compressor.
- If the amount of oil drained from the old compressor is greater than 148 ml (5 oz), pour 148 ml (5 oz), clean refrigerant oil into the new compressor.
- If the amount of oil drained from the old compressor is less than 90 ml (3 oz), pour 90 ml (3 oz), clean refrigerant oil into the new compressor.
10. Install the new compressor.
11. Install the suction filter from A/C filter kit in the hose between the receiver/drier and the compressor near the compressor.
12. Remove a length of suction hose (close to compressor end) to accommodate the suction filter and install the filter, using hose clamps provided in kit. Be sure filter is correctly oriented for refrigerant system flow. Check the label on the filter. Install O-rings from kit on suction filter.
13. Evacuate, charge and leak test the system.
14. Check all refrigerant system hoses, lines and the positioning of the newly installed filters to be sure they do not interfere with other engine compartment components. If necessary, use tie wraps to make adjustment.
15. At the A/C control unit, turn the function control knob to MAX A/C, the fan control knob to the highest setting and the temperature control knob to full cold (blue). Start engine and idle briefly making sure A/C is operating properly.
16. Provide air flow to front of vehicle with a fan and gradually bring the engine up to 1200 rpm by running it at lower rpms for short periods (first at 800 rpm, then at 1000 rpm). Set the engine at 1200 rpm and run it for an hour with the A/C system operating.
17. Stop the engine.
18. Allow the engine to cool sufficiently to remove the fittings, flexible hoses and pancake filter from the liquid line. It will be necessary to discharge the system first.
19. Discard the pancake filter. It can be used only one time.
20. Reconnect liquid line back into the system.
21. Evacuate, charge and leak test the system and make any necessary adjustment.
22. Check operation of system in all modes.