Disassembly
WARNING: CONTINUOUS EXPOSURE WITH USED ENGINE OIL HAS CAUSED SKIN CANCER IN LABORATORY MICE. PROTECT YOUR SKIN BY WASHING WITH SOAP AND WATER IMMEDIATELY AFTER THIS WORK.1. Remove the oil drain plug and drain the engine oil. After draining the engine oil, install the oil drain plug.
Tightening torque: 30-41 Nm (22-30 ft lbs.)
2. Remove the intake manifold.
Engine Auxiliary Components:

3. Remove the LH engine mount.
4. Remove the power steering idler pulley.
5. Remove the A/C idler pulley and compressor bracket.
6. Remove the engine hanger.
7. Remove the water inlet pipe.
8. Remove the water bypass hose.
9. Remove the distributor.
10. Remove the exhaust manifold insulator.
11. Remove the exhaust manifold.
12. Remove the dipstick.
13. Remove the oil filter.
Timing Components:

14 Remove the crankshaft pulley.

a. Mount SST# 49 S120 710 on the crankshaft pulley to hold the crankshaft.
b. Remove the crankshaft pulley bolt.

c. Remove the crankshaft pulley.
CAUTION: The crankshaft position sensor rotor is on the rear of the crankshaft pulley, and can be damaged easily.
15. Remove the timing belt cover.
16. Remove the upper idler pulley.
17. Remove the timing belt auto tensioner.
18. Remove the lower idler pulley.
19. Remove the tensioner pulley.
20. Install the crankshaft pulley lock bolt and hand tighten it.
21. Turn the crankshaft to align the timing marks on the pulleys.
22. Mark the timing belt rotation for proper reinstallation.
23. Remove the timing belt.
a. Mark the timing belt rotation for proper reinstallation.
b. Remove the timing belt.

CAUTION: The following will damage the belt and shorten its life; Forcefully twisting it, turning it inside out, bending it, or allowing oil or grease on it.
21. Remove the crankshaft pulley lock bolt.
22. Remove the cylinder head assembly.
Cylinder Block External Components:

Cylinder Block External Components (Part 2 Of 2):

23. Remove the backing plate, drive plate and adapter.
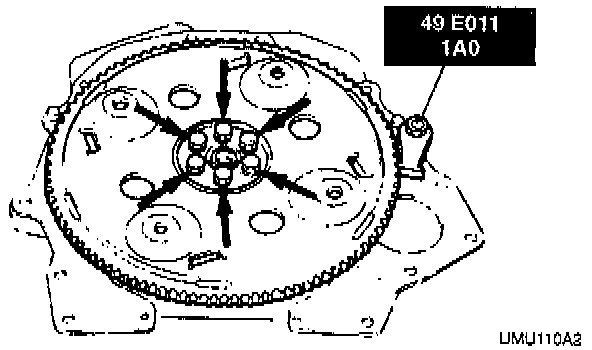
a. Hold the drive plate by using the SST.
b. Remove the drive plate bolts.
c. Remove the backing plate, drive plate, and adapter.
d. Remove the SST.
24. Remove the end plate.
25. Remove the oil pan.
a. Remove the oil pan mounting bolts.
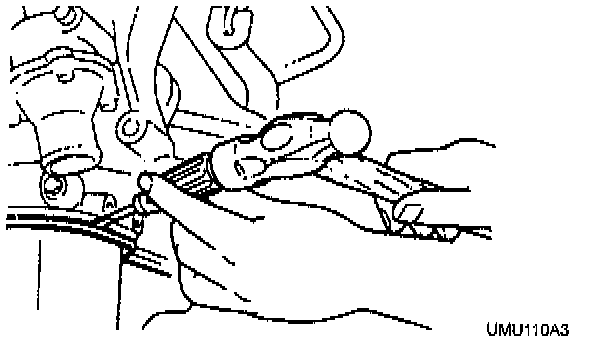
b. Insert a screwdriver between the oil pan and the cylinder block to separate them.
CAUTION: Pry tools can easily scratch the oil pan and cylinder block contact surfaces. Prying off the oil pan can also easily bend the oil pan flange.
26. Remove the oil strainer.
27. Remove the rear cover.
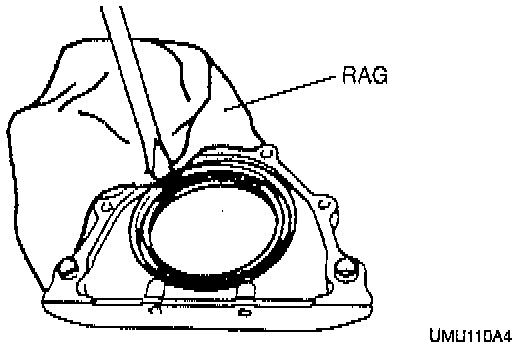
28. Remove the rear oil seal using a screwdriver protected with a rag.
29. Remove the thermostat.
30. Remove the water pump.
31. Remove the timing belt.
32. Remove the oil pump.
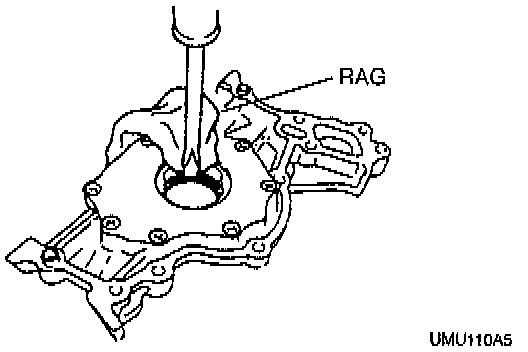
33. Remove the front oil seal using a screwdriver protected with a rag.
Cylinder Block Internal Components:

Cylinder Block Internal Components (Part 2 Of 2):

34. Remove the connecting rod caps.
NOTE: Before removing the connecting rod caps, measure the connecting rod side clearance.
35. Remove the lower connecting rod bearings.
36. Remove the pistons and connecting rods.
^ Before removing the piston and connecting rod, measure the connecting rod bearing oil clearance by using Plastigage.
^ Remove the Plastigage from journals and bearings.
37. Remove the main bearing caps.
a. Before removing the main bearing cap, measure the crankshaft end play.
b. After removing the main bearing cap, measure the main journal oil clearance.
38. Remove the lower main bearing and lower thrust bearing.
39. Remove the crankshaft.
40. Remove the upper main bearing and upper thrust bearing.
41. Remove the oil baffle plate.