Replacement
NOTE: The oil pan could contain small chips, shavings, and other particles helpful in checking the condition of the transmission and diagnosing certain problems. To ensure that all foreign particles stay in the oil pan, make sure that the transmission is never tipped completely over while the oil pan is still installed.
REMOVAL
1. Drain the ATF.
2. Remove the exhaust system. Refer to Exhaust System.
3. Remove the propeller shaft.
WARNING: Improperly jacking a transmission is dangerous. It can slip off the jack and cause serious injury.
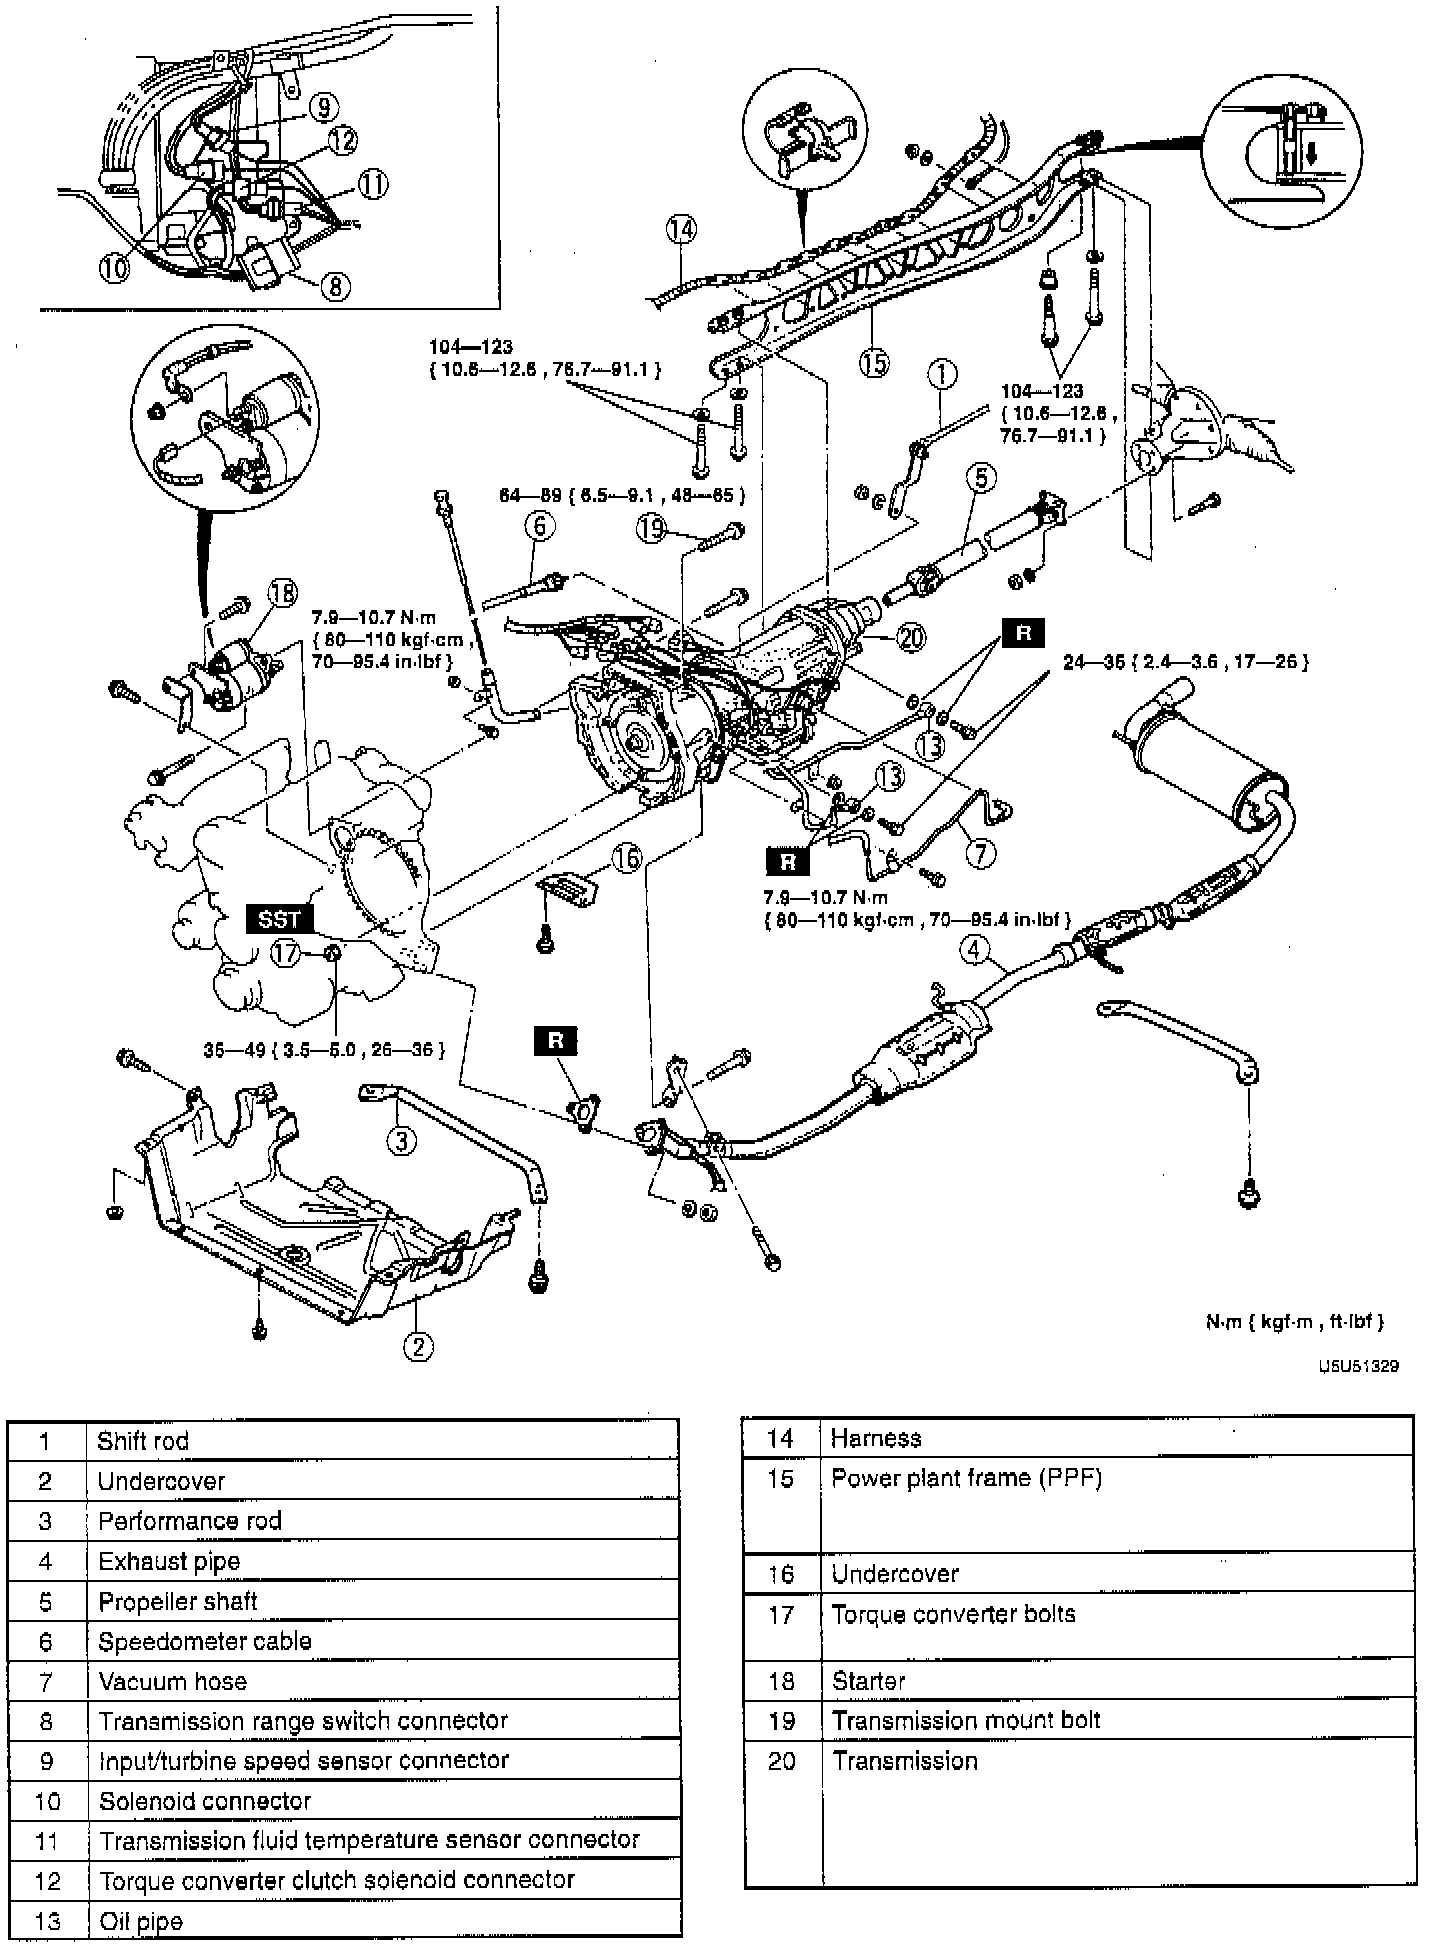
4. Remove in the order indicated in the illustration, referring to the following notes:
Power Plant Frame (PFF) (15)
1. Disconnect the wire harness from the Power Plant Frame (PPF).
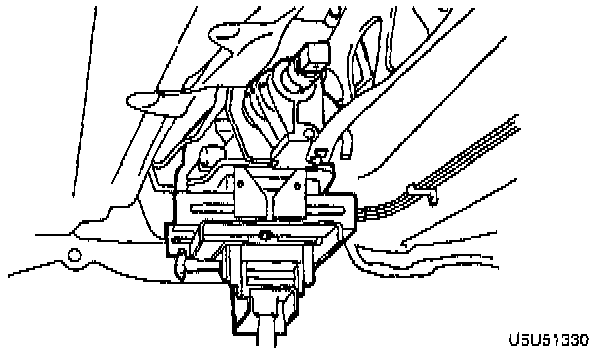
2. Support the transmission on a lack.
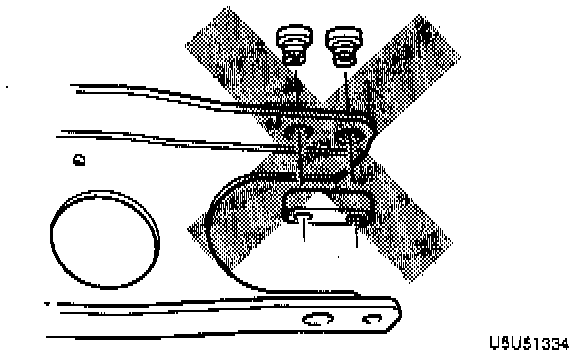
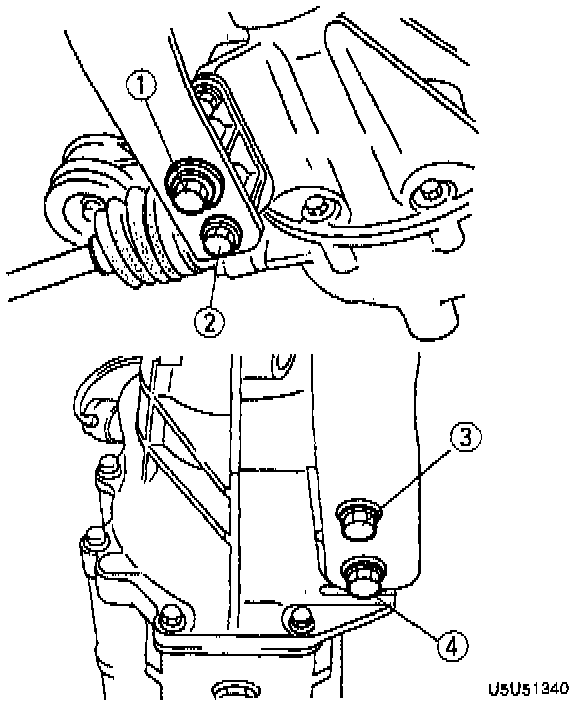
3. Remove the front bolts.
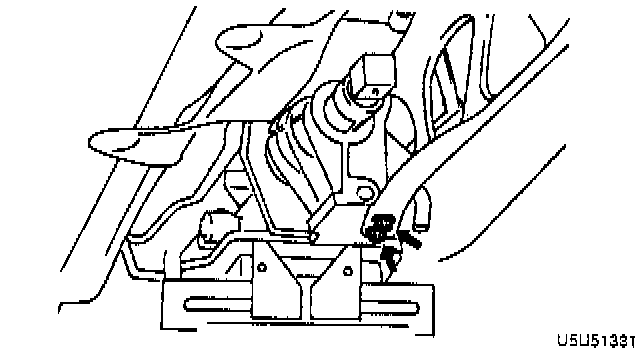
4. Remove the differential-side bolts, and pry out the bolt spacer.
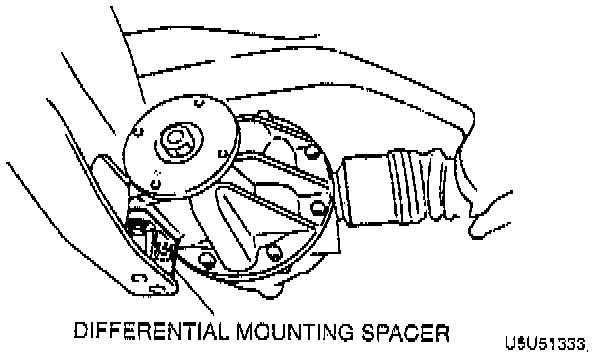
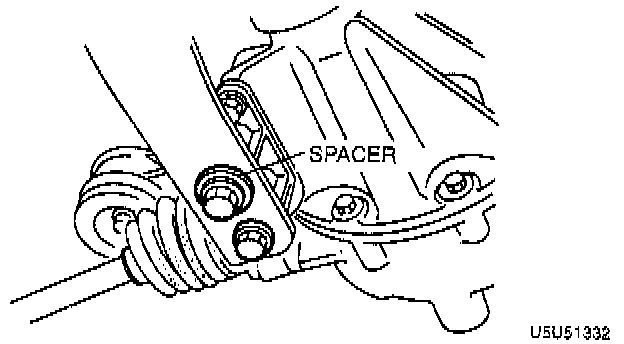
5. Remove the differential mounting spacer.
6. Remove the transmission-side bolts, and remove the PPF. Do not remove the spacers from the PPF. If they are removed, replace the PPF as an assembly.
NOTE: If the sleeve can not removed easily, tap the side of the sleeve with a plastic hammer.
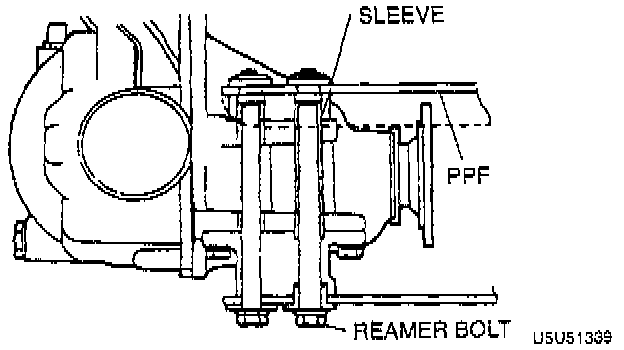
7. Remove the sleeve.
Transmission (20)
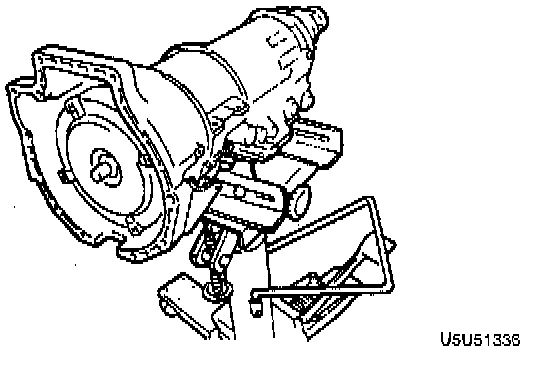
^ Set the transmission onto the transmission jack, paying special attention not to damage the oil pipes. Make sure that the torque converter side of the transmission is tilted slightly upward during removal. Carefully lower the transmission from the vehicle.
INSTALLATION
1. Install in the reverse order of removal, referring to the following notes:
Transmission (20)
^ Set the transmission onto the transmission jack, paying special attention not to damage the oil pipes. Make sure that the torque converter side of the transmission is tilted slightly upward.
Torque Converter Bolts (17)
1. Align the holes by turning the torque converter.
2. Lock the drive plate by using a screwdriver.
3. Hand-tighten the torque converter mounting bolts in a crisscross pattern.
4. Modify the torque converter mounting bolts' tightening torque to allow for a torque wrench-Special Service Tool (SST) combination.
5. Tighten the torque converter mounting bolts by using the SST to 35 - 49 Nm (26 - 36 ft. lbs.).

Power Plant Frame (PPF) (15)
1. Install the differential mounting spacer and tighten to 38 - 51 Nm (28 - 38 ft. lbs.).
2. Support the transmission on a jack so that it is level.
3. Position the PPF and install the sleeve.
4. Install the spacer and bolts, and snugly tighten the reamer bolt. The reamer bolt should be installed in the forward hole.
5. Tighten the outer bolts snugly.
6. Tighten the bolts to the specified torque in the order shown to 104 - 123 Nm (77 - 91 ft. lbs.).
7. Remove the jack.
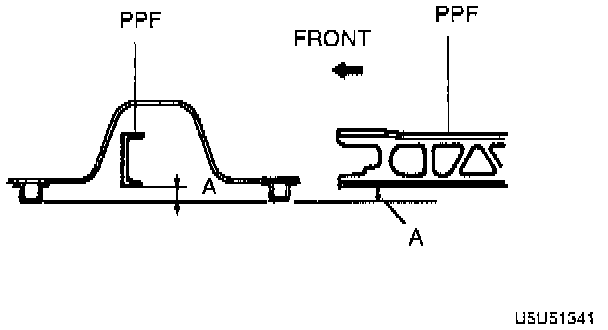
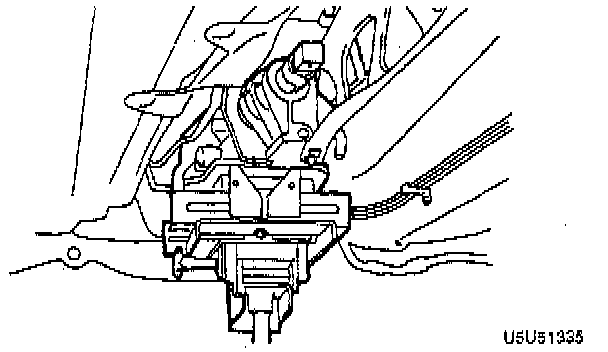
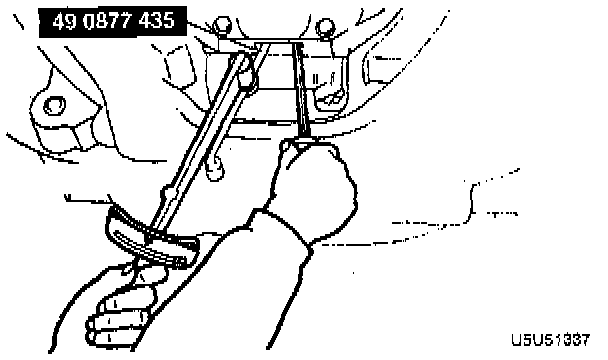
8. Measure distance A by using a straightedge and vernier calipers. Distance A should be 51.5 - 61.5 mm (2.023 - 2.417 inch).
9. If the distance is not within 51.5 - 61.5 mm (2.023 - 2.417 inch), reposition the power plant frame at the transmission.
2. Install the propeller shaft.
3. Install the exhaust system. Refer to Exhaust System.
4. Fill the transmission with the Dexron (R) II or M-III type fluid after installation.
5. Check for leakage of ATF from all connecting points.
6. Check the operation of the transmission range switch.
7. Check the operation of the selector lever. Testing and Inspection
8. Carry out the mechanical system test. Testing and Inspection
9. Carry out the road test. Testing and Inspection