Windshield Removal and Installation
Removal
1. Remove the rearview mirror.
2. Remove the cowl grille.
3. Remove the windshield molding.
4. Remove the striker.
5. Remove the sunvisor.
6. Remove the front header trim.
7. Remove the weatherstrip.
8. Remove the A-pillar trim.
9. Apply protective tape along the edge of the body to protect it from damage.
10. Apply protective tape along the dashboard to protect it from damage.
If The Glass Will Not Be Reused
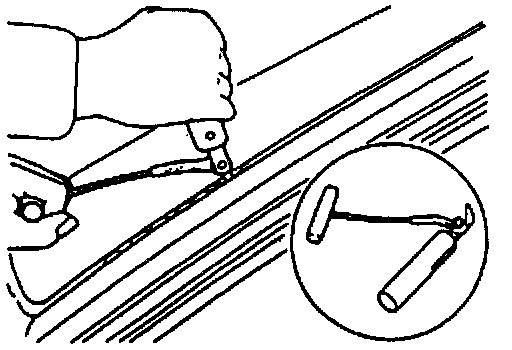
1. Using a tool like that shown in the figure, insert the blade into the sealant and cut it around the edge of the glass.
2. Remove the glass.
3. Remove the protectors.
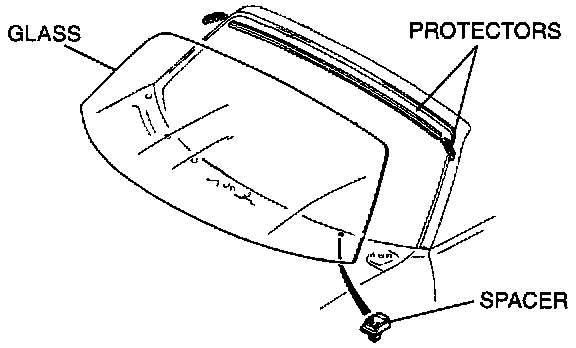
4. Remove the spacers.
If The Glass Will Be Reused
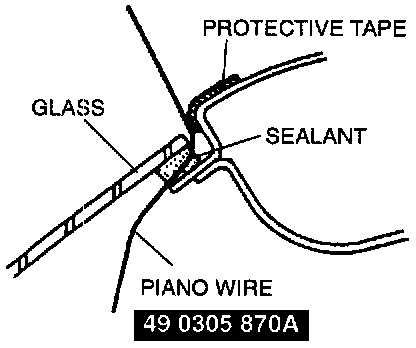
1. Make a hole through the sealant from the inside of the vehicle by using an awl.
2. Pass piano wire through the hole.
3. Wind each end of the wire around a bar.
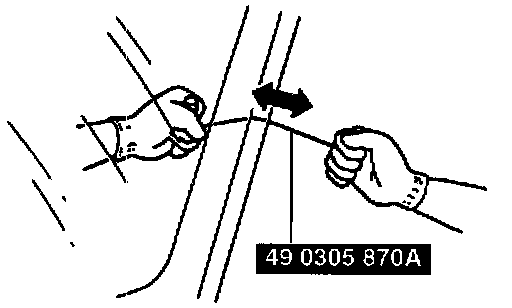
4. Working with another person, saw through the sealant around the edge of the glass. Use a long sawing action to spread the work over the whole length of wire to prevent it from breaking. Make sure the wire does not rub on the body or the dashboard.
5. Remove the glass.
6. Remove the clam.
7. Remove the protectors.
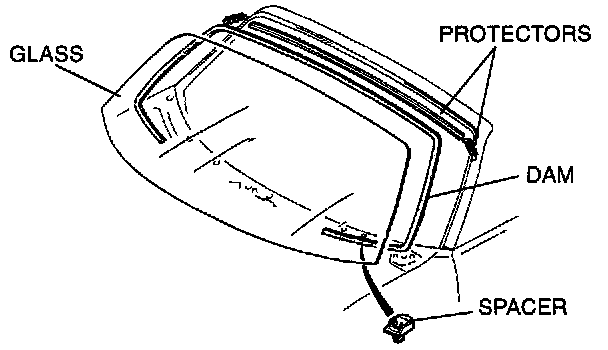
8. Remove the spacers.
Installation
1. Cut away the old sealant by using a razor knife so that 1-2 mm (0.04-0.08 in } thickness of sealant remains around the circumference of the frame. If all the sealant has come off in any one place, apply some primer after degreasing, and allow it 30 minutes to dry. Then apply new sealant to create a 2 mm { 0.08 in } layer.
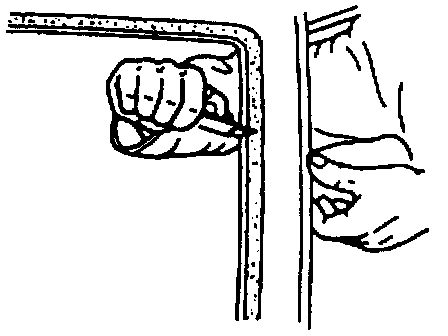
2. Carefully clean an area 50 mm (2.0 in) wide around the circumference of the glass and clean the bonding area on the body.
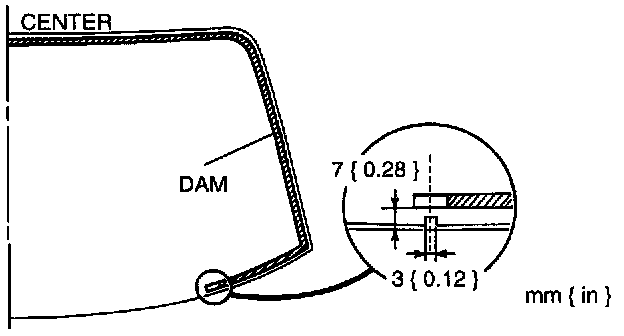
3. Securely bond a new dam onto the glass 7 mm { 0.28 in ) from the edge of the upper and the side portions as shown. Allow it to dry completely.
4. Install spacers. If a spacer is damaged, replace it.
5. Temporarily install the glass onto the body and adjust the glass-to-body clearance.
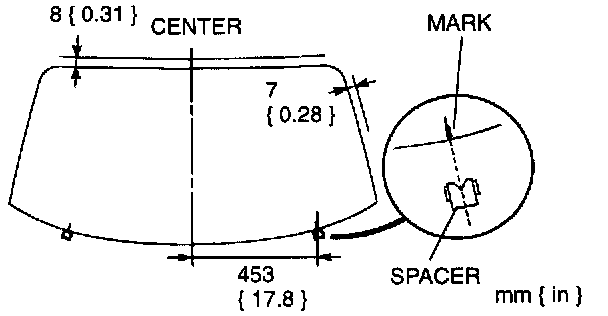
6. Make a mark on the glass directly above the V-notch of spacers.
7. Remove the glass.
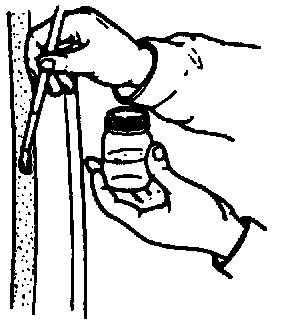
8. Apply primer onto the bonding area of the glass and body by using a brush. Use only glass primer on the glass and body primer on the body. Keep the area free of dirt and grease, and do not touch the surface. Allow the primer to dry for approximately 30 minutes.
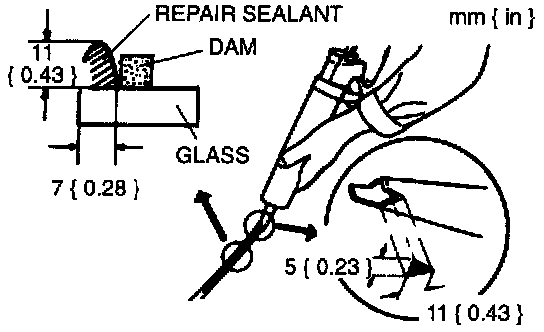
9. Apply an 11 mm (0.43 in) high bead of repair sealant around the circumference of the glass as shown. Keep the bead of sealant smooth and even, reshaping it by using a spatula where necessary. If the windshield is being reused, apply new repair sealant over the original.
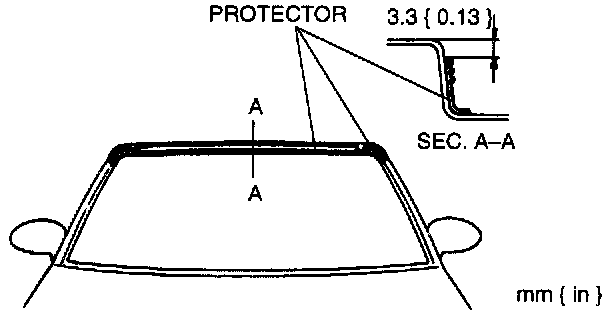
10. Securely bond a new one onto the body as shown. Allow it to dry completely.
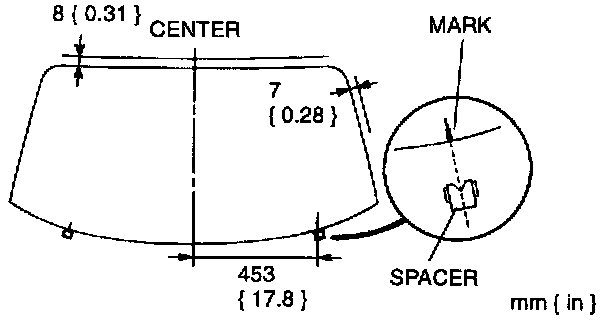
11. Align the glass marks with the V-notches of spacers and install the glass onto the body.
12. Press firmly on the glass to compress the sealant. Verify that the body-to-glass clearance is as shown.
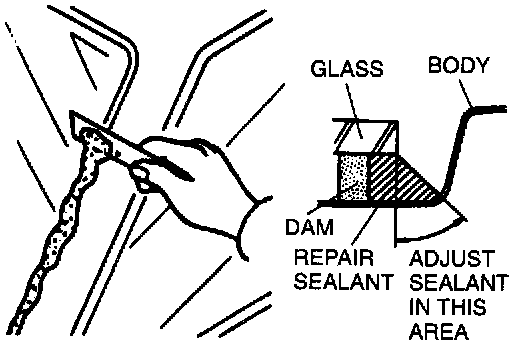
13. Use a scraper to smooth away any sealant that oozes out. Add more sealant to any points of poor contact. Adjust the upper and side sealant as shown, if necessary.
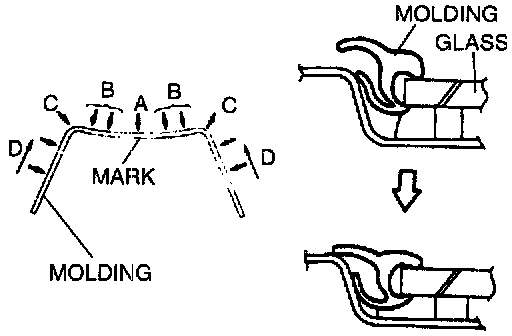
14. Install the windshield molding before the sealant hardens.
1. Align the center mark on the molding with the glass mark (A).
2. Install the upper part of the molding (B).
3. Install the corners of the molding (C).
4. Install the sides of the molding, starting from the bottom and working toward the top (D).
15. To prevent the glass from being pushed out by air pressure if a door is closed, open all of the windows until the repair sealant has hardened.
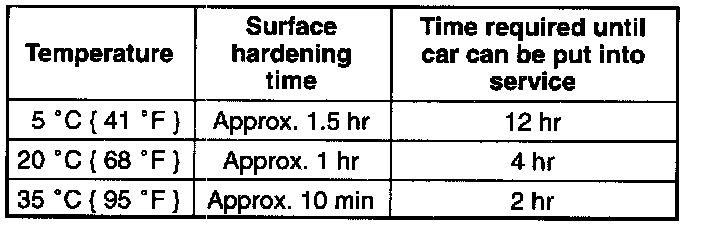
Hardening time of repair sealant
16. Check for water leaks.
17. If a leak is found, wipe the water off well and reinstall the windshield.
18. Install the A-pillar trim.
19. Install the weatherstrip.
20. Install the front header trim.
21. Install the sunvisor.
22. Install the striker.
23. Install the cowl grille.
24. Install the rearview mirror