Disassembly and Assembly
Disassembly/Assembly
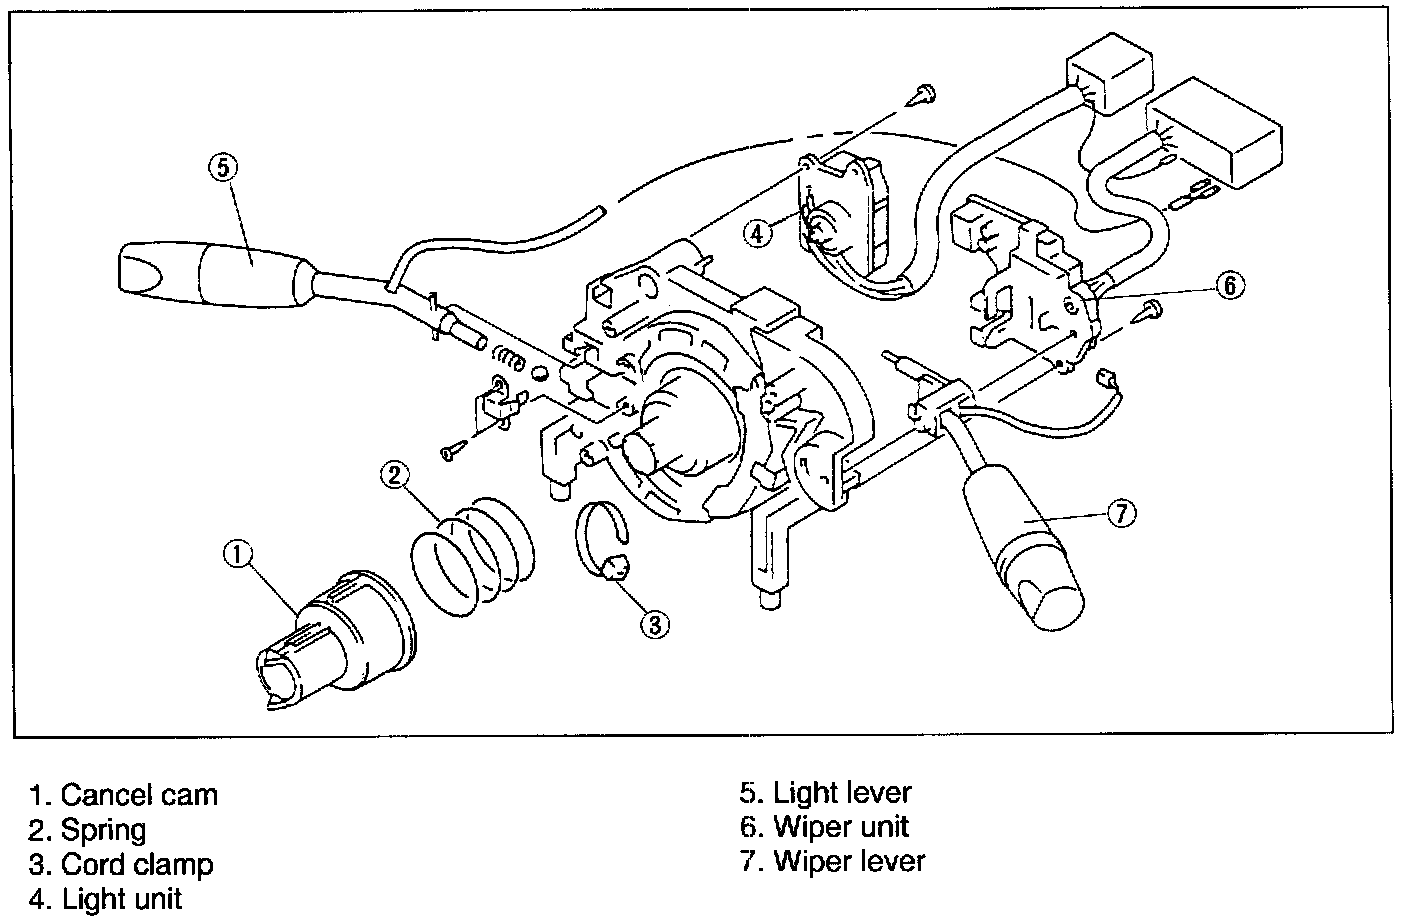
1. Disassemble in the order shown in the figure.
2. Assemble in the reverse order of disassembly.
Assembly note
Light lever
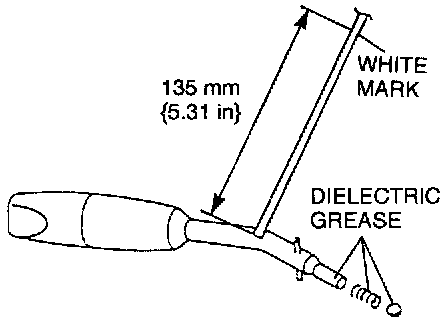
1. Place a mark on the new headlight switch harness 135 mm {5.31 in} from the point where the harness leaves the lever.
2. Apply a small amount of dielectric grease to the end of the new lever, the spring and the check ball
3. Assemble the light lever into the combination switch.
4. Verify that the new switch operates smoothly and does not bind.
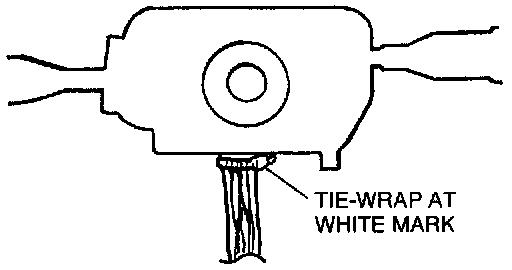
5. Join the headlight switch harness, the wiper unit harness and the light unit harness then install the tie-wrap at the white mark location on the harness.
NOTE: If the harness is not tie-wrapped at the white mark location, the harness may be too tight to permit smooth turn signal lever movement.

6. Measure the following distances from the tie-wrap toward the connectors and wrap one piece of electrical tape around the harness as shown.
NOTE: When complete, three locations on the harness will be wrapped instead of the original two locations.
Terminal Identification:

Reference:
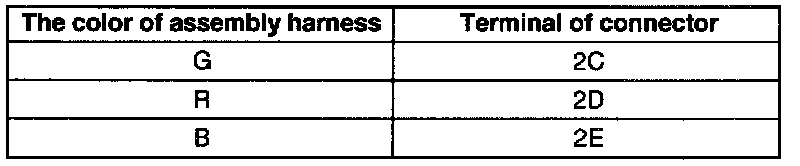
7. Refer to the table and insert the proper harness terminal into the correct position in the connector.
8. Close the gates on the connector.
Light unit
Terminal Identification:
Reference:

1. Refer to the table and insert the proper harness terminal into the correct position in the connector.
2. Close the gate on the connector.