Timing Belt: Service and Repair
TIMING BELT OUTER COVER REMOVAL AND INSTALLATION
1. Disconnect the battery ground cable.
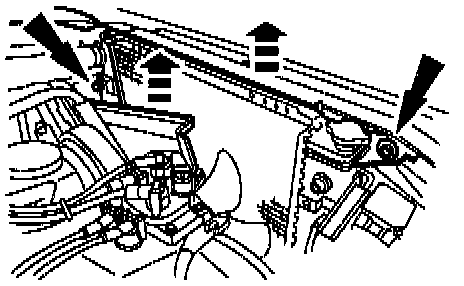
2. Remove the fan shroud.
3. Loosen the bolts on the water pump pulley, do not remove them at this time.
4. Remove the drive belt.
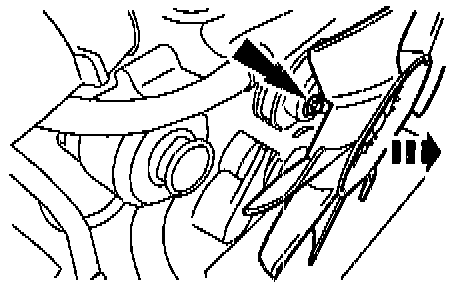
5. Remove the water pump pulley and the fan and clutch assembly.
6. Recover the refrigerant from the air conditioning system.
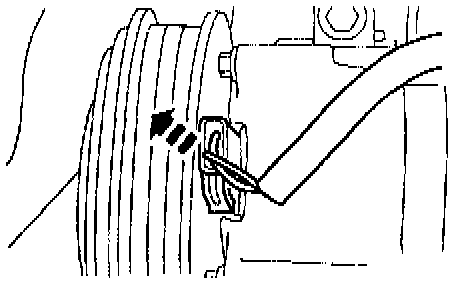
7. Disconnect the A/C wiring connector.
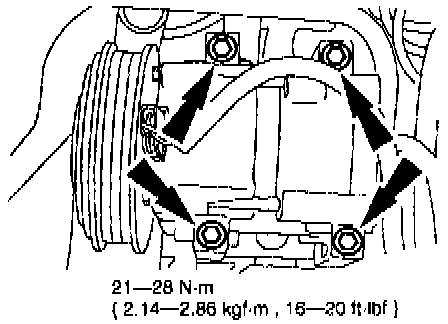
8. Remove the A/C compressor from the A/C compressor mounting bracket.
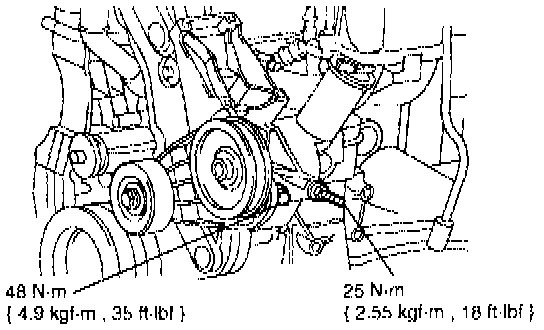
9. Remove the A/C compressor mounting bracket with the power steering pump attached. Position out of the way.
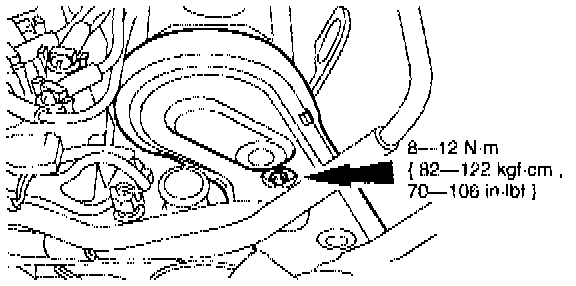
10. Remove the outer timing belt cover.
1) Remove the screw.
2) Release the interlocking tabs.
3) Remove the outer timing cover.
11. Install in reverse order of removal.
TIMING BELT INNER COVER REMOVAL AND INSTALLATION
1. Loosen the oil pump sprocket bolt.
2. Remove the timing belt.
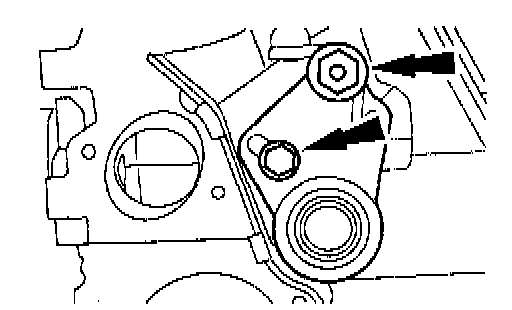
3. Remove the timing belt tensioner.
1) Remove the bolts.
2) Remove the tensioner.
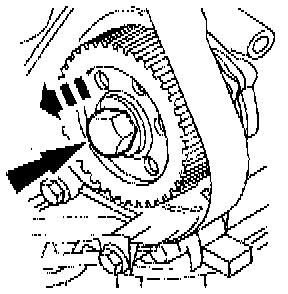
4. Remove the oil pump sprocket.
1) Remove the bolt.
2) Remove the sprocket.

5. Remove the crankshaft pulley; refer to Crankshaft Pulley Removal/Installation.
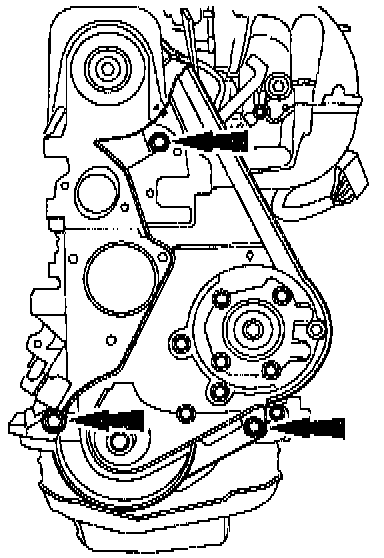
6. Remove the inner timing belt cover.
1) Remove the bolts.
2) Remove the stud.
7. Install in reverse order of removal.
TIMING BELT REMOVAL AND INSTALLATION
1. Disconnect the battery ground cable.
2. Remove the exhaust side spark plugs; refer to Spark Plug Removal/Installation.
3. Remove the crankshaft pulley; refer to Crankshaft Pulley Removal/Installation.

4. Remove the outer timing bells cover; refer to Timing Belt Outer Cover Removal/Installation.
5. Rotate the crankshaft until the number 1 piston is at Top Dead Center (TDC).
CAUTION: If you attempt to remove the belt without loosening both timing belt tensioner adjusting bolt and spring pivot bolt, damage to the SST could occur when attempting to relieve belt tension.
6. Loosen the timing belt sprints pivot bolt. Do not remove.
7. Loosen the adjusting bolt slowly and release spring tension.

8. Rotate tensioner with adjusting tool, against spring pressure, clockwise to the farthest position. Hold in this position and tighten adjusting bolt to hold tensioner away from the belt.

9. Remove the timing chain/belt.

10. Install in the reverse order of removal.
11. Make sure the crankshaft is at TDC on piston No. 1 with the crankshaft keyway pointing straight up and the circle on crankshaft sprocket aligned with notch in engine front cover.

12. Align the timing marks.
1) Align the crankshaft sprocket mark to the front cover notch.
2) Align the oil pump sprocket diamond to the engine front cover diamond.
3) Align the camshaft sprocket triangle to the engine front cover triangle.

13. Install the timing chain/belt over the crankshaft sprocket, proceeding counterclockwise over the oil pump sprocket and over the camshaft sprocket.
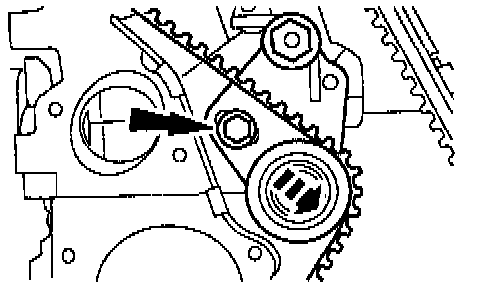
14. Loosen the bolt allowing the tensioner pulley to press against the timing chain/belt.
NOTE: The timing belt tensioner must not be tightened or belt tension will not be distributed over the entire belt.
15. Rotate the crankshaft two revolutions clockwise. Bring crank slowly to number one position firing position (keyway on crank facing up). The dot on the crankshaft gear is aligned with the notch on the front cover.
16. Recheck timing mark alignment. Repeat if required.
17. Install in reverse order of removal.