Disassembly and Assembly
REAR DIFFERENTIAL DISASSEMBLY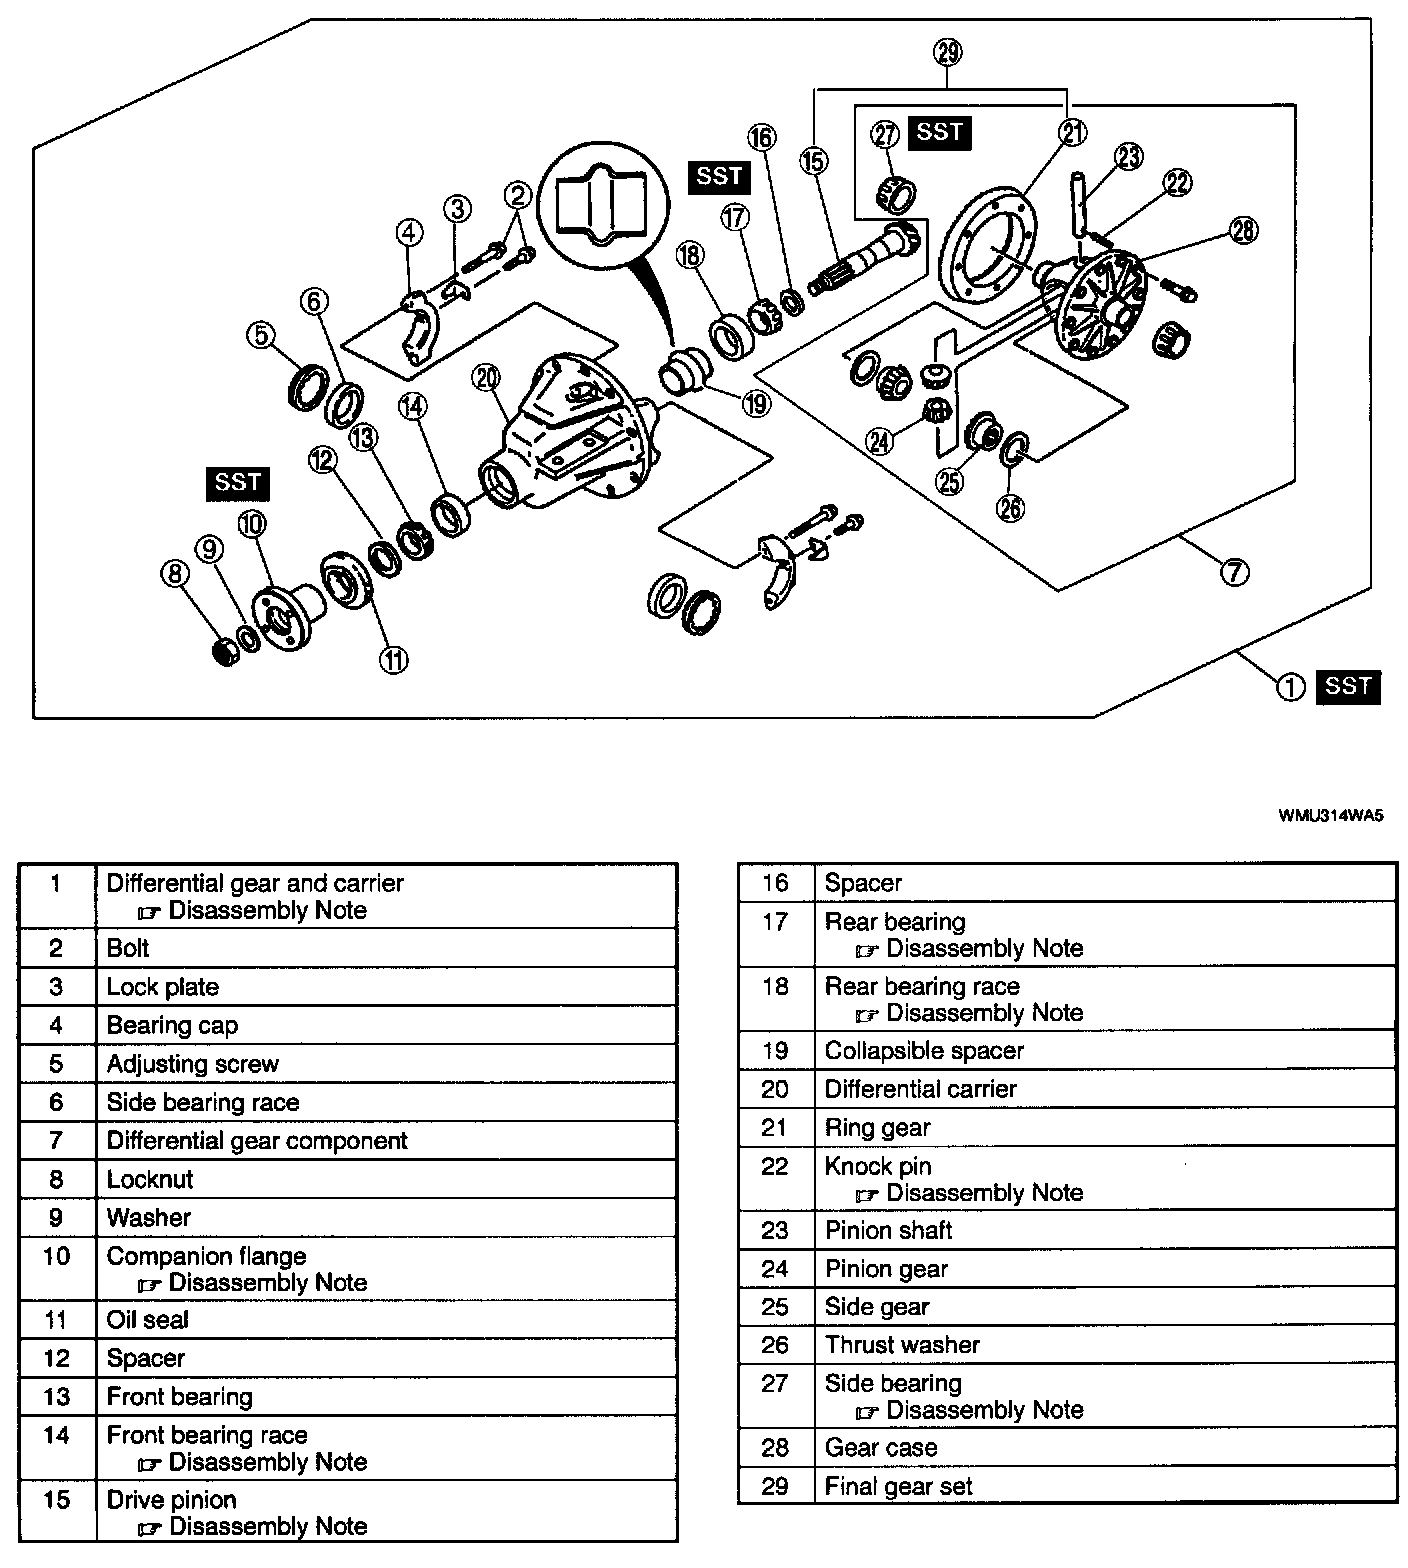
- Disassemble in the order indicated in the table.
Differential Gear And Carrier Disassembly Note
1. Mount the differential component on the SSTs.
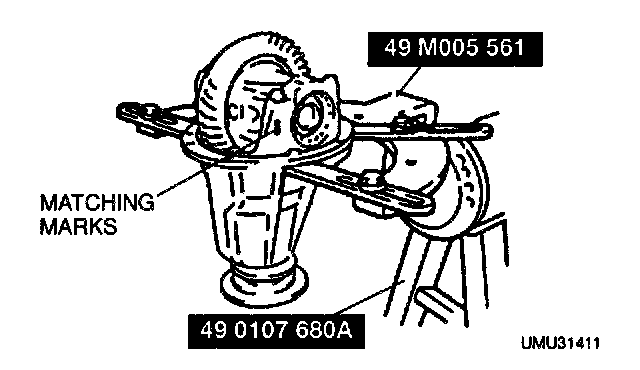
2. Make matching marks on one bearing cap and the carrier.
Companion Flange Disassembly Note
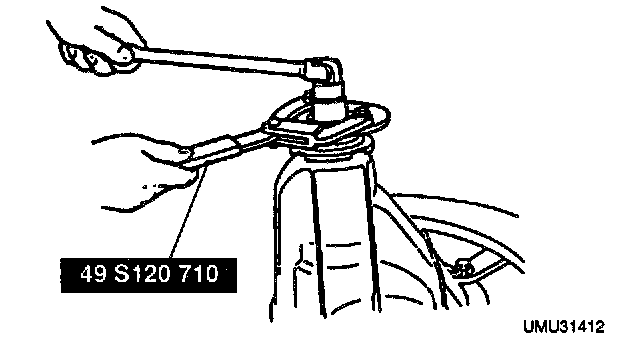
1. Hold the companion flange by using the SST, then remove the locknut.
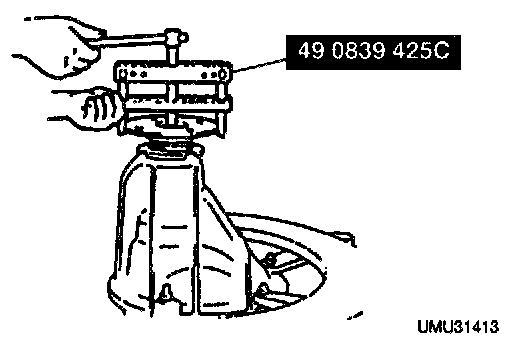
2. Remove the companion flange by using the SST.
Drive Pinion Disassembly Note
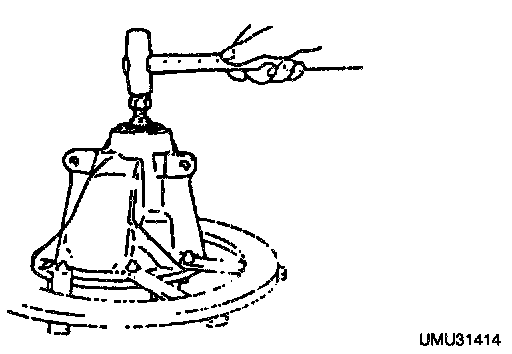
- Push the drive pinion out by attaching a miscellaneous locknut to it, then tapping it with a brass hammer.
Front And Rear Bearing Race Disassembly Note
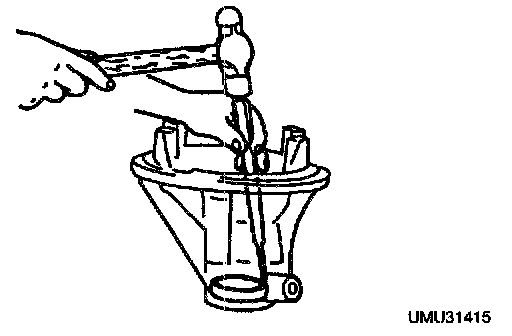
- Mark the bearing races for proper reassembly, and remove them by alternately tapping through the two grooves in the carrier.
Rear Bearing Disassembly Note
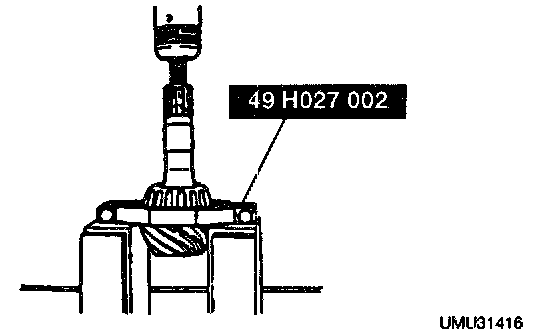
- While supporting the drive pinion, remove the rear bearing by using the SST.
Knock Pin Disassembly Note
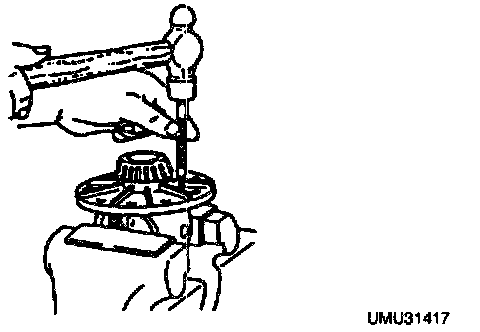
- Secure the gear case in a vise and remove the knock pin.
Side Bearing Disassembly Note
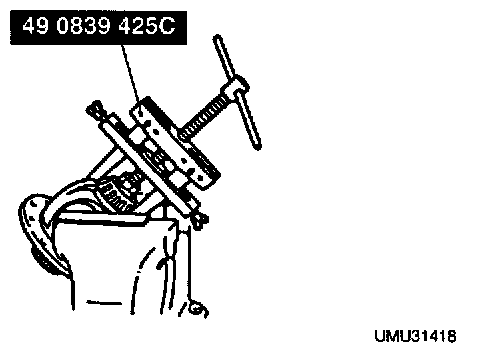
- Mark the bearings for proper reassembly, and remove them by using the SST.
REAR DIFFERENTIAL ASSEMBLY
Page 1 Of 2:
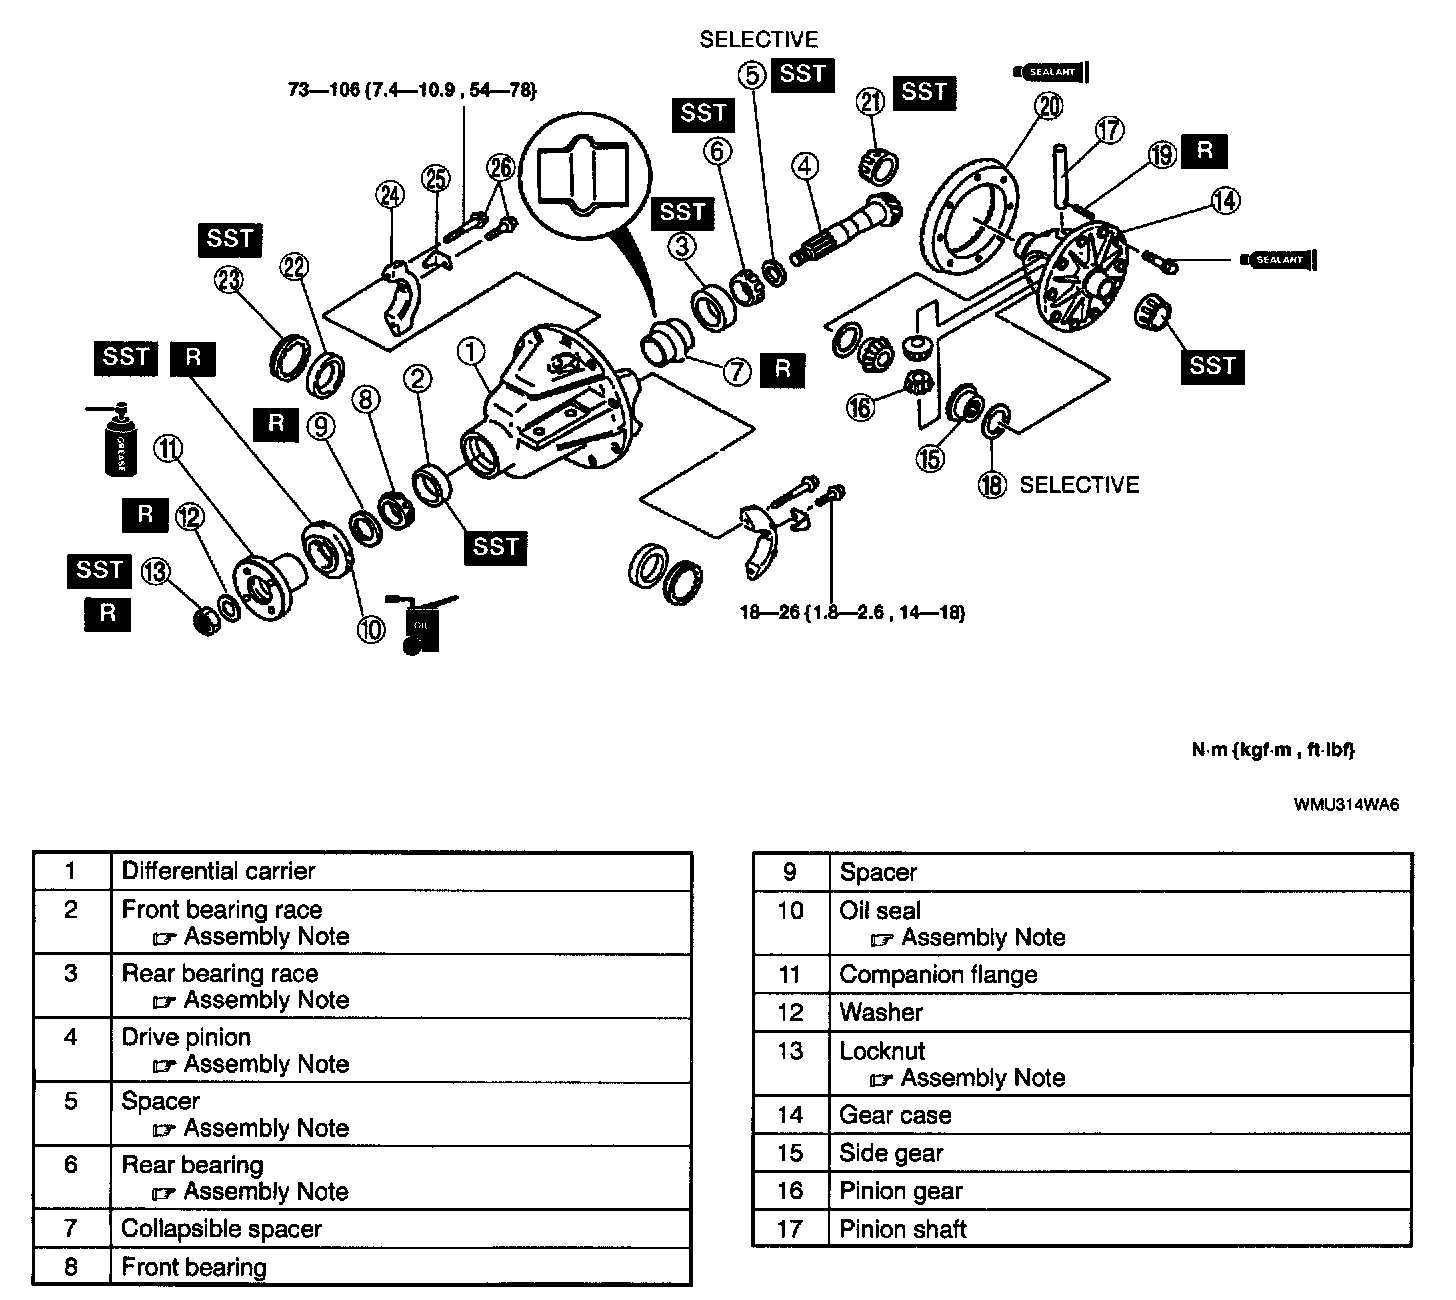
Page 2 Of 2:
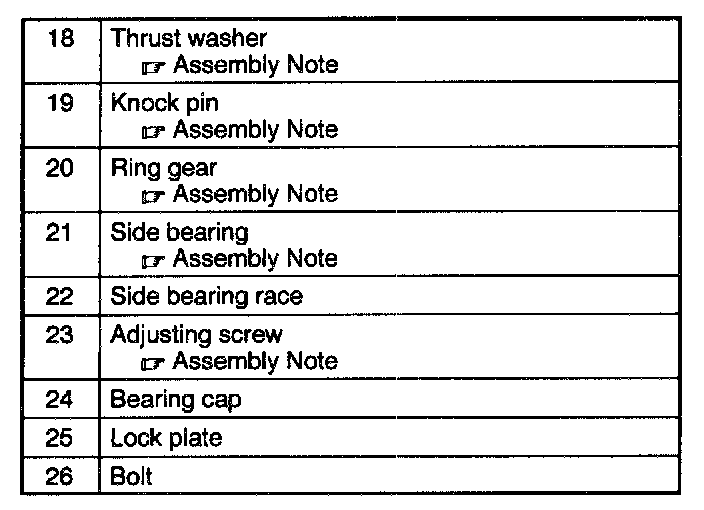
- Assemble in the order indicated in the table.
Front Bearing Race Assembly Note
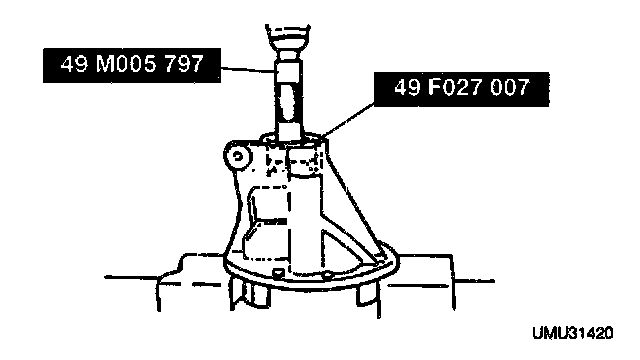
- Install the front bearing race by using the SSTs.
Rear Bearing Race Assembly Note
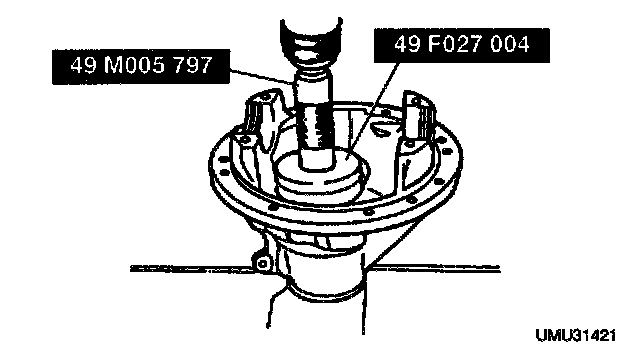
- Install the rear bearing race by using the SSTs.
Spacer Assembly Note
(Adjustment Of Drive Pinion Height)
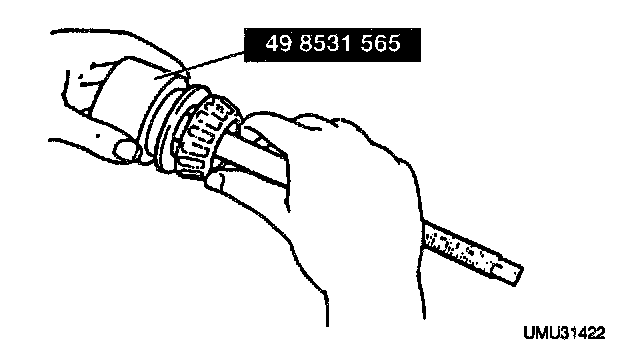
1. Install the spacer and bearing to the SST.
2. Assemble the spacer, rear bearing, and SST Secure the SST with the O-ring. Install the assembly in the carrier.
3. Install the front bearing, SSTs, companion flange, washer, and nut.
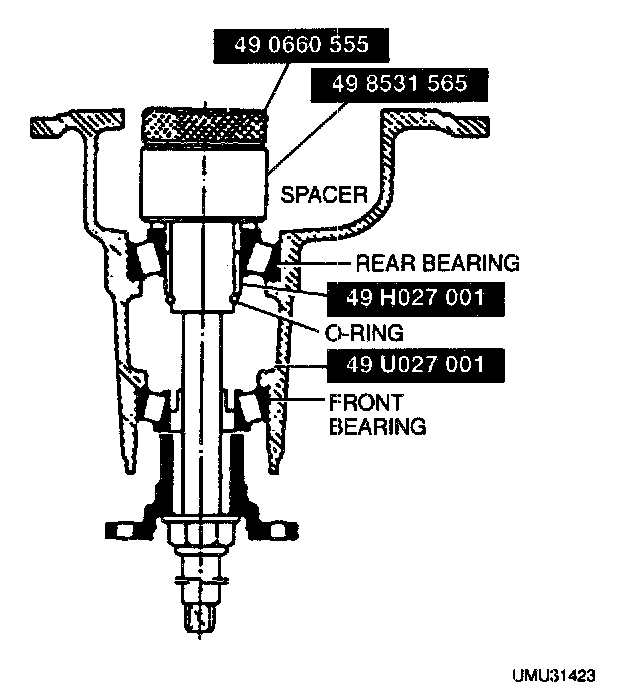
4. Tighten the nut to the extent that the companion flange can still be turned by hand.
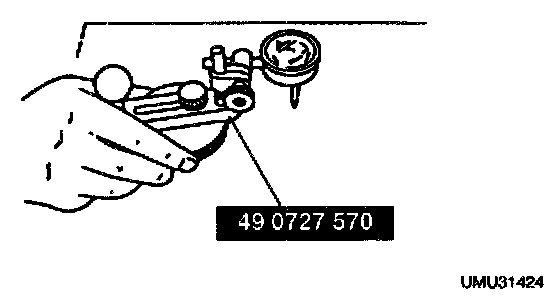
5. Place the SST on the surface plate and set the dial indicator to "Zero".
6. Place the SST atop the drive pinion model, then set the gauge body atop the gauge block.
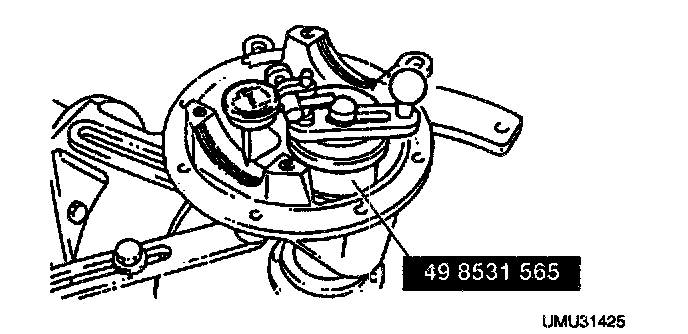
7. Place the feeler of the dial indicator so that it contacts where the side bearing is installed in the carrier. Measure the lowest position on both the left and right sides.
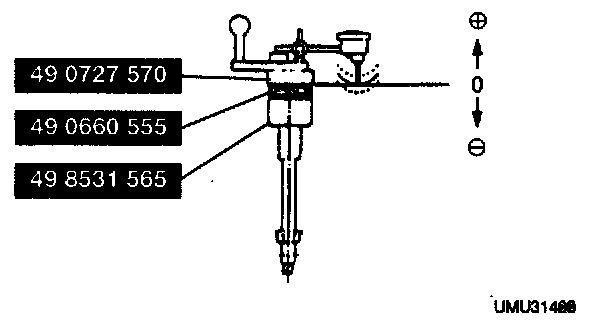
8. Add the two (left and right) values obtained in step 7 and divide the total by 2.
Specification 0 mm (0 inch)
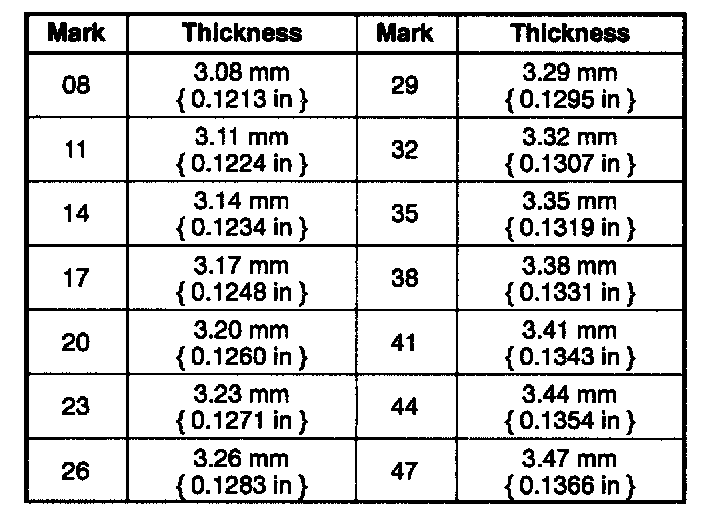
9. If not within the specification, adjust the pinion height by using a spacer chosen from the table shown.
NOTE:
^ The identification number is indicated on the outer side of the washer.
Drive Pinion And Rear Bearing Assembly Note
(Adjustment Of Drive Pinion Preload)
1. Install the spacer selected in the procedure above, with the beveled side facing the drive pinion.
2. Press the spacer onto the drive pinion until the force required starts to increase sharply.
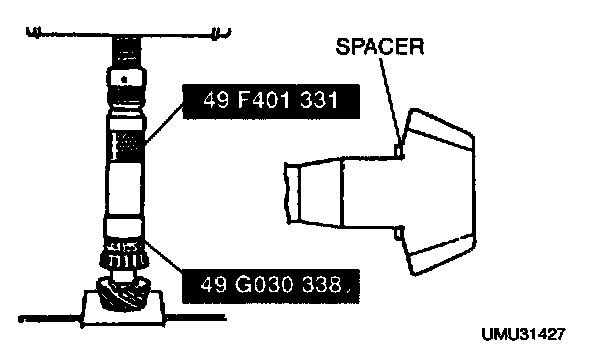
3. Press on the spacer and rear bearing by using the SSTs.
NOTE:
^ Perform the following procedure without the companion flange oil seal installed.
^ The front bearing is pressed and installed by tightening the locknut.
4. Apply a light coat of grease to the end face of the companion flange.
6. Install the drive pinion component in the differential carrier.
6. Install a new collapsible spacer, the front bearing, new front spacer, companion flange, and washer.
7. Temporarily tighten the new companion flange nut.
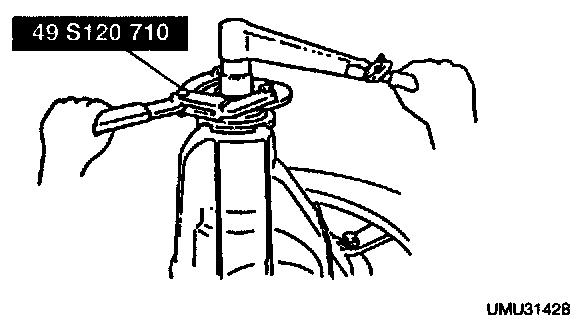
8. Hold the companion flange by using the SST, then tighten the nut.
Tightening torque
127 Nm (13.0 kgf-m, 94.0 ft. lbs.)
9. Turn the companion flange several turns by hand to seat the bearings.
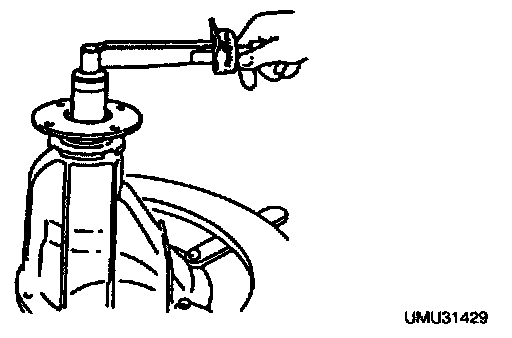
10. Measure the drive pinion preload.
11. Adjust the preload by tightening the nut, then record the required tightening torque.
Drive pinion preload
1.3-1.7 Nm (13-18 kgf-cm, 12-15 inch lbs.)
Tightening torque
128-284 Nm (13.0-29.0 kgf-m, 95-209 ft. lbs.)
12. If the specified preload is not obtained after tightening the nut to the maximum torque, replace the collapsible spacer with a new one.
13. Remove the nut, washer, and companion flange.
Oil Seal Assembly Note
1. Apply differential oil to the lip of the new oil seal.
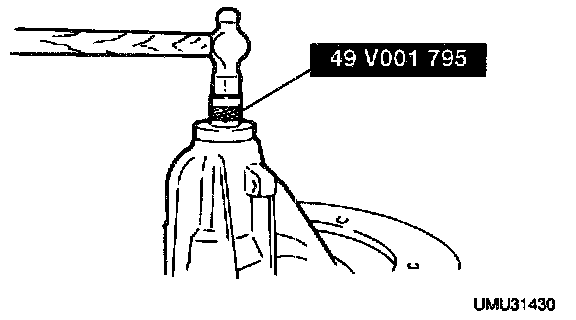
2. Install the oil seal by using the SST.
Locknut Assembly Note
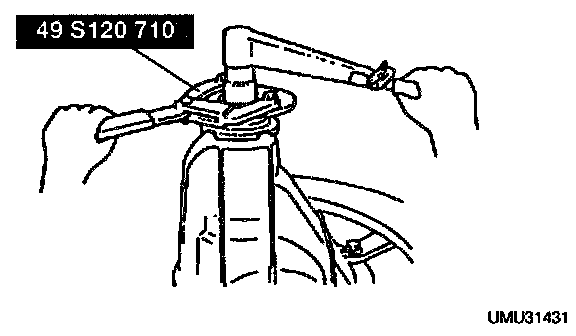
1. Using the SST, hold the companion flange and tighten the nut to the tightening torque recorded in "adjustment of drive pinion preload".
2. Verify that the drive pinion preload is within the specification.
Drive pinion preload
1.3-1.7 Nm (13-18 kgf-cm, 12-15 inch lbs.)
Thrust Washer Assembly Note, (Adjustment Of Side Gears And Pinion Gear Backlash)
Adjust the backlash of the side gears and pinion gear as follows.
1. Set a dial gauge against the pinion gear as shown.
2. Secure one of the side gears.
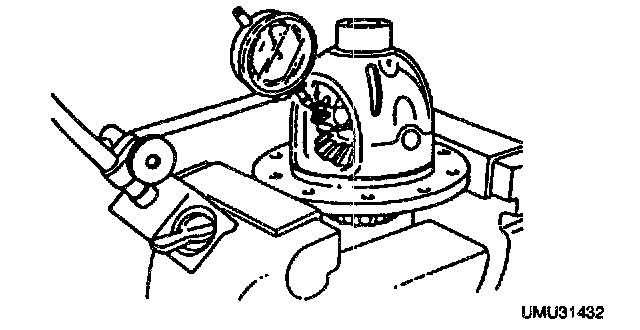
3. Move the pinion gear and Measure the backlash at the end of it.
Standard backlash 0-0.1 mm (0-0.04 inch)
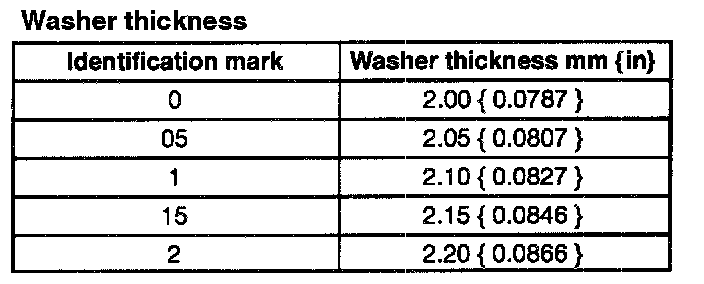
Washer Thickness
4. If the backlash exceeds the standard, use the selectable thrust washers for adjustment.
Knock Pin Assembly Note
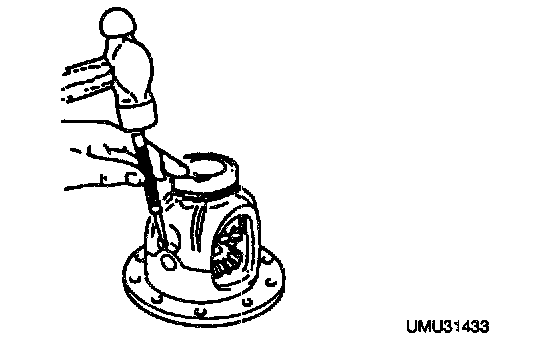
- Install a new knock-pin to secure the pinion shaft. Stake the knock-pin into position by using a punch to prevent it from coming out.
Ring Gear Assembly Note
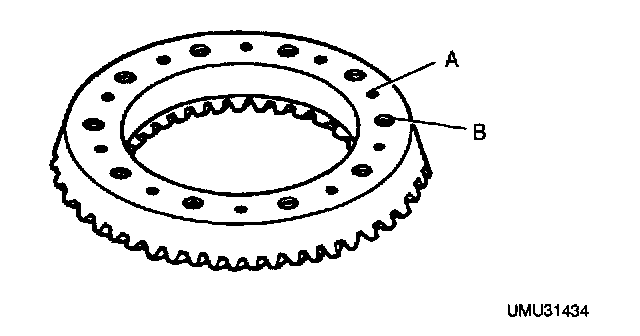
1. Apply approximately 0.04 cm3 (0.04 cc, 0.0024 cubic inch) of thread-locking compound to each of the bolt threads A and points B.
Apply thread-locking compound to bolt threads A and points B of the gear back face.
2. Install the ring gear onto the gear case.
Tightening torque
69-83 Nm (7.0-8.0 kgf-m, 51-61 ft. lbs.)
Side Bearing Assembly Note
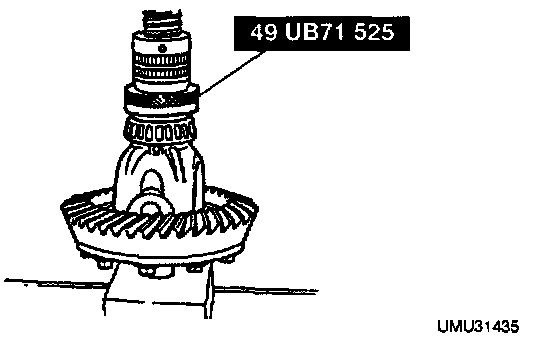
- Press on the correct side bearing on the corresponding side by using the SSTs.
Adjusting Screw Assembly Note
(Adjustment Of Drive Pinion And Ring Gear Backlash)
1. Install the differential gear component in the carrier.
2. Note the identification marks on the adjusting screws, and install the adjusting screws to their respective sides.
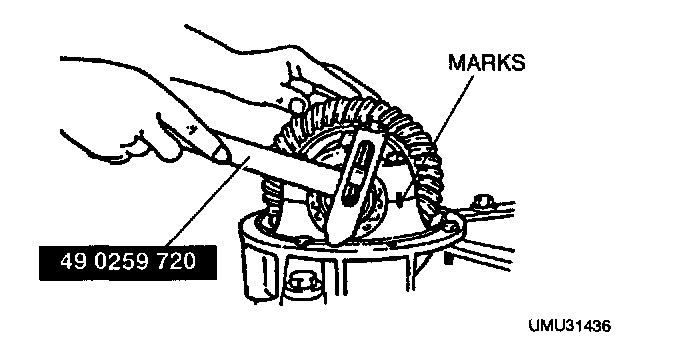
3. Install the differential bearing caps, making sure that the identification marks on the cap corresponds with the one on the carrier.
4. Mark the ring gear at four points at approximately 90° intervals. Mount a dial indicator to the carrier so that the feeler comes into contact at a right angle with one of the ring gear teeth.
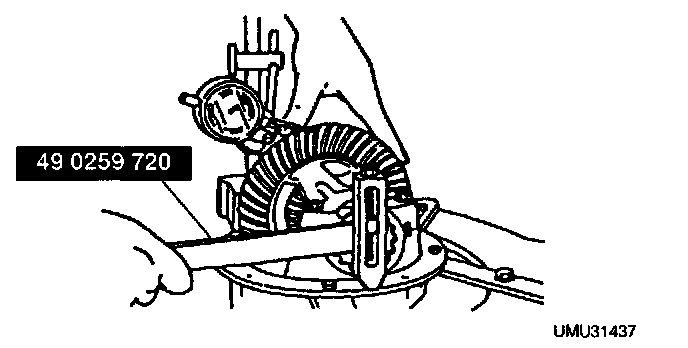
5. Turn both bearing adjusters equally by using the SST until the backlash is 0.09-0.11 mm (0.0036-0.0043 inch).
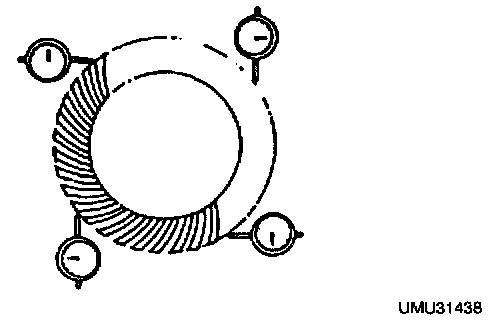
6. Check the backlash at the three other marked points, and make sure the minimum backlash is above 0.05 mm ( 0.002 inch) and the difference between the maximum and minimum is less than 0.07 mm (0.0028 inch).
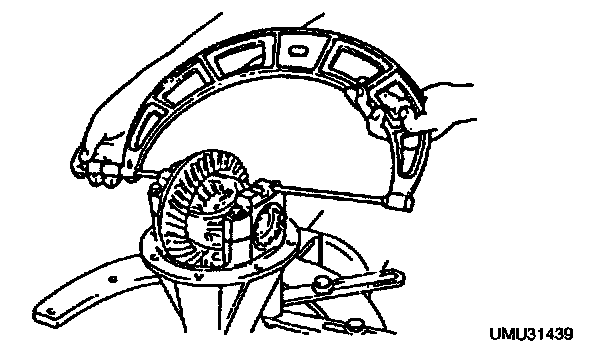
7. Tighten the adjusters equally until the distance between the pilot sections on the bearing caps is as specified. Make sure that the backlash of the drive pinion and ring gear does not become misadjusted.
Specified distance
203.78-204.50 mm (8.023-8.051 inch)
8. Check the drive pinion and ring gear tooth contact.
1. Coat both surfaces of 6-8 teeth of the ring gear with a uniformly thin coat of red lead.
2. While moving the ring gear back and forth by hand, rotate the drive pinion several times and check the tooth contact.
3. If the tooth contact is good, wipe off the red lead.
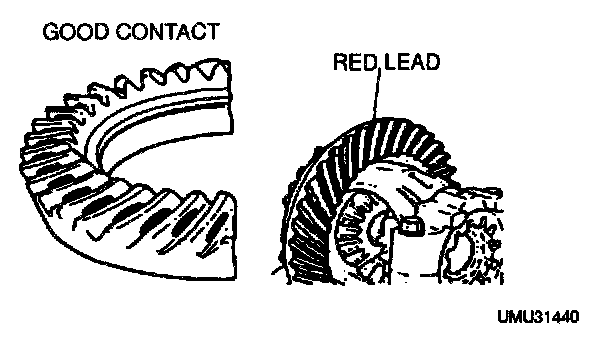
4. If it is not good, adjust the pinion height, and then adjust the backlash.
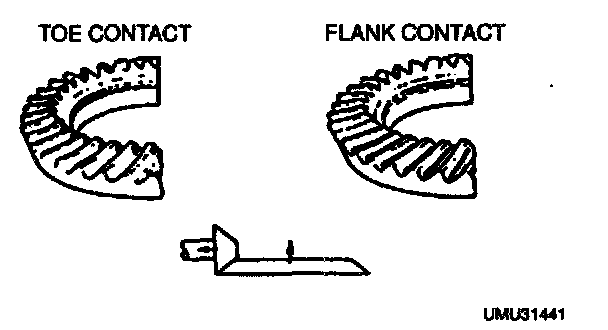
5. Toe and flank contact
Replace the spacer with a thinner one to move the drive pinion outward.
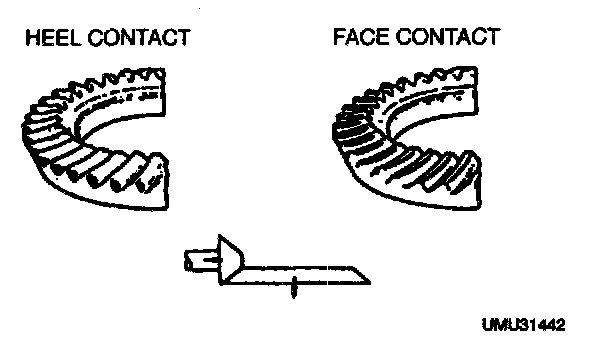
6. Heel and face contact
Replace the spacer with a thicker one to bring the drive pinion inward.