Valve Body: Service and Repair
CONTROL VALVE BODY REMOVAL INSTALLATION [GF4A-EL]Warning
- When the transaxle and ATF are hot, they can badly burn. Turn off the engine and wait until they are cool before removing the control valve body.
- Using compressed air can cause dirt and other particles to fly out, causing injury to the eyes. Wear protective eyes whenever using compressed air.
Caution
- Clean the transaxle exterior throughout with a stream cleaner or cleaning solvents before removal.
- If any old sealant gets into the transaxle during installation of the oil pan, trouble may occur in the transaxle case and oil pan. Clean with cleaning fluids.
1. Clean the transaxle exterior thoroughly with a steam cleaner or cleaning solvents.
2. Disconnect the negative battery cable.
3. Drain the ATF and engine coolant into separate containers.
4. Remove the splash shield.
5. Remove the oil cooler hose.
6. Remove the radiator hose.
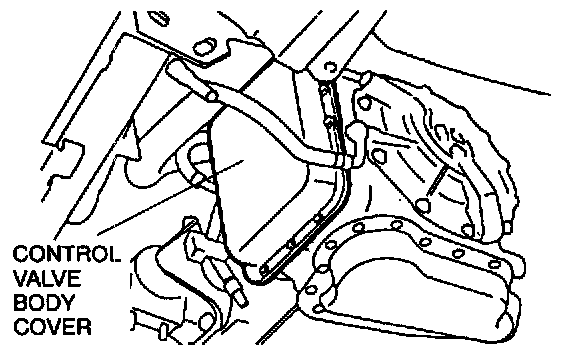
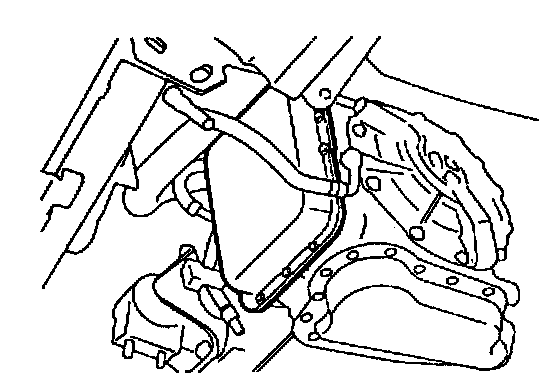
7. Remove the control valve body cover and gasket.
8. Disconnect the solenoid connectors and transaxle fluid temperature sensor connector.

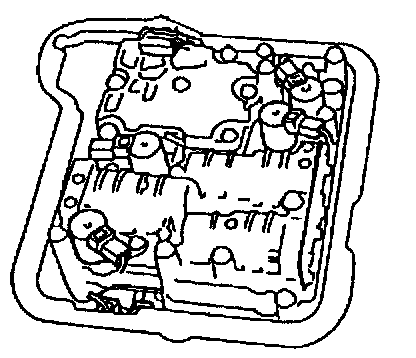
9. Remove the control valve body component.
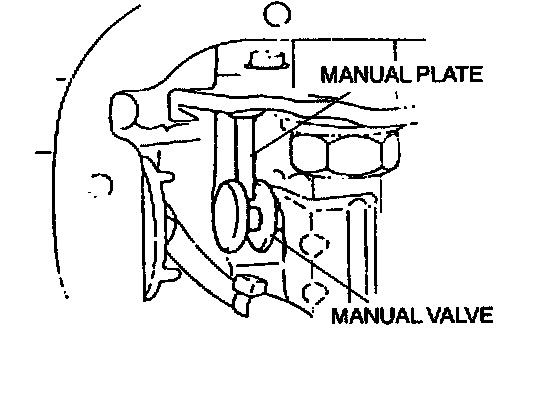
10. Align the manual plate and the manual valve.
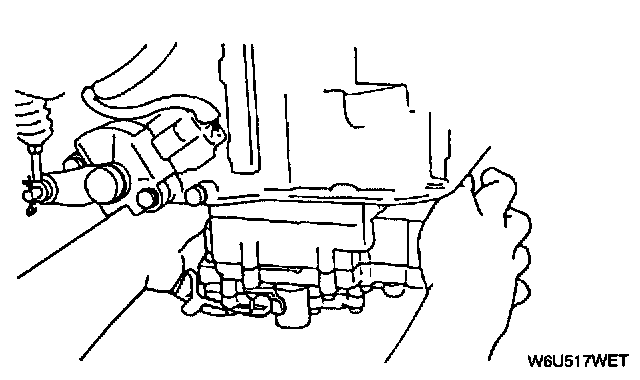
11. Install the control valve body component.
Tightening torque
10.8 - 14.7 Nm (110 - 150 kgf.cm, 95.5 - 130.2 inch lbs.)
12. Match the harness colors and connect the solenoid connectors and transaxle fluid temperature sensor connector.
13. Install a new gasket and the control valve body cover.
Tightening torque
8.4 - 10.7 Nm (85 - 110 kgf.cm, 73.7 - 95.4 inch lbs.)
14. Install the radiator hose.
15. Install the oil cooler hose.
16. Install the splash shield.
17. Fill the radiator and reservoir with the specified amount and type of engine coolant.
18. Connect the negative battery cable.
19. Fill the transaxle with the specified ATF.
20. Inspect for leakage of ATF from the oil pan or the oil hose connecting points.
21. Carry out the mechanical system test.
22. Carry out the road test.