Condenser HVAC: Service and Repair
CONDENSER REMOVAL/INSTALLATION1. Disconnect the negative battery cable.
2. Discharge the refrigerant from the system.
3. Raise the front of the vehicle.
4. Remove the ambient temperature sensor.
5. Remove the radiator grille, mud guard (RH), splash shields (front), and hood stay. (See FRONT BUMPER FASCIA REMOVAL/INSTALLATION.) (See RADIATOR GRILLE REMOVAL/INSTALLATION.)
6. Remove the radiator brackets and coolant reservoir. (See RADIATOR REMOVAL/INSTALLATION.)
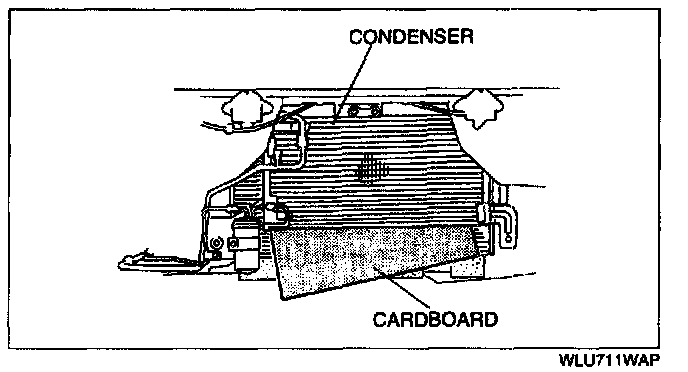
7. Insert a protector (such as cardboard) between the condenser and the radiator, and lean the radiator toward the engine.
CAUTION: If moisture or foreign material enters the refrigeration cycle, cooling ability will be lowered and abnormal noise will occur. Always immediately plug all open fittings after removing any refrigeration cycle parts to keep moisture or foreign material out of the cycle.
8. Remove the assembled cooler pipe No.2, receiver/drier, and condenser. Do not allow compare moisture out of the system.
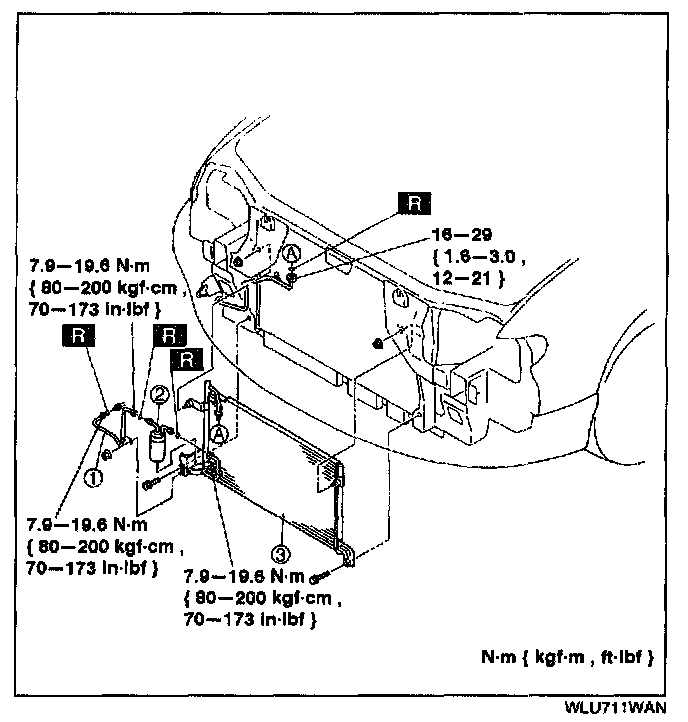
9. Remove in the order indicated below. Do not allow compressor oil to spill. Immediately plug all open fittings to keep moisture out of the system.
1. Cooler pipe No.2
2. Receiver/drier
3. Condenser
10. Install in the reverse order of removal.
11. Perform refrigerant system performance test.
Condenser Installation Note
When installing a new condenser, add ATMOS GU10 compressor oil into the refrigeration cycle.
Supplemental amount (approximate quantity)
20 ml (20 cc, 0.6 fl oz}