Rear A/C Unit
REAR A/C UNIT REMOVAL/INSTALLATION1. Disconnect the negative battery cable.
2. Drain the engine coolant.
3. Evacuate the refrigerant from the system.
4. Remove the passenger-side rear side trim.
CAUTION: If moisture or foreign material enters the refrigeration cycle, cooling ability will be lowered and abnormal noise will occur. Always immediately plug open fittings after removing any refrigeration cycle parts to keep moisture or foreign material out of the cycle.
5. Disconnect the rear heater hose No.1.
6. Disconnect the rear heater hose No.2.
7. Disconnect the rear cooler pipe No.2.
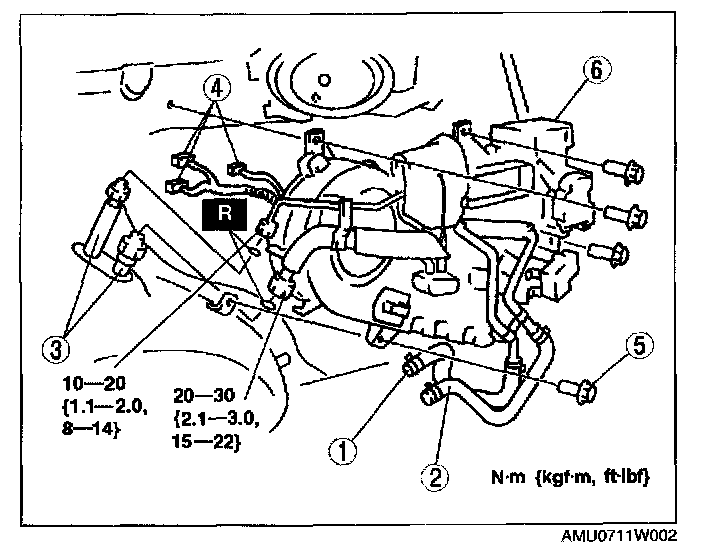
8. Remove in the order indicated below.
1. Rear heater hose No.1
(See Heater Pipe and Hose Component Installation Note)
2. Rear heater hose No.2
(See Heater Pipe and Hose Component Installation Note)
3. Rear cooler pipe No.2
(See Refrigerant Lines Removal Note)
(See Refrigerant Lines Installation Note)
4. Connector
5. Bolt
6. Rear A/C unit
9. Install in the reverse order of removal.
REAR A/C UNIT DISASSEMBLY/ASSEMBLY
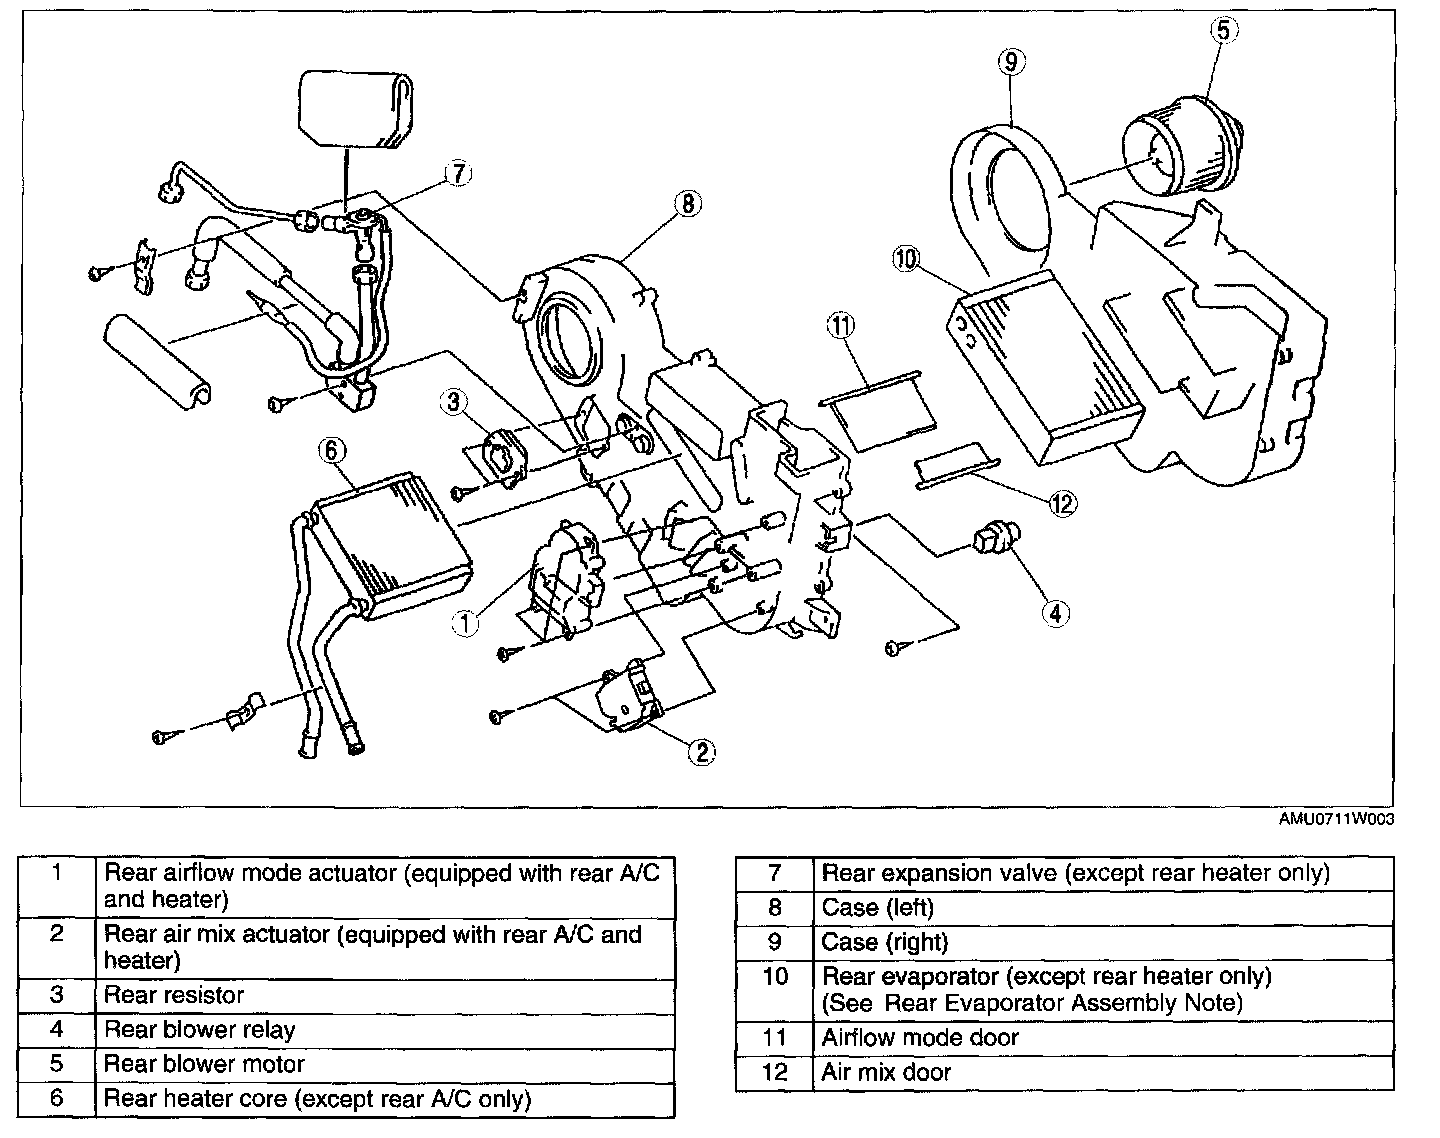
1. Disassemble in the order indicated in the table.
2. Assemble in the reverse order of disassembly.
Rear Evaporator Assembly Note
1. When installing a new rear evaporator, add ND-OIL8 compressor oil from the inlet.
Supplemental amount (approximate quantity): 40 ml {40 cc, 1.4 fl oz}